10 Best Clear Custom RC Body Shells

Many of the ready to run (RTR) stock RC vehicles look fantastic. Some hobbyists, though, prefer unique designs that no one else has. That’s entirely possible thanks to the clear custom RC body kits available. There’s also a huge sense of achievement from personalizing an RC model with custom paints and decals. My guide shows you how to achieve that, and then reviews 10 RC body sets.
Prepping an Old RC Body
You can revamp the body of an old RC model, but the prepping must be meticulous. First, remove all the existing paint for the best results rather than cover it. Don’t use regular paint stripper of you may end up with a ball of goo. It needs to be a something made especially for polycarbonate Lexan that’s kind to the surfaces of RC models. Carefully follow the maker’s instructions on how to use the product.
The old paint should wipe off easily after a few hours. It’s then a simple case of washing and drying the body before proceeding. Ask at your local hobby shop if you need advice on paint stripping.
Prepping a New RC Body
Customizing an old or new RC body is a lot of fun, but it does take time, and you mustn’t hurry. If you’re short on time, put a hold on the project until you can give it proper attention.
Here are the 6 steps for a successful outcome:
- Trimming (new body)
- Wash the body
- Draw the design
- Apply the new paint
- Add the decals
- Finish with a clear coat
OK, let’s look at each of the above in a little more detail.
#1 Trim the body
Most new RC bodies need a little trimming. You do this by placing it over the vehicle’s chassis to assess the fit. What you’re looking for here are any areas that are too tight to the wheels, or too big in other places. You can use a quality hobby knife or pair of curved modelling scissors to trim off any fat. Gently sand any burs or rough edges until they feel smooth to the touch.
Tip: Always trim the body BEFORE you paint it to avoid damaging the new coat.
#2 Wash the body
One of the biggest mistakes beginners make is a failure to wash the RC body thoroughly. To skip this process can result in the paint cracking or peeling soon after it dries. All you need for this step is some gentle dishwashing soap diluted into warm tap water. Make sure you cover the entire body inside and out before rinsing the soap solution of wit plain water.
You can dry the RC body with a lint-free cloth, a hairdryer on low heat, or let it air dry. Which method you use doesn’t matter, as long as it’s 100% dry before you start to paint.
Tip: Wear surgical latex gloves to keep fingertips off the newly cleaned body.
#3 Draw the design
Skip this step if you’re painting the vehicle body with a single color.
Now it’s time to draw the design onto your RC body. It can be a delicate process, so take your time. Make sure you know what your plan is before you start to draw on the vehicle. Use a permanent marker like Sharpie so that the lines don’t fade or rub off. These defined lines now act as guides for when you apply the masking tape. Try to keep the design straightforward if it’s a first-time project.
Carefully cover any parts of the body you’re not painting with masking tape. The tape must be tight so that no wet paint seeps under its edge. Use your fingernails to press the tape down.
Tip: The cardinal rule of painting RC models is to apply dark colors before light.
#4 Prepping and applying the paint
It’s time to apply that first coat of fresh paint to the RC body. You should already have the spray paint, but recheck that it’s a purpose product for polycarbonate Lexan. Universal paint will cover your model just as well, but it’s unlikely to last as long. Getting an even cover takes a bit of skill, so practice on a few throwaway parts before you start on the car.
Safety first
Get some protective goggles to cover your eyes before you begin. You may want to wear a disposable respirator mask to protect the mouth too. Also, make sure the spray area is free from dust and has adequate ventilation. It’s not wise to spray outdoors unless it’s a windless day. Even then, you risk tiny bugs sticking to the paint. Always STOP spraying if you feel lightheaded or nauseous at any point.
Make sure there are no family pets in the area. Finally, read the directions on the spray can before you begin.It’s time to start painting once you check all the above boxes.
Paint & decorate your new RC body
Remember to practice spray painting on a few throwaway surfaces if you’ve never done it before.
Here’s a quick rundown on the 7 steps of spray painting:
- Hold the spray can about 3+ inches from the RC body
- Spray evenly from one end of the model to the other
- Let the paint dry thoroughly between coats
- Apply as many coats as necessary for your desired effect
- Remove the masking tape when you’re ready to move on
- Progress through the colors as necessary, darkest to lightest
- Add the RC decals to the newly painted car once it’s dry
Tip: You can use a hairdryer on a cool to low heat to speed up the drying process if you need to. Keep the dryer a few inches away from the body, and don’t have the fan on too high.
#5 Add the RC decals
Add the RC decals to the newly painted car once it’s dry. Applying stickers to your new model needs as much care as the painting. Read our piece on ‘How to apply RC Decals’ and decal mini-reviews if it’s new to you. It’s not a difficult process, but it can go wrong with a lack of know-how.
#6 The finishing touch
Congratulations, you’ve now got a newly painted and decorated RC body, but we’re not quite finished. All that excellent work needs a clear coat of protective spray paint. Tamiya’s TS-80 is a decent product, but there are others with different finishes. A transparent coat does a few things. It prevents decals from peeling, makes the body more scratch-resistant, and it improves the look of the vehicle.
Tip: Mask the windows before applying the finishing coat as they don’t benefit from clear paint.
About My ‘Custom RC Body’ Guide
The first part of this guide looked at how to prepare, paint, and customize your RC body. The second half reviews 10 clear bodies for various models. These are my personal favorites based on experience and real user feedback. The first three are the Editor’s choice for Best Value, Best Budget, and the Top Pick, in that order. The products below those are by price, starting with the least expensive first.
Custom RC Bodies Comparison Table
| Make and Model | Material | Decals | Price |
|---|---|---|---|
| Redcat Racing Clear 1/10 Scale Buggy Body | Not specified | Yes | Check Price |
| Ford 1956 F-100 Clear Body | Genuine Lexan | Yes | Check Price |
| Axial Jeep NuKizer 715 RC Clear Body Set | Polycarbonate | Yes | Check Price |
| Coolplay 1/10 Car Body Shell for Mazda Rx7 | PVC | No | Check Price |
| Traxxas 1/10 Scale 4×4 Clear Slash Body | Polycarbonate | Yes | Check Price |
| Toyota Tundra TRD Pro Clear Body | GE Lexan | Yes | Check Price |
| Chevy ’72 C10 Long Bed Revo3.3 by PLR | GE .060 Lexan | Yes | Check Price |
| Racing Jeep Wrangler Rubicon Clear Body | GE Lexan | Yes | Check Price |
| Volkswagen Full Fender Baja Bug Body | GE .040 Lexan | Yes | Check Price |
| Ford Mustang Fox 1991 Clear Body | Polycarbonate | Yes | Check Price |
1. Redcat Racing 1/10 Scale Clear Buggy Body | Best Value
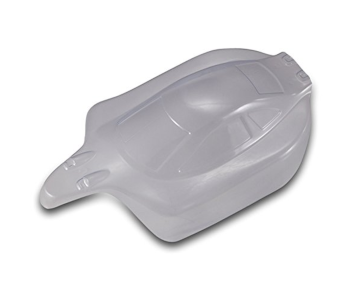
EDITOR’S RATING: 4.6/5
Compatible with: RC body for Redcat Racing’s Shockwave, Tornado BB, Tornado Epx/Epx PRO.
The Best Value RC body pick goes to Redcat Racing’s clear buggy body for 1/10 Scale models. It’s a high-quality shell with peel-off plastic, and a decal sheet. The material is super easy to cut and drill. The finished product looks fantastic with or without a paint job. Being a ‘genuine part’ means it’s exactly like the stock body, but you get to give it a unique, custom look.
Cons: No window masks included.
Dimensions: 12 x 7 x 3”, Weight: 3.2 oz., Wheelbase: 11”
2. Ford 1956 F-100 Clear Body | Best Value
EDITOR’S RATING: 4.8/5
Compatible with: RC 956 Ford F-100
The 1956 Ford F-100 clear body by Pro-Line Racing gets the Best Value slot. It’s an excellent body project for anyone into vintage style trucks. The material used is genuine Lexan—a strong yet flexible polycarbonate resin thermoplastic. The body has a simulated wood bed, window masks, and detailed sticker sheet. It’s a high-quality body that fits over most 1/10 scale vehicles.
Cons: quite expensive.
Dimensions: 21 x 9.9 x 6.5”, Weight: 8 oz., Wheelbase: 11.2”
3. Axial Jeep NuKizer 715 RC Clear Body Set | Top Pick
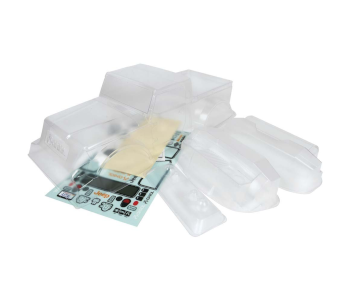
EDITOR’S RATING: 4.8/5
Compatible with: RC Jeep® Nukizer 715 for Axial SCX10 vehicles.
Axial’s Jeep® Nukizer 715 clear body kit get the Top Pick. It’s molded from thick 040” clear polycarbonate material and comes with LED light buckets. Also in the box are front & rear body assemblies and a window mask sheet. You get a full set of decals as well. This body won’t disappoint those who love to trim, paint, and decorate Axial SCX10 RC models.
Cons: Takes more time and work than one-piece clear bodies.
Dimensions: 20.5 x 9 x 5.8”, Weight: 6.1 oz., Wheelbase: 12”
4. Coolplay 1/10 PVC Car Body Shell for Mazda Rx7
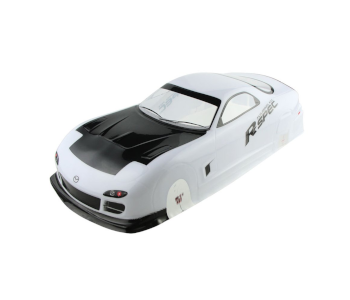
EDITOR’S RATING: 4.6/5
Compatible with: RC Mazda Rx7.
This RC body shell is for the 1/10 scale Mazda Rx7. It’s pre-painted PVC shell, but hobbyists can easily remove the coat if they prefer to prep and paint it in other colors. The wheel arches need cutting out, but there are clear markings to follow. The shell stands up well to knocks considering its low cost, but it’s not indestructible.
Cons: Some complain that the material is too hard to cut. That’s certainly true with the wrong type of scissors. Make sure you use proper curved scissors made specifically for cutting RC model bodies.
Dimensions: 3.9 x 2.2 x 1.6”, Weight: 4.6oz., Wheelbase: 9.8”
5. Traxxas 1/10 Scale 4×4 Clear Slash Body

EDITOR’S RATING: 4.4/5
Compatible with: Traxxas RTR vehicles
This clear RC body is by Traxxas for its ready to run 1/10 scale RC vehicles. It’s a genuine part and thus a perfect fit. One of its main attractions is the precut wheel arches and edges, so that’s one less job to worry about. The body looks fantastic when coated with polycarbonate paint and decorated with decals (included). The kit also comes with window masks.
Cons: Traxxas stock bodies are not the most durable options. Some creative RC’ers use fiberglass tape to help strengthen the shell.
Dimensions: 28.1 x 5 x 19.5, Weight: 9.6 oz.
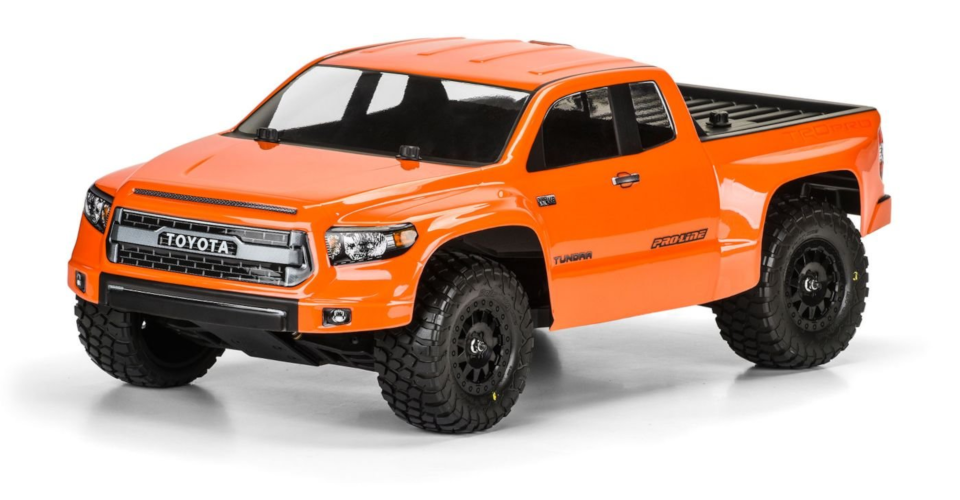
6. Toyota Tundra TRD Pro Clear Body
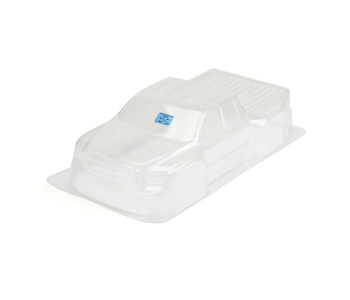
EDITOR’S RATING: 4.8/5
Compatible with: RC Toyota Tundra TRD, PRO-2 SC, Traxxas Slash, Associated SC10, and others. Some models will need a body mount kit (sold separately).
Sixth on the list is a clear body by Pro-Line Racing for 1/10 scale short course RC trucks. The body is easy to work with and comes with clear instructions on the best painting practice. All you need are some hobby scissors, a reamer tool, and Lexan paint of your choice. The product arrives with window masks and a full decal sheet to decorate the finished model.
Cons: Everything as advertised, no negatives to report.
Dimensions: 23 x 13.4 x 6.5”, Weight: 14.9 oz., Wheelbase: 13”
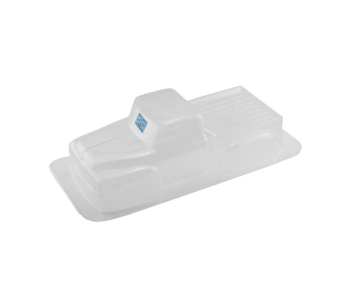
7. Chevy ’72 C10 Long Bed Revo 3.3 by PLR
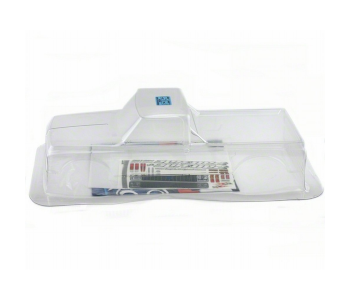
EDITOR’S RATING: 4.5/5
Compatible with: RC E-MAXX 3905, E-REVO, REVO 3.3, T-MAXX 3.3, MGT, and Savage.
This crystal clear long bed body by Pro-Line Racing is a for the timeless 1972 Chevy C10. Now classic car fans get to capture the spirit of the C10 in 1/10 scale format. The kit comes complete with body molding trim, headlights and a detailed grill to replicate the C10’s distinct look. There’s a custom decal sheet in the box and masks for the windows. The material used is high-quality, GE .060 Lexan.
Cons: Everything as advertised, no negatives to report.
Dimensions: 18.6 x 6.4 x 26.8”, Weight: 10.6 oz., Wheelbase: 12.6”
8. Racing Jeep Wrangler Rubicon Clear Body

EDITOR’S RATING: 4.3/5
Compatible with: RC Wraith platform.
This clear Lexan RC body kit is for the Jeep Wrangler Rubicon. It’s an excellent choice for any RC Wraith fan who wants to create a distinct off-road custom jeep look for their vehicle. The product has body molding trim, headlights, and a well-defined grill. It also features low-profile doors, a new look dashboard, and comes with dash and body decals to boot.
Cons: Everything as advertised, no negatives to report.
Dimensions: 18 x 4.2 x 26.5, Weight: 11.2 oz.
9. Volkswagen Full Fender Baja Bug Body for Slash
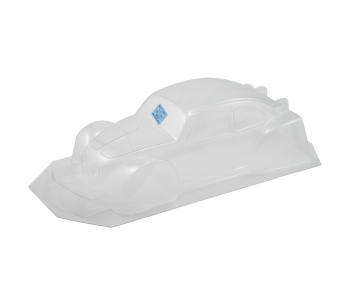
EDITOR’S RATING: 4.4/5
Compatible with: RC Volkswagen (VW) for TRAXXAS Slash 2WD and 4×4.
The VW beetle has been around for eons because of its much-loved design. This clear, unpainted .040 Lexan body brings you the classic VW bug with Baja flair. It has simulated rear engine detail, add-on spoiler, full decal sheet, and window mask. This is a Pro-Line product too. That means it’s durable, long-lasting, and guaranteed quality.
Cons: Cutting and drilling take a lot of work. That’s also a pro for enthusiastic DIY fans.
Dimensions: 11 x 5.8 x 31.9”, Weight: 0.96 oz., Wheelbase: 12.5”
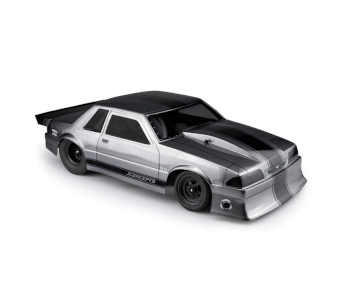
10. Ford Mustang Fox 1991 Clear Body
EDITOR’S RATING: 4.7/5
Compatible with: RC modified 1/10 scale short course trucks, e.g., Traxxas Slash 2WD.
Last of the custom RC bodies is the 1991 Ford Mustang Fox by J Concepts Inc. It’s a clear polycarbonate Fox body with a gorgeous low-slung appearance and snug wheel wells. The extended front fascia, hood-scoop, bobbed tail, and the rear spoiler adds further to the design. The kit includes a full 1991 generation decal sheet and custom window mask.
Cons: Everything as advertised, no negatives to report.
Dimensions: 23.5 x 12 x 6.5”, Weight: 15 oz., Wheelbase 13”
Contents
- Prepping an Old RC Body
- Prepping a New RC Body
- #1 Trim the body
- #2 Wash the body
- #3 Draw the design
- #4 Prepping and applying the paint
- Safety first
- Paint & decorate your new RC body
- #5 Add the RC decals
- #6 The finishing touch
- About My ‘Custom RC Body’ Guide
- Custom RC Bodies Comparison Table
- 1. Redcat Racing 1/10 Scale Clear Buggy Body | Best Value
- 2. Ford 1956 F-100 Clear Body | Best Value
- 3. Axial Jeep NuKizer 715 RC Clear Body Set | Top Pick
- 4. Coolplay 1/10 PVC Car Body Shell for Mazda Rx7
- 5. Traxxas 1/10 Scale 4×4 Clear Slash Body
- 6. Toyota Tundra TRD Pro Clear Body
- 7. Chevy ’72 C10 Long Bed Revo 3.3 by PLR
- 8. Racing Jeep Wrangler Rubicon Clear Body
- 9. Volkswagen Full Fender Baja Bug Body for Slash
- 10. Ford Mustang Fox 1991 Clear Body