3D Modeling in ZBrush – A Beginner’s Guide
Making your own 3D models from scratch is an absolutely fun experience, especially if you’re into art, animation, or 3D printing. There are lots of design platforms out there for this purpose that range from beginner-friendly to more appropriate for professional use. In this article, we will be focusing on one of the more advanced options – ZBrush.
ZBrush has often been criticized for not being too accessible for beginners and having a poorly designed user interface. Those issues are valid, but they can be overcome. Check out our beginner’s guide to making your first 3D model using ZBrush.
What is ZBrush?
In contrast to more beginner-friendly 3D design platforms like SketchUp or TinkerCAD, ZBrush is decidedly more complex and offers much more advanced features. For this reason, ZBrush is commonly used by professional users in the fields of animation and game development.
The workflow of ZBrush is more comparable to traditional, freeform sculpting. This provides greater degree of freedom in terms of geometries and textures. It can also be used to create high-resolution models of up to or more than 40 million polygons. The latest version of ZBrush also offers integration with other 3D design programs such as Blender, Autodesk Maya, and LightWave 3D.
Models made in ZBrush are made of “pixols.” This is a proprietary data type that contains information on a single point’s X and Y positions, depth, texture, and material. The pixol is conceptually similar to the more standard voxel, another 3D analogue for the pixel.
Just like real sculpting, 3D modeling in ZBrush works on the principle of progressive detailing. You likely will need to start on a basic shape that most similarly approximates the appearance of your desired model. You will then need to define larger features such as arms and legs. As modeling progresses, you then move on to finer details – facial features, wrinkles, and various textures. It’s a long process and requires going through a fairly steep learning curve at the beginning.
ZBrush offers packages for both individual users and volume users. An individual users may opt for a subscription package or perpetual license. Volume users must get perpetual licenses, the prices of which vary based on how many people will need to use the software.
The basics of ZBrush
The user interface of ZBrush is not one of its most lauded features. The interface is quite complex, and many of its commands are not very intuitive. To make the learning process easier, let us start with some of the more basic tools and elements. As you shall see later, just using the basic tools can go a long way towards building your 3D model.
Basic navigation
There are two basic modes that you can quickly access using the buttons at the top panel – Draw and Edit. As the names imply, you use the Draw mode to add new shapes to the workspace while the Edit mode is for manipulating or altering the shapes that are currently already in place.
In Edit mode, dragging the mouse around the canvas rotates the workspace. You can hold down the Alt button to pan around the workspace or release it to scale the model. There are also dedicated buttons to swap around these navigation methods but learning the keyboard shortcuts is a lot more efficient in the long run.
To simplify the learning process, we will be focusing primarily on the Tool palette that is docked to the right of the screen. This is where you will be accessing most of the features that you will need to start 3D modeling. The Move, Zoom, and Rotate buttons can also be accessed here in case you forget the keyboard shortcuts.
At the top panel, you will see sliders for controlling the brush size (Draw Size) and brush intensity (Z intensity). The intensity of your brush is also quantified by the “Total Points” number that can be seen just right beside the sliders. The general rule is that the higher the number, the greater the intensity. Over time, you will intuitively know the intensity of your brush just based on this number.
When working on a project, we recommend always saving it as a project. This can be accessed via the Project menu. This retains all the features of the project without flattening the layers, allowing you to edit them later on.
Basic sculpting tools
To get started with sculpting, you must first add a basic shape to you canvas. You can do this by going into Draw mode, going to the Tool palette, and selecting a Tool. Clicking the Tool button will open a large menu of different brushes and 3D meshes. Under the 3D meshes section, you will see a variety of basic 3D and 2D shapes. We will be using one of these shapes as the starting point for sculpting.
For simplicity’s sake, let us go with the basic sphere. Just click on the sphere and place it on your canvas by clicking and dragging. Dragging the cursor away from the starting point will control the size of the shape. You can make the sphere any size that you’re comfortable with.
To start sculpting, you will need to turn this shape into Polymesh 3D simply by clicking the ‘Make Polymesh3D’ button in the tool palette. This turns the object to a mesh – a layer of tessellated shapes – that is now ready for sculpting. You can try this out by dragging at any point in the sphere with the mouse while the left mouse button is clicked. You will notice that it will drag out sections of the sphere based on the size and intensity of your brush.
Holding down the ALT key while maintaining your finger on the left mouse button will do the opposite action, which means that the geometry of the sphere will become depressed. Alternating between dragging and depressing is pretty much the fundamental process of 3D sculpting. You can also play around with different brush sizes and intensities to see how finer control feels.
Just undo the changes to revert the sphere to its original appearance.
History slider
Before we go into the more advanced tools, now would be the perfect time for you to play around with the massively useful Undo function of ZBrush. This is represented as a history slider on the top panel of the window. By sliding the selector forward and backward, you can go to any point in the history of your project.
What makes this tool incredible is that it is said to save up to 10,000 actions. In most cases, it will take several days before you reach a point in your project where you can no longer go back to your initial actions.
If you want to be able to use the history slider even after you have saved and closed the project, make sure to always save your work as a Project.
Brushes
At this point, you may have noticed that you have been altering the surface of your sphere in segments that look like flat circles. This is because you have only been using the standard brush shape so far. The standard brush will remain one of your go-to tools, but ZBrush offers so much more.
To access the different brushes, just click on the Brushes button on the far-left panel. This will open a huge menu of different brush shapes. This menu is very overwhelming, but you likely won’t need to use most of these brushes. Aside from the standard brush, you will want to try out the Clay Buildup, DamStandard, Trim Dynamic, Pinch, Smooth, and Move brushes.
Understanding the different brushes and their effects on the model’s shape and surface is a central part of developing your 3D sculpting skills. This will take some time because of the huge selection of brushes but don’t let that intimidate you. We suggest learning about ten of these brushes (including the ones we have mentioned above) and playing around with them. You can also try and learn the keyboard shortcuts for the brushes to make your workflow more efficient.
Subdividing the mesh and resolution control
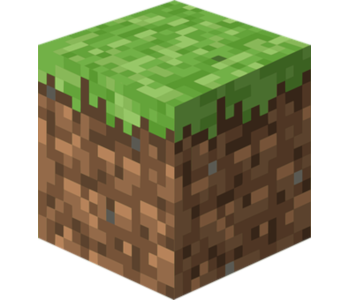
When you draw a shape, it is automatically generated using a fixed number of mesh divisions. This is the number of tessellated flat surfaces that approximate the more complex geometry of your 3D model. As you sculpt the model, you end up increasing the size of these surfaces. Eventually, you will observe a drop in resolution of the sculpted features.
There are several ways to increase the resolution of your model. The easiest is to go to the Geometry subtool in the tool palette and choose the Divide option. With this option activated, clicking at any point on the model will increase the mesh by a factor of 4. This will increase the resolution of the model, refining the features and giving you more sculpting freedom.
Another option is to enable DynaMesh mode, also accessed via the Geometry subtool. This makes the mesh of your model dynamic, allowing automatic mesh adjustment for finer features. Under DynaMesh, you can also fix the resolution of your model with a slider.
If you’re playing around with mesh and resolution, we suggest activating the PolyFrame view, which you can see right beside the Tool Palette. This makes the mesh of the model visible so you can visually see the resolution of specific features.
As we mentioned, ZBrush is capable of creating models made with more than 40 million polygons. Using DynaMesh and subdividing the mesh repeatedly might get you to this value, but it’s hardly necessary. A couple million polygons is usually enough to generate a high-resolution model.
Just using this basic knowledge, you can spend hours sculpting a model and experimenting with different brush types. You can also use this time to get comfortable with the interface of the program. Don’t feel to pressured about making a masterpiece. The best thing about sculpting in ZBrush is that it’s fun, even when you’re limiting yourself to just the basic tools.
Sculpting tools
Now that you’re more comfortable with the interface of ZBrush, we can move on to doing actual sculpting work. To start, let us Add another sphere, go to Draw mode, and go to Polymesh visibility.
Enable symmetry
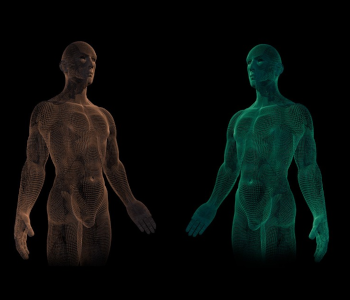
If you go to the Transform menu at the top, you will see button to Active Symmetry. Enabling this will automatically recreate any edits you make on the opposite end of the model based on the axis of symmetry that you have chosen. This is very handy for sculpting faces. As an early exercise, you can try sculpting a human face.
It is a worth mentioning at this point that you have the option of using a reference – whether it be a photo of a real person, a skull, or an existing 3D model. A skull makes a good reference for sculpting the shape of a human head, while a real photo is more useful for working on the finer facial features.
Throughout this exercise, avoid getting caught up in trying to make your model look perfect. Sculpting is a skill that you develop through practice and a conscious effort to identify areas for improvement. It is also normal to be slow at first, especially while you are still becoming familiar with the tools.
Under symmetry is also an option enable radial symmetry. All this means is that features will be symmetric with respect to an axis of rotation. This is useful for adding features around a sphere.
Use Move brush to alter the shape of the model
As you can tell, a sphere is far from the most accurate shape to represent a human head. Using the Move brush, you can sculpt the sphere into something that looks closer to your reference skull.
The Move brush pushes or pulls on specific parts of the model so that you can easily alter its entire shape. This is useful for adding a chin to the sphere as well as for tapering its sides to make it look more elongated. You will also want to make the base of the skull flatter, as well as to pull out as section for the neck.
Use Clay Buildup for preliminary features
The Clay Buildup brush is one of the best brushes for preliminary sculpting. This is because this brush is very aggressive. If you want to make broad strokes to set the major features of your model, the Clay Buildup brush will do the work very quickly.
Using the knowledge we have so far, you can start sculpting your model into something that resembles a human head. Start by sculpting symmetric features such as eyes, eyebrows, ear, nose, and mouth.
Use different Alphas
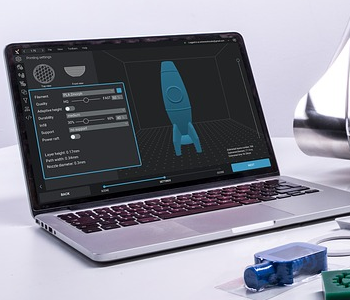
One setting that we have not touched yet are the Alphas, found at the left-side panel below the brushes. The Alpha of a brush determines its shape, basically changing the way that it changes the texture of the model.
To demonstrate, you can try setting the Alpha off and use the brush on your model. You will see that you are sculping without adding any texture. Sculpting with Alpha off is great if you’re finishing up a model but will make it look flat and uninteresting if used throughout.
Using Alphas is a great way to create an interesting texture on the surface of your 3D model. You can make surfaces that look like skin, scales, rocks, or any other interesting material. Experiment with and combining different Alphas is incredibly fun until you find that works best for your project.
Moving and scaling objects
Manipulating a 3D model does not always involve the use of brushes. If you just want to make simple transformations, you can use the Move, Scale, and Rotate tools located at the top panel of the workspace. As the tool names imply, these can be used to move, rotate, or scale your subtools on any axis. You can hold the SHIFT key to make subtools snap into any of several pre-determined positions.
Creating subtools
You can think of subtools as the ZBrush equivalent of the “layers” that you would typically work with in a 2D graphic design program. Subtools can refer to different 3D models in your workspace, all of which can be manipulated independently. As your projects become more complex, you will quickly end up using more and more subtools in a single workspace.
To add a subtool, click the Append button in the tool palette. This will open up the standard menu of 3D meshes and 2.5D brushes. Simply select which shape you wish to add and click in your workspace. This will automatically add the shape to your workspace as a separate subtool.
Switching between subtools can be done via the subtool menu in the tool palette. An even faster way would be to hold down the ALT button and click on the subtool you wish to select on the workspace. This is m
Using the Select tool
Sometimes, 3D models can get so overly complex that focusing on just a single feature can seem daunting. When this happens, you might benefit from using the Select tool.
The Select Tools can be found in the Brushes menu in the left panel of the window. You will be looking for either the SelectRect or SelectLasso Tool. Both tools function similarly, with the sole difference being the shape of the selection that you can make.
To use a Select tool, hold down the CTRL + SHIFT buttons and choose the portion of the model you want to focus on. This will turn off the visibility of everything in the same subtool that is outside your selected region. You can also invert the selection by doing the same action on any section outside the model. Finally, you can revert the model’s visibility to normal by clicking anywhere outside the model in the workspace.
The Select tool can also be used to split a single model into several parts. This is ideal if you want to make several subtools out of a single model. This option is also great if you’re splitting a large model into smaller parts in preparation for 3D printing. Take note that the “Split to Parts” command, found near the bottom of the tool palette, is an irreversible action.
Masking
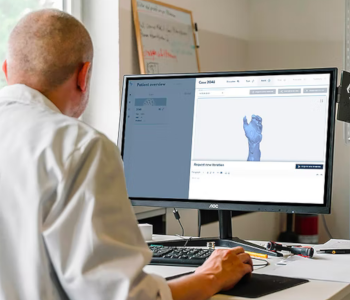
The Mask tool is also found in the Brushes menu in the left panel. With the Mask tool activated, you can paint over any portion of the model that you want to remain unaltered. You can then freely sculpt all sections in the model without altering the Masked area. This is great for fine-tuning very small features of your model, as well as for making very subtle alterations.
Play around with Layers
Layers in ZBrush are very different conceptually compared to Layers in Photoshop or Illustrator. Instead of separate design elements, Layers in ZBrush represent design changes that can be reversed or removed easily. This is great when you don’t want to commit yet to making major changes to your existing model, or if you want to make several variations using the same base model.
To enable Layers, simply clicks on the Layers sub-menu in the tool palette. This will open a list of several untitled layers. Just click on the big New Layer button to start making a layer. You can then make any changes to your model and these changes will be recorded under a timeline that is separate from the timeline of the rest of your project.
A Layer can be reversed or removed from your model instantly. You can have several Layers activated simultaneously and in different combinations.
Merge subtools
If you’re making a model for 3D printing, you will want to merge all of your subtools into a single model. This can be done using the Merge command, also found in the tool palette. You can control exactly which subtools to merge together by changing the visibility of individual subtools and using the Merge Visible command. Your merged model can then be exported and saved as an OBJ file.
The steps and tools we have gone through in this tutorial barely scratch the surface of what you can do with ZBrush. However, this already provides a good foundation for making your first few sculpting projects.
Over time, you can try experimenting with some of the more advanced tools and brushes that are found by default in ZBrush. It is also possible to load custom brushes and meshes, even further expanding your toolset. Ultimately, the quality of your work really won’t depend on how many tools you use – what matters more is how creatively you can use even the most basic set of sculpting tools.
Final thoughts
ZBrush has certainly earned its reputation as one of the most preferred 3D design platforms by many professionals. As a tool for 3D sculpting, the capabilities and flexibility of ZBrush is unparalleled.
However, ZBrush is not well-known as being friendly or easily accessible to beginners. Its menus, tools, and basic navigation can be quite confusing at first. We hope that this rundown of the basic tools of ZBrush is enough to get you excited about its possibilities and continue to learn about one of the best 3D design platforms in use today.

