3D Print Troubleshooting: Printing Failed, What Do I Do Now

Not all printing projects go according to plan. 3D printers are such complex machines with a lot of moving parts that there are bound to be a few issues during the process. Although they can stop working mid print, these cases are well documented, and the fixes are not as complicated as you might think.
As long as you can identify the problem, you’ll be able to make the necessary corrections so you can restart your printing project and complete it. Here’s a guide on what to do when one of your projects stops printing and how to fix them.
Most Common 3D Printing Issues That Lead to Failed Prints
There are three common 3D printing issues that lead to failed prints. Each of them is pretty unique and can happen anytime during the printing process. It’s undoubtedly going to cause many headaches since there is a good chance that you’re going to restart your entire print.
Printing Failed, What Next?
Everything started up according to plan and is looking great as your machine prints layer after layer. However, midway through the process, everything stops, and your print has failed for some weird reason.
The filament stopped extruding, or your model is moving around since it’s not secured to the print bed. There are going to be a lot of underlying causes and ways to attack these issues. It could be several things, but at least you have a good idea on what to do next.
EXTRUSION STOPS MID PRINT
What’s This Problem?
There’s a lot of reasons why this problem can happen. If you’re running 3D printing projects constantly, you’ll surely experience this. The hot end will simply stop extruding filament mid print and can ruin your model and your day.
The Cause of This Problem
You can quickly narrow down this 3D printing issue to two causes. It can either be your filament supply or a problem with the hot end or nozzle, making the printer stop working.
Don’t panic, as there is a good chance that your filament has run out. Many 3D printers in the market don’t show the spool in plain sight and store them inside the body, so it’s not that straightforward to check it. It could also be caused by an idler tension that’s too tight, stripping your filament, and it’s not getting appropriately fed to the hot end.
Another possible cause is a blockage on the hot end, which prevents any material from coming out of the nozzle. In both these cases, the fixes are pretty simple, and you can be printing your model again in no time.
Fixing This Problem
The first thing that you need to do is check if you have enough filament. It’s one of the most straightforward fixes out there, but it’s also something that can be overlooked, especially if your printer model obscures the view to your filament spool. If your printer is the type that estimates the remaining material for your projects, you’re in luck. If not, it’s better to check your filament before you start your print.
Another issue that you need to check for is a stripped filament. It’s one of the most common reasons why a printing project can stop midway through the process. If you have enough filament loaded in your printer, check if it’s stripped as it can be a cause.
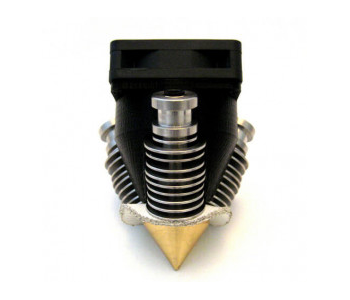
A clogged nozzle is another issue that can cause your extrusion to stop abruptly. This is especially true if you like to change materials with different melting temperatures. The nozzle can easily be blocked by caked in burnt filament. If you have this particular problem, you can check out our guide on dealing with clogged nozzles.
Lastly, you’ll have to check for a snapped filament. This is especially true if you have a Bowden-style extruder, as breakage in your material can cause a divide between your material and the hot end. This is an easy fix, though, but it can be a sign that your filament is way past its best.
| How To Solve This Issue Checklist |
|---|
| ✔ Check if you have enough filament |
| ✔ Check for a stripped filament |
| ✔ Check if your printer has a clogged nozzle |
| ✔ Check for a snapped filament |
PRINT NOT STICKING TO BED
What’s This Problem?
Although it sounds serious, having your prints not sticking to the bed is a fairly common problem. The good news is that it’s also relatively quick and straightforward to resolve. However, there’s going to be a good chance that your model is going to be ruined, and you’ll have to do it over again.
Now, every time you start a 3D printing project, it can loosen and fail from sticking to the bed at any point. It can get a little frustrating, but since it’s a common issue, there’s a lot of ways to solve it.
It’s not always the printer’s fault whenever this happens. Sometimes, the model you’re working on might not have enough contact points to make it stick by itself to the bed. You can look at adhesives or supports to ensure that your prints don’t go all over the place.
The Cause of This Problem
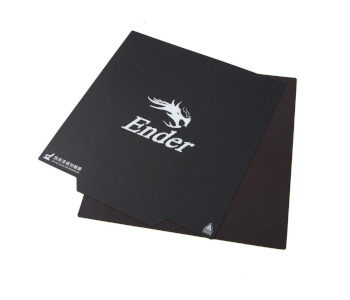
The most common reason why you’re experiencing this annoying issue is that your model simply doesn’t bond well enough to the surface of the print area. The melted material is so smooth that it needs a textured bed to adhere to. To solve this and not deal with it constantly, you’ll need to use a print bed with a surface that’s primed for bonding.
Another leading cause of this issue is that your print bed is not level. If it’s uneven or tilting to one side, your print nozzle won’t be close enough to the platform so your filament material can bond to it properly. This is especially true with your first layer since if it does not stick properly, you’ll end up ruining your entire print project.
If you have not calibrated your 3D printer properly, you’ll also encounter this issue since the distance between the nozzle and the previous layer can be different that it’s going to be dragged instead of being correctly extruded and pushed into the bed.
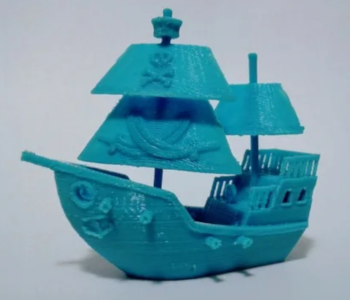
In all these cases, the telltale signs are that you’re going to see your filament forming a spaghetti-like shape as it prints out your model rather than the shape you want it to be.
Fixing This Problem
One of the first things you need to do is to add texture to your print bed. This ensures that your filament material sticks to the platform, so it doesn’t ruin your model. To do this, you’ll need to apply a layer of stick glue on the platform. This will add the necessary texture, and it’s easy to remove after your print project is done. If you’re printing with PLA, you can add decorators’ tape or other types that are heat resistant.
After making sure that you have the necessary texture on your print bed, it’s time to check if it’s level. Every printer has a way to adjust this, with the latest models coming with a reliable automatic leveling system, giving you fewer problems. For others, they will surely come with a guide on how to do it properly.
Adjusting the nozzle height is also another way to deal with this problem. If the nozzle is too high up on the print bed, the filament will not stick to the platform. Get it too low. It will drag the previous layer off. To ensure that your nozzle height positioning is perfect, open up your printer’s settings and adjust the Z-axis offset.
Sometimes it’s just about how clean the print bed is. Get it dirty, and you’re going to experience adhesion problems between your filament material and surface. This is especially true if you’re using glass since grease from your fingers can make it too slippery. Give your printing surface an excellent clean, mainly if you use glue to make it stickier.
If you’re printing a model with fewer contact points between your model and surface, you’ll need some form of Build Plate Adhesion. You can add these to your slicer software. They’re usually named “Brim” and “Raft.”
The Brim option adds a layer of material around the contact point of your model. You can think of it as a stand increasing the surface area of your model and the print bed to stick better. It uses less material compared to the Raft option, but you’ll need to cut it off after your printing is done.
On the other hand, the Raft option adds a layer that’s shaped like a raft with your model printed on top. It provides your project a better and thicker layer to stick to so it doesn’t slide and move around. It does use up significantly more material than Brim. Still, it’s a lot easier to release your model since you can simply snap it off.
Lastly, you can add supports. You’ll need to use this if you’re printing a model with a lot of overhangs, so they don’t fall off as soon as your material is extruded as it’s still molten hot.
| How To Solve This Issue Checklist |
|---|
| ✔ Add texture to the print bed |
| ✔ Level your print bed |
| ✔ Adjust the nozzle height |
| ✔ Clean your print platform |
| ✔ Use “Brim” or “Raft” options for adhesion |
| ✔ Add supports |
SUPPORTS FALLING APART
What’s This Problem?
When you move on to 3D printing complex projects, you’ll need to master the art of adding in supports. It can get challenging to remove, but some models really require it, or it’s impossible to print.
The job of supports is to make sure that your model stays upright during the printing process. However, there are times when they fail and can ruin your entire project. You’ll know that you have this problem since you’ll notice that the supports you print will look uneven or cracked as you print. You’ll need to correct this quickly before it goes out of hand and collapses, bringing your entire model down.
The Cause of This Problem
Whenever you print a model that has a more complex shape than usual, you’re going to need to use supports to make sure everything comes out correctly. To add to the complexity, support structures are tricky. While your slicer software will give you options, its suggestions are not always the best ones.
You want to make sure that you select the correct type of support, so your model is as steady as possible while the nozzle adds new material on top of it. Straight lines and zigzag type supports are usually the easiest to cut and polish, but they are not the strongest. Triangle-shaped supports often provide better rigidity but are more challenging to remove.
Some will go to extra lengths to make sure that supports are as small and thin as possible. This can certainly cause many issues in the long run, especially when you’re printing an object that’s tall or has a significant overhang. If the supports you’re making are load bearing ones, it’s better to be on the safe side and use the proper density to not ruin your model.
Another cause of this problem is using an old filament. If it’s already past its best, there is a good chance that the adhesion on the previous layer is affected. It won’t bond as readily, and you’ll end up with a model with weak and cracked supports.
Printer vibration can also cause this issue. This happens when your printer is not on a stable surface, or there could be loose screws that make it shake as it prints. Make sure that your printer is as durable as possible to avoid it printing out subpar supports.
Fixing This Problem
The first thing you need to do before starting is choosing the proper support for your model. Depending on what you’re printing, there is bound to be a type of support that’s perfect for it. If there are significant overhangs, ensure that the support has enough contact with your print bed and use sturdier support designs.
You can also add some sort of platform adhesion like a brim around your model and supports. This gives the object you’re printing a good foundation which further improves their overall stability.
If nothing works at this point, you can try increasing your support density. You can make them a little thicker, so they don’t collapse from the weight of your model. A denser structure will make your object a lot sturdier, so it does not get affected by the movements of your print head and new material being extruded every time.
Printing tall objects can also pose a problem with your supports. Having a tall model means also making supports that are just as high. To give them more strength, you can use blocks to provide your model and supports a more solid base.
If your supports still break at this point, then there could be an issue with your filament. Using an older material that’s brittle can cause multiple problems like a stripped or snapped filament. These can affect your overall printing, primarily if you’re relying on using supports. Swap a fresh set of material, and you should be printing without experiencing any issues in no time.
Lastly, make sure to check that everything is tight and stable. Make sure you have a steady base for your printer by tightening the screws to not get unwanted shakes. Make sure to calibrate your printer again after you have tightened every part.
| How To Solve This Issue Checklist |
|---|
| ✔ Choose the right support structure type |
| ✔ Print brims for better adhesion |
| ✔ Make your supports thicker for better stability |
| ✔ Use in-model supports |
| ✔ Change up your filament |
| ✔ Tighten everything |
Final Thoughts
These are the most common issues that you’ll face whenever your project fails in the middle of printing. These are more severe issues since if they fail, there is a possibility that the model you’re currently printing will be ruined.
However, most of the fixes to overcome these are easy, and there are also preventive tasks that you can do so they won’t happen to you. Before starting a 3D print project, it’s always wise to make sure that you have done these preventive checks, so you don’t have to waste time and material.
Printing 3D models can get tricky and challenging. But, if you can spot the issues earlier and know what to do when they arise, you’ll be a more confident printer and won’t need to panic when these happen to you.