3D Printed Lithophane: What It Is and How to Make One

3D printers can create a lot of unique and creative items, but how about recreating a photo in a way that only 3D printers can? Lithophanes have been catching on as a great gift or souvenir that you can make with your 3D printer. They are unique, personalized, and still fairly uncommon, so what’s not to love?
For those who haven’t seen a lithophane before, just one look at it and you’ll realize that 3D printing one isn’t’ exactly going to be easy. How can you successfully turn a photo into a lithophane? Check out our detailed guide below.
What is a lithophane?
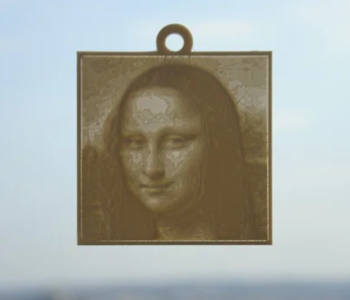
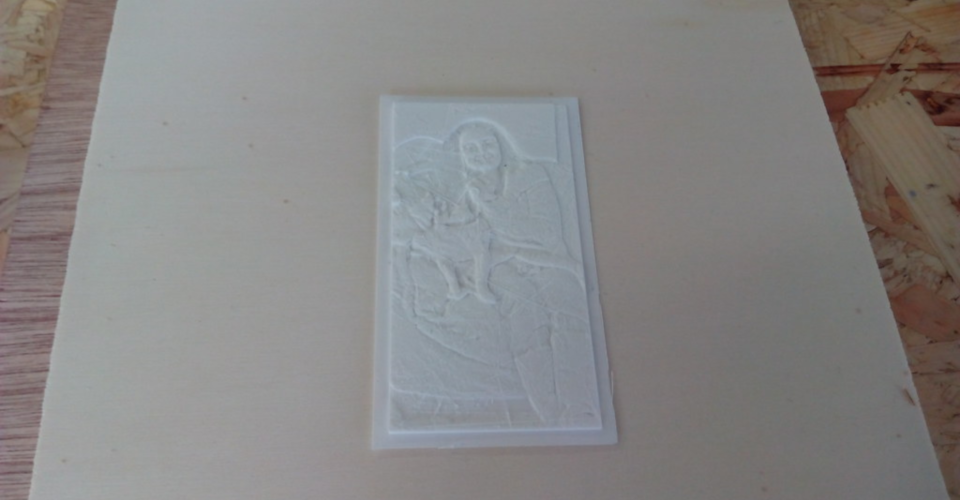
To put it simply, a lithophane is an embossed representation of a photo on a hard material, such as the plastic used in 3D printing. A lithophane doesn’t reveal much detail until you let some light shine through it. Through variations in the thickness of the different sections of a lithophane, the way the light shines through it creates various shades of gray that faithfully recreate the details of the source photo.
That being said, not all photos can be turned into good lithophanes, especially if you plan to make one using a 3D printer. Because of the limitation of 3D printers when it comes to resolution, it would be better to pick a photo that doesn’t have any fine details. Photos with areas of high contrast also create much more dynamic lithophanes.
Lastly, you can really only create a lithophane in a single color if you are using a single-extruder 3D printer, so it’s best to pick a photo that doesn’t rely on a rich color palette to look good. Considering the color limitation, it is often recommended to simply use a neutral color such as gray or tan for the lithophane.
A guide to making your own lithophane
1. Pick a photo
The first step in making a lithophane is to pick a suitable photo. As we’ve already mentioned, pick something simple. Going overboard with the details can result in an unpleasantly cluttered lithophane. It bears mentioning that some 3D printers may be capable of reproducing high levels of details, and that’s fine if you’re willing to spend a few hours printing your lithophane.
2. Convert your photo to a lithophane STL file
Now that you’ve got your photo, it’s time to turn into a 3D lithophane model. There are a couple of ways to do this, but we will be focusing on the easiest options:
- By far, the simplest way to convert your photo into a lithophane is by using this online tool developed by NestedCube. All you have to is to upload your photo, select your preferences, and you can instantly download your STL file! The online platform even lets you pick a shape for your lithophane in case you want to give it a nice little arc or even have the photo wrap around a cylinder. It doesn’t offer you a lot of options, but it also does the job for free, and you won’t even have to do much work yourself.
- The Customizable Lithophane embedded app in Thingiverse works in pretty much the same way – simply upload a photo, make few tweaks, wait for the generated 3D model, and download it as an STL file. This tool, though easy to use, is restricted to only creating flat lithophane models. It’s also a bit slow, so prepare yourself for a long wait if you go this route.
- If you have Adobe Photoshop CS5, this downloadable action set will add a command to your program for automatically generating a lithophane from a photo. Simply install the action set, select the appropriate command on the Actions tool set, and wait for its to do its magic. This is quite a resource-intensive process that can take a while, depending on the specs of your computer. The quality of the resulting lithophane will depend on the contrast levels of your photo, so you might have to do a bit of trial and error before you’re satisfied.
- Use Cura (version 13.11 and up) to import your photo and simply convert it a 3D mesh. By selecting the “Darker is Higher” option, this command will turn your photo into a relief map where darker areas are printed thicker. Cura allows you to “smooth” out some of the details in your 3D model if you’re not satisfied with the initial results. The main advantage of Cura, if you’ve already been 3D printing for some time, is that you’re probably already using it.
3. Print the STL file
Now that you’ve got your STL file, all you need to do is to load it onto your 3D printer using either a USB connection or an SD card. Of course, a lot of things can still go wrong at this point, so here are our best tips so that your lithophane comes out as good-looking as possible:
- It’s best to use a natural filament color, such as white or light yellow. The way that light shines through thee colors seems better or ‘natural’, for lack of a better word. Any rigid filament material, such as PLA or ABS, will work perfectly fine. Under no circumstances should you use a flexible filament to make a lithophane.
- Since you are relying on the property of the filament to partially block out light and create varying shades of gray, you cannot create a good lithophane using translucent or transparent filament, unless you’re going for that over-exposed photo look.
- We recommend printing vertically because removing a flat print from your building platform without damaging it is going to be a nightmare.
- You want to preserve as much detail as possible, so if you’re printing vertically, set your layer height to as low as possible.
- Also related to preserving detail, adjust your printing speed to the lowest setting possible. Not only does this technique allow you to print more refined detail, but you’re also going to avoid running into any problems with stringing or blobs.
- Set your infill to 100%. Setting it at anything below 100% will mean that there will be void spaces inside your build, which will disrupt the way that light goes through the lithophane. This will also prevent the molten filament from collapsing inside the hollow sections and ruining your print.
- Don’t forget to apply the appropriate bed adhesion according to the filament you are using and to use a heated bed if necessary. Warping is less of a problem if you’re printing slowly, but it can still happen.
If you’ve managed to dial in all the correct settings, then you should end up with a nice lithophane after several minutes or a few hours. How much time you spend printing your lithophane will depend on the level of detail you want in your image, how big the darker areas are, and the size of the actual model.
We find that looking at a lithophane with natural sunlight shining behind it is the best way to appreciate all its fine details. You can still go back to the original source image and play around with contrast settings if you’d like to improve on your lithophane, but remember that going overboard on the contrast can also result in a loss of detail.
Final thoughts
Lithophanes can make really cool gifts simply because not many people have seen one. If you don’t have anyone to gift a lithophane to, then you can just make one for yourself and display it around the house – it will surely make a great conversation piece.
3D printing a lithophane may seem like an easy process, but from our experience, it takes a few tries to get a print with just the right balance of contrast and detail. Our advice is to just have fun with it and play around with your model and printer settings.