Tips on Making 3D Printed Molds

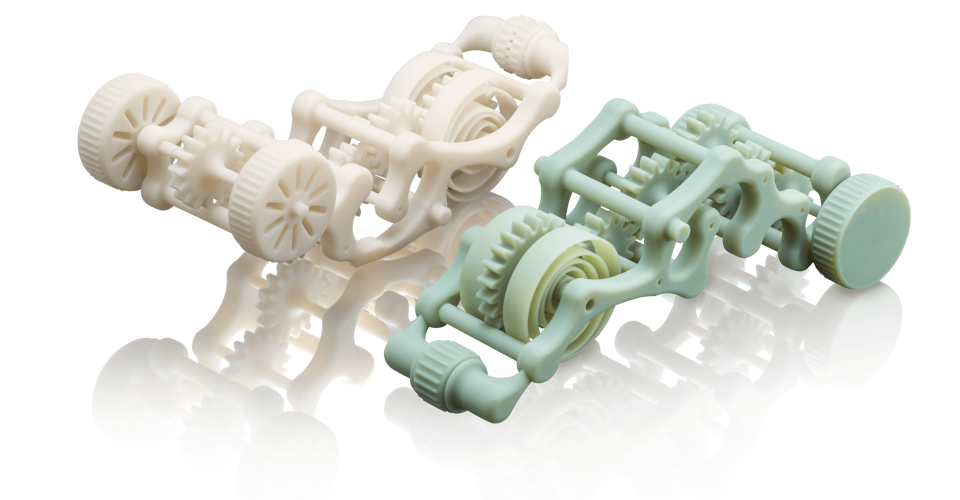
An indirect way to harness the versatility of 3D printing is to use it to create molds instead of the final products. Although this may seem like a roundabout way of using additive manufacturing techniques, 3D printing molds instead of the final product has its own unique benefits. It can also be a great venture for learning new skills for any 3D printing professional.
The practice of creating molds is not that different from any other 3D printing project, but it requires looking at things from a different perspective. What’s the best way to design and print a mold using a 3D printer?
Pros and cons to using 3D printing to create molds
Molds are essentially “negative copies” of the part you’re trying to create. Once you have a mold, the typical production process involved pouring molten material into the mold and waiting for it to solidify. This is quite old-fashioned, so the question is – why not just 3D print the part in the first place? Here are a few good reasons for 3D printing molds instead:
Faster for large-scale applications
If you need to make hundreds of copies of the same model, you might spend several months if you decide to 3D print them individually. A smarter way to approach this problem would be to 3D print several molds and use each of these molds multiple times. This is faster, easier, and less power-intensive than running your 3D printer for several weeks on end.
Better quality control
While 3D prints have become more reliable for the most part in the last couple of years, it’s almost unavoidable to run into issues every now and then. Now, imaging having to 3D print a hundred copies of the same model. How many of those are going to have extrusion or warping issues? How much time and filament might you end up wasting because of production rejects? This is an issue that you might be able to avoid by using a mold instead.
Cheaper than industrial molds
3D printing isn’t the traditional way to make a mold. Normally, you would have to start with a prototype from which the mold is made using plaster or metal. This is a process that requires more skill and likely is more expensive than 3D printing. By using a 3D printed mold, you can mimic industrial-level production techniques at much lower costs.
However, 3D printing is really just a short cut to a more industrial approach to mold-making. It may be cheaper, but it also compromises in other areas.
Less durable than industrial molds
There’s a good reason why most molds are made of plaster or metal. Molds go through a lot of punishment. From coming in contact with hot material to being pried apart mechanically, molds typically only have a limited life cycle before they start falling apart. This problem becomes more magnified when using 3D printed molds. If you’re planning to use a 3D printed mold, then don’t count on it lasting up to a hundred uses each.
Will require lots of trial and error
If you’ve never 3D printed a mold before, then you’re likely going to need to do a lot of trial and error to get it just right. Designing a mold isn’t as simple as making a negative copy of a 3D model. You will need to learn concepts such as where to best place the parting line of your mold, how to reinforce your mold for extra strength, and how many air vents you need to place to avoid air bubbles in the final product.
Molds require post-processing
As with any 3D printed project, a mold made via 3D printing will naturally come out with layer lines. You can minimize this effect by using layer lines that are as thin as possible, but they will still be there. If you want all the products made from this mold to come out with a smooth finish, then you’ll have to smooth out the layer lines of the 3D printed mold. This is not exceptionally difficult but is something you may need to consider if you’re counting on this process to have a very quick turnaround time.
3D printing may be a very good alternative to traditional molding methods, but it is not a 100% viable substitute. There are still certain circumstances that call for more heavy-duty molding methods. Recognizing when you could consider using 3D printed molds depends on the scale of your operations, the materials you’re working with, and the design of the model to be replicated.
Tools and supplies for 3D printing molds
Molds can be made using either filament-based or resin-based 3D printers. The approach to designing a mold using either of these 3D printer types aren’t significantly different. A resin-based printer can print at a higher resolution, which means that layer lines aren’t that much of a problem. However, filament-based printers are less expensive and much more common.
3D modeling software
If you’re designing a mold, you will likely need to start with a 3D model of the part you’re trying to reproduce. You will need a 3D modeling software, such as AutoCAD, to manipulate this model and make a negative copy out of it. Keep in mind that this is easier said than done and that there are certain principles to consider when designing a mold.
High-performance 3D printing material
When 3D printing a mold, you will want to use a material with good mechanical strength and heat resistance. A material that expands minimally when exposed to high temperatures would also be ideal to avoid dimensional inaccuracies due to warping. The Digital ABS Plus filament from Stratasys is a very popular option. The Sculpt High-Temperature Resin is also worth considering for those who work with resin-based 3D printers.
Mold release spray
A mold release spray does exactly what it says on the label – it helps you remove the hardened cast from the mold. A single can of mold release spray costs less than $20 and goes a long way, so there really is no excuse to not have one on the ready. Take note that there are different kinds of mold release sprays depending on the material you’re casting. For instance, a spray made for silicone might not work as well when used with urethane or an epoxy-based material.
Sandpaper
A little post-processing of your mold can save you a lot of work down the road. This goes for the layer lines that are unavoidable in 3D printing. Once you’ve finished printing your mold, take your sandpaper and get out of as many of these layer lines as you can. You might also need to do this for the mating surface of the mold to make sure that they press against each other without letting any of the casting material leak out.
Other tips
Make sure to match the 3D printing material with the casting material
When designing a mold, it is prudent to decide early on what kind of material you’ll be casting with. Different casting materials melt at different temperatures. You have to make sure that the material you 3D print with does not melt when it comes into contact with the molten casting material. There are also other factors to consider, such as urethane, which gives off extra heat during casting because of its exothermic reaction.
Don’t forget to add air vents
Air vents are a critical part of a mold design for allowing air bubbles to escape while the casting material is poured in. While there’s no rule of thumb on the maximum number of vents that a mold should have (the more of them the better), a good practice is to make sure that at least 30% of the perimeter of the mold is vented. Venting out all the air inside the mold as the casting material is poured in results in better products, both in terms of aesthetics and strength.
Avoid sharp corners
Sharp corners and 90-degree angles are your worst enemies when designing a mold. A lot of people learn this the hard way, but we’re telling you now – designs with sharp corners are very hard to remove off a mold. Rounding up these corners, even by just a few degrees, helps in part removal and helps preserve your mold for multiple uses.
Print at the highest resolution possible
When you’re 3D printing a mold, you want it to come out at the best quality possible. The level of detail and resolution of your mold will translate directly to how well the casted products are. This means that printing your mold at the highest resolution settings is well worth the extra time it takes. This is even more important if your design has a lot of small details and curved surfaces.
Keep support structures away from the inside face
Avoiding support structures entirely when printing a mold is ideal. However, this may not always be an option. If absolutely necessary, it would be best to place these support structures on the outer face of your mold. This reduces the amount of cleanup needed before a mold can be used and helps reduce any imperfection as a result of the support removal process.
Place the mold inside an aluminum frame
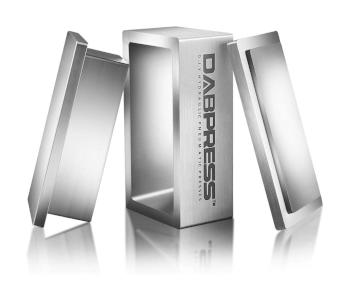
One of the best ways to give your mold extra durability would be to place it inside an aluminum frame. There are a variety of sizes of pre-made aluminum molds that you can buy online. Aside from providing mechanical support, a rigid aluminum frame also prevents any geometrical distortion due to warping.
Should you decide to use an aluminum frame, you will also have to customize your mold design for compatibility. It should fit snugly into the frame and should have a sprue and air vents that aligns perfectly with the channels of the frame. Aluminum frames can be a little expensive but are virtually indestructible.
Final thoughts
Creating a mold is an unconventional of using a 3D printer, but it can be more practical in certain situations. Making identical parts from a 3D printer mold is simply faster and more practical if you want to churn out multiple copies. Just keep in mind that a cheap 3D printed mold will not be as heavy-duty as one made from plaster or metal.
If you’ve never tried 3D printing a mold before, then this would be a good weekend project. Just take your favorite design (ideally one with good symmetry) and try to make a mold out of it. You’ll almost certainly learn a few good design lessons on the way.