A 3D Printed Selfie – What It Is and How to Make One
Turning your phone camera to your face and taking a photo – a selfie – is so 2010. It’s now 2021, so it’s time to add a new dimension to your selfie game.
There are now various online services that can make a “3D printed selfie” for you. What exactly is a 3D printed selfie and how is it made? Can you make one yourself if you own a 3D printer?
What is a 3D printed selfie?
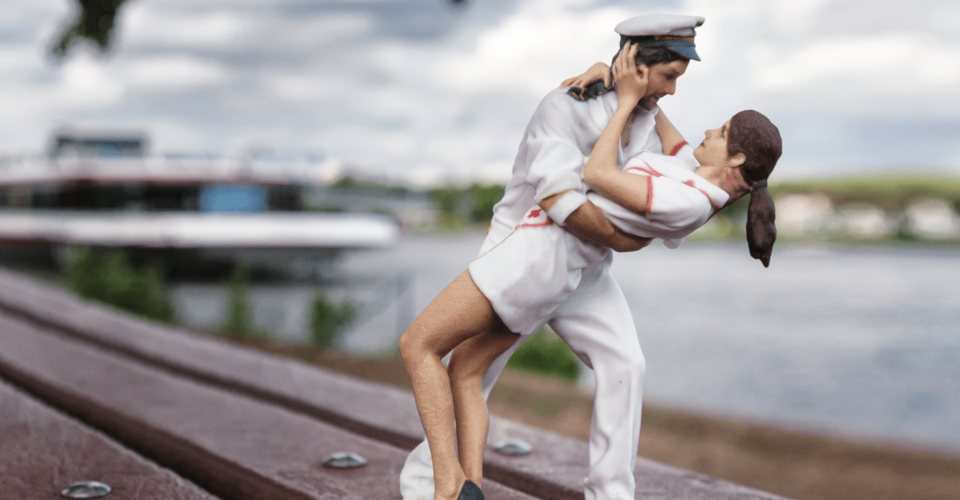
In a nutshell, a 3D printed selfie is simply a miniature 3D model of yourself. It can be a reproduction of just your face or an entire body model. Of course, you can also make a 3D model of another person – the word “selfie” is only being used in this context to make the concept easier to market.
3D printed selfies are products of the combined technologies of 3D scanning and 3D printing. They have become quite popular in the last couple of years as personalized gifts, mementos, or souvenirs for guests at events.
Making your own 3D printed selfie
If you already own and use a 3D printer, then you have almost all the hardware you will need to come up with a 3D printed selfie. The only question now is how to transfer a human face into a digital 3D modeling platform.
Scanning your face

The first step in making a 3D printed selfie is making a 3D scan of your face or your subject. There are two ways to do this – using a face scanning app on a smartphone, or by an actual commercial 3D face scanner.
If you’re just doing this for fun, then downloading a free face scanning app will be a lot more practical. The most common recommendations are Bellus3D Face App for iOS and Sony 3D Creator for Android. If you have an iPhone with a LiDAR sensor, you can also consider the much more powerful Scandy Pro 3D Scanner.
Companies that offer 3D printed selfies as a product will likely use standalone 3D scanners. Compact 3D scanners can be used for facial scanning. Full-body 3D scanning, on the other hand, is typically done using an array of sensors that scan different parts of the human body simultaneously.
If this is your first time doing a face scan, you will likely need to experiment with your app’s settings to get a good result. You will want to make sure that the 3D model is watertight, as it cannot be 3D printed otherwise. Set the resolution of the 3D model to the highest possible value. When it comes to face scans, you will want the model to be as detailed as possible.
Once the results look good, export the file as an STL file. You will then have to open this using a slicer software.
Preparation for 3D printing
With your face now fully modeled in 3D, you will then need to prepare the file for 3D printing. This is done using slicer software. There are lots of equally good software options out there. Good recommendations include Simplify 3D and Ultimaker Cura. Prusa Slicer is also worth considering if you’re looking for a slicer that is free and open-source.
If you have exported your model as an STL file, it should be immediately compatible with your slier. Your model should already be watertight at this stage. If not, you can fix this easily in the slicer.
You will then want to scale down the model to fit your 3D printer and to change its orientation to reduce the number of supports. The best way to do this is to orient the model so that the face of the model is facing away from the build plate. This means that the supports will be attached to the back of the head, which is much less visible.
You should be fine with the default settings for infill, layer thickness, and wall thickness. If you’re making a “miniature” figure, then you can go ahead and set 100% infill.
If you have done a final inspection, then save and export the sliced model to an SD card or directly to your printer via wired or wireless connection.
3D printing and finishing
Before getting started with the actual 3D printing, make sure to do the usual maintenance work first. The most important things to do are to level the print bed, make sure that the nozzle is clean, and use filament that has already been dehydrated. 3D printed selfies are very detailed and have little room for error.
A 3D printed selfie can take between 5 to 12 hours to print depending on the size and level of detail. Most people use PLA for 3D printed selfies as it is much easier to work with and can be printed at higher speeds.
After 3D printing, you have the option of sanding, polishing, or painting the 3D printed selfie as you see fit. The amount of work that will go into post-processing will largely depend on the size of the 3D printed selfie and the level of detail you’re going for.
3D printed selfie services

Do you want to have a 3D printed selfie but can’t be bothered to make one yourself? 3D printed selfies are so popular nowadays that several companies offer them as a service. You can either send in a 2D photo of your face for digital reconstruction or have your body 3D scanned using one of their professional full-body scanners.
Shapify is one of the more popular companies in this market. The approach of Shapify is multi-pronged. Enterprise customers can purchase the Shapify Artec booth – a full-body 3D scanning booth that can scan a person in 12 seconds and produce a detailed 3D model right after. Shapify also sells a handheld version of this 3D scanner, called the Eva.
Shapify also offers the option of sending in your own 3D scan so they can do the printing for you. They have a free software download on their website. The only caveat is that you will need a Microsoft Kinect camera to use the software.
My 3D Worlds further simplifies the process by only requiring customers to send in a 2D photo of any person they want to be modeled. Using the picture as a reference, the company constructs digital models which then have to be approved by the customer before printing.
Although this business model adds a lot of work for the service provider, it allows My 3D Worlds to cast a larger net over their potential market. After all, convenience is an essential factor for customers nowadays.
Few other businesses are offering similar services such as Holodeck 3D Studios, Reconstruct Me, and Twindom. Again, the services these companies offer can range from on-site full-body 3D scanning to 3D reconstruction from standard 2D photos.
Most 3D printed selfie services that can produce an output within a few minutes do so by using gypsum as the base material for 3D printing. Using binder jetting technology, a full-color gypsum reproduction can be made in around 5 to 10 minutes. The biggest downside of gypsum is that it’s a fairly fragile material – think of it like a porcelain figurine but still much more brittle and prone to cracking.
Final thoughts
It’s easy to see the appeal of a 3D printed selfie, as it’s essentially a miniature figure of yourself. 3D printed selfies make excellent keepsakes and will certainly catch the attention of people in any event.
If you’re curious about 3D printed selfies and have a 3D printer at home, then you can take a stab at making your own. The great thing about modern 3D scanning is that you can do it using just your phone. Professional 3D scanning equipment, on the other hand, is so much more precise and faster to use.
3D printed selfies are huge businesses now. Try and get in touch with a company that’s near you to see what they can come up with.

