3D Printer Controller Boards: Buying Guide and Top Recommendations

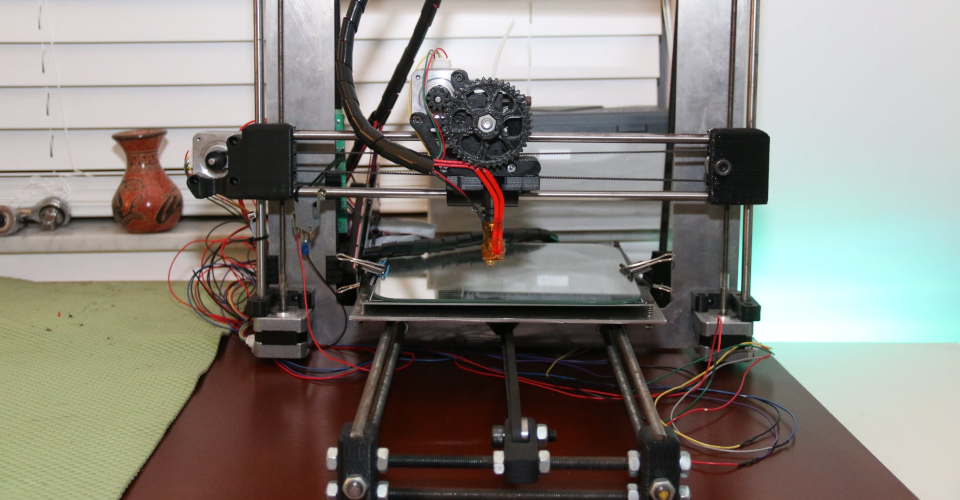
The simplicity and user-friendliness of modern 3D printers belie just how much technology lies under the hood. 3D printers have a huge number of motors, sensors, and heating elements that work together to achieve the machine’s purpose. However, the central “brain” that directs all these components is a 3D printer’s controller board.
If you bought a fully assembled desktop 3D printer, then picking a controller board is probably something you won’t need to bother with. This guide is made for those who are into assembling their own DIY 3D printers.
What are 3D printer controller boards?
Controller boards are compact printed circuit boards (PCBs) that handle all the logic functions and requirements of a 3D printer. It receives the g-code commands from the slicer software and converts them to commands to the various components of the printer including the motors and heating elements. The controller board also receives data from the printer’s sensors, running them through a built-in algorithm to come up with the appropriate response.
Older 3D printers typically had basic controller boards designed to handle only the fundamental functions needed in 3D printing. However, controller boards have evolved in the last couple of years to accommodate features such as Wi-Fi access, shorter response times, more complex algorithms, and more powerful motors.
What to look for in a 3D printer controller board
Despite the prevalence of fully assembled 3D printers, there is still a huge market out there for controller boards for those who want to assemble custom-built 3D printers. With so many brands and models out there, picking one with the right specs can be an overwhelming task. To help you choose the controller board that is just right for your needs, here are some factors to consider:
Firmware compatibility
Every controller board comes with a built-in firmware. The important thing for you to check is if this firmware is compatible with your 3D printer and its components. For instance, some Arduino controller boards are designed solely for specific 3D printer models. More generic ones, like RAMPS or RAMBo, have wider compatibility lists.
Wider compatibility isn’t always ideal, because a more specialized controller board typically makes better use of a 3D printer’s more complex features. Our advice is to think of a build that you’re going for and look for components that are compatible with it.
Processor power
8-bit boards are very common in older 3D printers, but you can get controller boards right now that are 32-bit. Theoretically, 32-bit boards are capable of processing more calculations per minute than 8-bit boards and should help reduce the printing time for any given project. This doesn’t always translate well to actual performance as there are several other bottlenecks along the process, such as the USB connection or the movement of the stepper motors.
In any case, getting a 32-bit board versus an 8-bit board is considered a good move in that your build is more future-proof. For the DIY enthusiast, the ability to upgrade with better components is always considered a good thing.
Wired or wireless communication
Wired communication with the controller board isn’t much of a problem nowadays. Just about all controller boards offer a plethora of wired communication ports including the classic USB Type-A, the newer USB Type-C, mini-USB, and micro-USB.
Again, we prefer coming up with a future-proof build. This means outfitting your 3D printer with wireless communication options. Wi-Fi capabilities would be ideal, albeit they can make a controller board quite expensive. You can save a few dollars by looking for a board with an Ethernet port. Either way, you will gain the ability to control or monitor your 3D printer remotely.
Stepper drivers
A stepper driver is essentially the circuit that controls the operation of stepper motors. They work by sending controlled pulses of current to stepper motors so that they run in the desired increments. The stepper motors, in turn, handle high-precision movements in the 3D printer such as the rotation of the extruder gears and the motion of the nozzle along the print bed. The stepper driver is a particularly crucial part of the controller board as they tend to heat up and get worn down rather quickly.
There are two options when choosing a stepper driver assembly – it can either be built-in to the board or be plugged in separately. Built-in stepper drivers typically have better heat dissipation, which makes them last longer. However, they can also be a pain to replace. In contrast, plug-in drivers are easier to replace but have the disadvantage of smaller heatsinks.
Microstepping performance
Microstepping is the process by which controller boards can split up the movement of stepper motors to even smaller intervals. While this may enhance the resolution of a printer, any 3D printer is still limited by other factors such as nozzle diameter.
The biggest benefit of better microstepping lies in reduced vibrations in the movement of the component being driven by a stepper motor. This means better electrical efficiency and less noise.
The benefits of better microstepping may seem subtle, but they are often enough to justify choosing one board over the other. Most controller boards are capable of 1/16th microstepping, but other boards can go as small as 1/128 or 1/256. However, you will still need to have the right stepper driver and stepper motor to realize the benefits of better microstepping.
Top 5 best 3D printer controller boards
1. BIGTREETECH TFT35 V3.0 Smart Display 3D Printer Controller Board
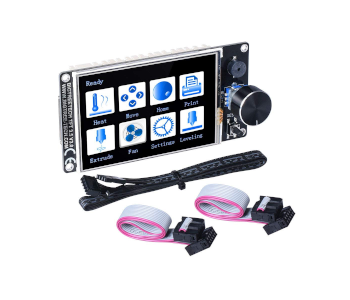
This controller board from BIGTREETECH is one of the most popular upgrade options, especially for those who run Ender 3 Pro 3D printers. Its main feature, of course, is the integrated touchscreen display. This touchscreen interface provides easier access to tuning, calibration, and other more advanced features. However, the classic rotary knob is still there for more old-fashioned users.
This controller board comes with a 32-bit 120MHz ARM Cortex-M3 processor. It has no built-in Wi-Fi capability but has a reserved port for an external Wi-Fi module. If you don’t have the equipment to connect to the board wirelessly, you can simply print models on the board using an SD card. The controller board has two sets of UART extension ports for components that you would like to add to your 3D printer such as a filament run-out sensor.
One thing to take note of about the BIGTREETECH controller board is that it’s not exactly user-friendly. Poor documentation means that setting up the board is not easy and that the board isn’t designed to be plug-and-play. Its built-in firmware is not open source, which somewhat detracts from its DIY objective. It’s not a terribly expensive board, but the addition of a touchscreen means that there are dozens of cheaper boards out there.
2. BIQU Upgraded Rumba Controller Board
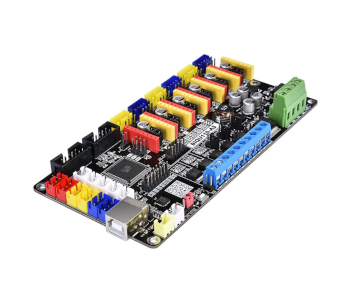
The Tango control board from BIQU is one of the most versatile controller boards in the market. Not only does it support a wide range of 3D printers, but it’s also compatible with multicolor 3D printing. Best of all, it’s remarkably cheap.
This controller board comes with an ATMEGA2560 processor, six stepper motor interfaces, five temperature sensor interfaces, an expansion port for an LCD screen, six-way pulse width modulation (PWM), and compatibility with all RAMPS-related firmware.
The best thing about this board is its versatility. It’s basically a RUMBA board with a lot of extra connectors, leaving room for more servo motors and stepper drivers. The Marlin firmware works well, has simple updates, and is quite easy to use.
At less than $30, the BIQU controller board is hard to beat in terms of value for money. Some users have run into alignment problems when connecting the pins of their drivers. The board is also a little bigger than the standard RUMBA board, so you might need to check if you have space on your 3D printer’s controller board mount.
3. BIGTREETECH SKR Mini E3 V1.2 Control Board

Another entry from BIGTREETECH, this control board is a “stripped down” version of the V3.0 control board with an integrated touchscreen. Instead, this controller board is a bit more old-fashioned, opting instead for display supports instead of an integrated display.
The Mini E3 control board still has the ARM Cortex-M3 32-BIT 72 MHz processor, Marlin 2.0 firmware, and optimized heat dissipation. The board was designed as an upgrade for the Ender-5 and Ender-3 series of 3D printers, thus it has the exact form factor of stock Creality boards. This means that swapping this board with your existing one should be quick and easy. So far, no alignment problems have been reported.
The V.12 board comes with silent stepper motor drivers, which should result in much quieter 3D printer operations. Compared to stock boards, the SKR Mini E3 is said to have five times faster processing speeds and more than twice the original flash memory. Take note that you’ll also need to update the firmware of your 3D printer to get this control board to work. All firmware updates are available via Bigtreetch’s GitHub page.
4. Creality 3D Motherboard Silent Mainboard V1.15
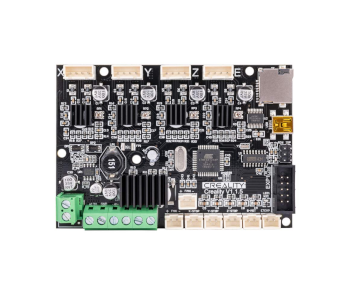
The silent motherboard V1.15 from Creality is designed for a wider host of 3D printers – the Ender 3, Ender 3 Pro, Ender 5, and CR-10. As its name implies, the Creality Silent Mainboard is made to help the 3D printer produce minimal noise. That said, don’t expect this board to make your stepper motors completely silent.
Being a straightforward board replacement, installing the Silent Mainboard is much easier than most other 3D printer controller board. The board comes with pre-installed firmware for Ender 3 and Ender 3 Pro. For those who want to use this board with the Ender 5 Pro or CR-10, the firmware will have to be installed by SD card. If you are unsure how to do a board swap, the best backup would be to take pictures of your printer’s current board.
Despite the ease of installation, the experience of customers who used this board are mixed. Users have reported a variety of problems from slow heating, poor resolution prints, and inaccurate temperature measurements. These problems likely stem from improper installation or setup, which means that using the Creality Silent Mainboard may not be as simple as the manufacturers imply.
5. Entweg GT2560 3D Printer Controller Board
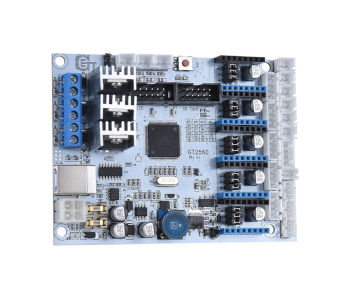
Rounding up this list is the GT2560 controller board from Entweg, which was designed as a replacement for the Arduino Mega2560 and RAMPS 1.4 kit for Ultimaker 3D printers. This board has the same Mega2560 processor but features a more compact form factor, better heat dissipation, and more stable connectors for peripheral components.
The board comes with support for an LCD screen plus a memory card interface, allowing for the loading of 3D models even without a PC. Moreover, the board provides the option to run at 24V instead of just 12V, making it possible to run motors at higher rotation rates and higher torque. Theoretically, this should speed up the printing process although you will need to watch out for added vibration and its effects on print quality.
Overall, this is a well-designed control board that manages to fit all essential ports of the Arduino Mega2560 in a smaller form factor. It’s far from being the cheapest control board for 3D printers but seems worth the price for the powerful processor and improved reliability.
Final thoughts
Behind all the sophisticated features and well-coordinated movements of a 3D printer is a computer that processes all the g-code commands and information from the sensors. Through a series of logic control, the controller board of a 3D printer commands the heating elements to heat up to specific temperatures and the motors to rotate at set speeds.
Given the purpose of a controller board, it comes as no surprise how there’s a huge market for these boards that appeal to DIY 3D printer users. Even if you run a fully assembled 3D printer, there are probably upgraded controller boards out there that you can swap for your stock control board.
This can be a rather complex operation. if you’re interested in swapping out your control board, you will want to read up on how to install new firmware on your 3D printer and how to configure new circuits for peripheral components.
All options shown are very limiting and leave little to know room to grow, now a big tree tech GTR, that is another story and a killer board + expandable.
3D printing is far from simple, even in todays climate. I would not recommend it for the average user.
Your first paragraph sends the wrong message about the printers. The printers themselves are far from complicated. On an Ender 5 for example, and Ender 3 style, you have 4 steppers, two heaters and two sensors to sense the temperatures. An X stepper, a Y stepper, a Z stepper, the extruder stepper, hot end heater and bed heater and sensors to go with the heaters. Not really a huge number of motors. The printers themselves are not the complex part. The firmware to interpret the G Code and the slicer settings are the complex part, in particular slicer settings, which are the settings users have to play with.
Saying the printer itself is complex really is the opposite to what it is. The printer itself is simple. The Slicer and firmware that interprets the G-Code is complex.
So, as you may see, the bit the end user has to play with is still the complex part.