3D Printer Extruder Calibration: Why and How

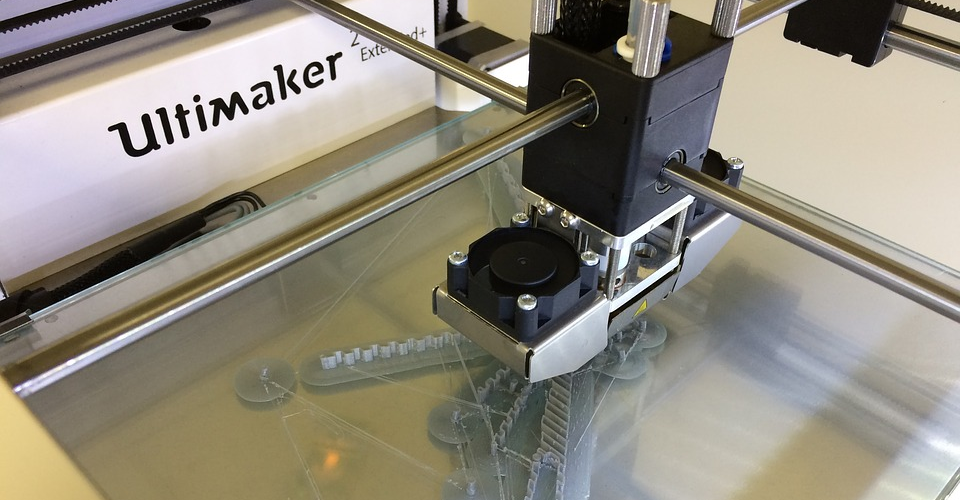
Despite 3D printers looking more and more like the inkjet printers we all have at home, keeping them in good operating condition is often a lot more complicated. Between keeping your print bed leveled and cleaning your extruder, 3D printing requires a lot of maintenance that you need to do regularly.
Extruder calibration is a very good example of something that you’ll need to do frequently for your 3D printer, especially if you want your finished prints to look as close as possible to your 3D model. How important is it to calibrate your extruder and how will you know when it’s time? What are the steps that you need to take?
Why calibrate your 3D printer extruder?

To realize the importance of calibrating your printer’s extruder, all you need to know is the goal behind calibration – to make sure that your extruder is extruding the exact amount of filament that it should. From this definition, we can already tell that not calibrating your extruder will result in either of two extrusion problems – over-extrusion and under-extrusion. Either one of these issues will compromise the quality of your finished print or lead to worse problems with your 3D printer.
Over-extrusion means that your printer is extruding more filament than it should. The most obvious manifestation of this is strings or blobs in your print. This happens because the excess filament that passes through the extruder remains molten in the nozzle and becomes heavy enough to droop down to the build platform.
If allowed to persist for too long, the excess filament can eventually lead to your nozzle getting clogged. As anyone who has experienced a clogged nozzle before, this is a much larger problem that will likely involve dismantling your extruder for it to be resolved.
On the other hand, under-extrusion can result in your printer having gaps or holes where there shouldn’t be any. This is a direct result of your extruder not extruding enough filament to make a finished print according to the reference model. A less obvious manifestation of under-extrusion is layers that are thinner than ideal, which may result in layer adhesion problems and an overall mechanically weaker finished print.
How can you tell when it’s time to calibrate your printer’s extruder? Easy – when you see any of these problems pop up and persist, despite trying to dial in the ideal settings for your filament. Without doing so, it is virtually impossible for your finished print to come out anywhere near an acceptable level of quality.
How to calibrate your extruder – detailed steps
The specific steps you need to take to calibrate your 3D printer depends largely on the model of your 3D printer and the slicer software you are using. In any case, this is a simple process that shouldn’t take you more than an hour to finish.
To start off, you will need a couple of materials aside from your 3D printer and slicer software:
- A few feet of any non-flexible filament
- Permanent marker
- A micrometer or caliper
- A ruler
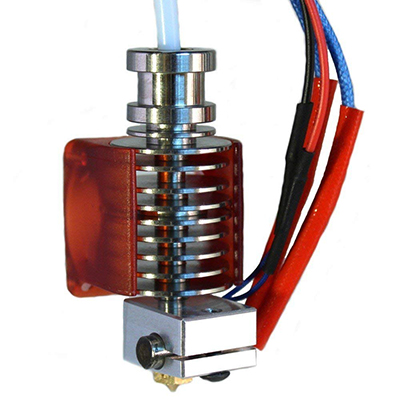
Make sure that your extruder is clean and that there is no leftover filament in the nozzle.
Turn on your printer and make sure that it is connected to your computer and that the appropriate slicer software is open. Go through the normal initialization steps of your printer which should include pre-heating the extruder to the printing temperature needed for your filament. Feed the filament into the extruder like normal.
Before you start printing anything, measure exactly 120 millimeters of your filament from the point where the filament enters the extruder. Mark the point clearly on the filament with a permanent marker.
Through the slicer software, send a command to your printer to extrude exactly 100 millimeters of filament. If your slicer software doesn’t allow you to issue this command directly, then you may need to use another program that will let your send gcode commands to your printer. Simpliify3D or the Octoprint web interface are good options. The relevant gcode command, in this case, is G1 E100.
Your printer should now extrude exactly 100 millimeters of filament – or so it thinks. To confirm, check the position of the mark you made on the filament and measure how far away it is from the point where the filament enters the extruder. If the measurement is exactly 20 millimeters, then you might not need to do any calibration. You may want to repeat this whole process one or two times, just to be sure.
If there’s a discrepancy, then write down the actual measurement you made. Take note of how much filament your printer actually extruded based on your measurements. We’re going to have to run this whole process a few times to make sure that your figures are correct.
Repeat the whole process from marking the filament, feeding 100 millimeters, and measuring the length of filament extruded for two more times. Ideally, you will have exactly the same or very close figures. If there are small variations between your measurements, you can simply take the average of the three. Your measured length of filament extruded will be your basis for making corrections to how your printer quantifies the length of filament it extrudes.
For the purpose of this example, let’s say that the actual extruded filament you measured is 120 millimeters – 20 more than what is necessary. This means that our printer was over-extruding. This may not necessarily be the case but the steps are similar even if you’re solving an under-extrusion problem.
At this point, you will need to extract your printer’s E-value. The E-value is the number of extruder steps that your printer will make to extrude exactly one millimeter of filament. The easiest way to do this is by sending the gcode command M503.
The output should be a string of characters, but you’re looking for a line that will start with echo:M92. At the end of this line, you should find a number that pertains to your printer’s E-value. For this example, let’s assume that the E-value you found is 140.5.
By multiplying the E-value by 100 millimeters, we can then determine that your printer makes 14,050 extruder steps to extrude exactly 100 millimeters. However, our measurements tell us that the printer actually extrudes 120 millimeters when it makes that many extruder steps, Thus, some correction is in order.
We will then have to come up with a new E-value by dividing the actual number of extruder steps by the actual length of filament extruded. In our case, 14,050 extruder steps divided by 120 millimeters gives us a new E-value of 117.1.
We now have to replace your printer’s current E-value with the new E-value we have calculated based on our measurements. To do this, send the gcode command M92 E###.# where the hash symbols are to be replaced by the new E-value. For our example, the correct gcode command is M92 E117.1. Send this command and send another command – M500 – to save the new E-value.
Restart your printer. The changes you’ve made to your printer settings should have remained, but you can send the M503 gcode command again to confirm the new E-value.
To verify how good your calibration was, just repeat the whole process of extruding exactly 100 millimeters of filament again. Hopefully, the correction to the E-value you made has resulted in a huge improvement. If there’s still a significant discrepancy, you may have to repeat the whole calibration process. Do up to three trials just to be sure that the calibration was effective.
How much discrepancy is too much?
When checking for the difference between the 100 millimeters the printer was supposed to extrude and the actual extruded filament you measured, you may find yourself asking: how much discrepancy is acceptable? Does a one-millimeter difference call for calibration or can you put it off for another day?
The answer depends on how much printing problems you can tolerate. An extrusion discrepancy of 1% to 2% will almost certainly still lead to minor stringing or layer adhesion problems. While this may not be enough to completely ruin your finished prints, your prints still won’t come out looking the best. If this doesn’t bother you so much, then you can probably get away with a few imperfections by a bit of post-processing. Letting that deviation go up to 5%, however, will result in a drastic drop in quality that post-processing may not be able to salvage.
When it comes to determining how much deviation calls for a calibration, your measures may vary. If you’re measuring more than 2 millimeters of difference for a 100-millimeter length of filament for calibration, then that’s a very good indicator that it’s time to calibrate. You should be aiming for zero discrepancies after calibration. It’s tough to pull off but isn’t impossible if you’re very careful about your measurements.
Final thoughts
With so many moving parts, making sure that your 3D printer remains in tip-top shape requires a serious amount of regular maintenance. The whole process of extruder calibration that we’ve discussed here is just one of about a dozen little things that you’ll need to do for your 3D printer every now and then to make sure that you don’t run into any printing problems and that your finished printed come out at the best possible quality level.
To be honest, extruder calibration is one of the easiest maintenance activities for 3D printers. You don’t need special tools and you don’t need to take any of the 3D printer’s components apart. Considering how easy it is, extruder calibration is something that you can do every 150 to 200 hours of printing.