3D Printer Not Extruding? Here Are Some Troubleshooting Tips

With so many moving parts that have to work together perfectly, there is a lot that can go wrong in a 3D printer. In fact, one of the most essential skills for someone who works with a 3D printer is learning how to diagnose problems and troubleshoot them. This is often not a straightforward process, so finding the best solution requires a deep understanding of how 3D printers work.
In this article, we focus on solutions to one major problem: a 3D printer that does not extrude. What are the possible causes of a failure of extrusion and how can you solve them?
What is a failure to extrude?

A failure to extrude happens when every other part o the 3D printer works perfectly, but no filament comes out of the extruder. A tell-tale sign of this is when the print head moves in the appropriate x-y directions, but no filament is being laid down on the build platform.
Failure of extrusion can happen before printing even starts, or at the middle of a project. Obviously, detecting the problem before printing starts is much less problematic. Although it’s still possible to salvage a print that has stopped mid-way, the final quality often isn’t quite as good as if no problems were encountered.
Extruder problems may have different causes. Knowing when the failure occurred is often the first thing you’ll need to consider to properly diagnose the problem.
Possible causes of extrusion failure
There are three elements that need to work together to ensure the extrusion of filament at the correct rate: the extruder, the nozzle, and the filament itself. As with any of our troubleshooting articles, we’ll start with the possible reasons that are easiest to diagnose and fix and work our way down to fixes that will literally require opening up the extruder assembly.
1. Out of filament
If your 3D printer suddenly stops extrusion in the middle of a project, the first thing you need to check is if your current spool still has any filament left. Hopefully, your print hasn’t been ruined, and you still have time to load another spool of filament onto your 3D printer.
2. Overheated extrusion motor
If the motor of your extruder suddenly stops running in the middle of the print, then there’s a good chance that the temperature of the extruder motors went beyond its thermal threshold, causing it to stop automatically. Overheating of a motor naturally happens if it encounters any resistance that prevents it from rotating, or if it runs for too long. At this point, all you can do is stop printing for a while to allow the motors to cool down.
To prevent overheating problems, the best thing to do would be to ensure that filament is being fed to your extruder freely (with no tension or resistance) and that you allow the printer to have breaks in between projects. If you still find your extruder motors overheating in the middle of a project, then you may consider placing a cooling fan directed to the extruder.
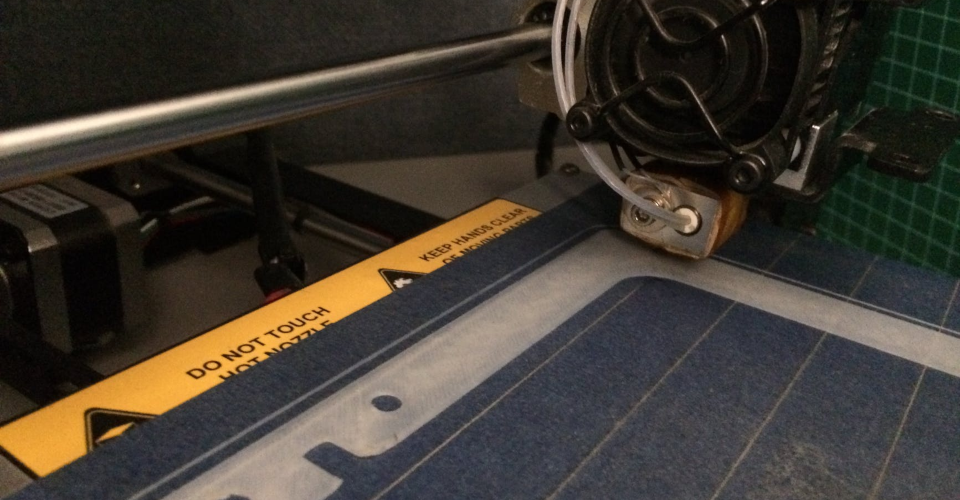
3. Initial nozzle height is too close to bed
If the initial nozzle height is too low, it may simply be too close to the print bed to allow the molten filament to flow freely. This is easy to spot if your 3D printer fails to extrude for the first two layers but only starts to extrude normally on the succeeding layers.
To remedy this problem, you simply need to set the initial nozzle height properly. This can vary according to the opening size of your nozzle. The best thing you can do is to adjust the nozzle height gradually (by 0.05 to 0.1 millimeters) until you’re satisfied with how the first layer looks.
Take note that a nozzle that’s set too low can still extrude but “flatten” the first layer. This can improve first layer adhesion but doesn’t look quite as good. Your measures may vary.
4. The extruder needs to be primed
When an extruder sits idle, some of the molten filament may start to ooze out of the nozzle, resulting in a small section of the nozzle that is void of any filament material. This results in a delay of extrusion once you resume printing. This isn’t such a big problem, and we don’t exactly consider it an extrusion failure, but the solution to this problem is also very easy.
To prime your extruder, the simplest way is to print a skirt around the first layer of your project. This gives the filament time and space to establish a smooth and constant flow before printing your first layer, which hopefully should help you get more consistent results. If a single skirt isn’t enough to completely prime your extruder, then you can also print several skirt outlines, keeping in mind that you are also consuming extra filament.
5. Clogged nozzle
A clogged nozzle may be a problem at the start of a print, but a nozzle can also get clogged in while you’re already printing. In any case, a quick way to check for a clogged nozzle is by trying to feed a metal string (such as a guitar string) up the opening of the nozzle.
A clogged nozzle can be caused by several different things. A nozzle that stays idle for too long inside the extruder can cool down and solidify at the nozzle. A filament with moisture can developed bubbles inside the heating element, which can then burst at the nozzle and cause the plastic to stick to the nozzle’s inner surface. Dust on a filament can also get burnt when it comes in contact with the heating element and leave charred pieces of carbon inside the extruder assembly.
In any case, there are various options for you to unclog a nozzle. If you have a brush with brass threads, you can try brushing the inner surface of the nozzle from the outside and hope to dislodge any hardened materials. If the clogged material is mostly plastic, you can also use a heat gun and allow the plastic to melt out of the nozzle. If all else fails, the most reliable solution would be to disassemble the nozzle, soak it in a suitable solvent, and clean out the debris manually.
6. Stripped filament
A stripped filament when the gears of the extruder “grab” onto the filament too firmly, resulting in the plastic of the filament getting worn out. Not only does this thin out the filament that is in contact with the extruder, but the extruder gears get filled with the plastic material, resulting in the loss of its ability to grab into any additional filament. This can be spotted by an extruder that continues to rotate despite a failure to extrude or a section of the filament that has been visibly ground down.
Stripping of the filament can happen because of several different reasons. If there is too much tension on the filament spool, the extruder gears may over-exert against the filament. If the printing temperature settings are set either too high or too low, the increases resistance of the filament against the extruder gears can also cause the filament to get stripped.
The problematic thing about a stripped filament is that you will almost certainly have to open up the entire extruder assembly to get your 3D printer to work normally again. This is because there is no other way to remove the stripped plastic material from the extruder gears than to poke them out from the hobs manually using a steel brush or any small pointed tool.
7. Worn-out PTFE tube
There are two major components in an extruder: the drive gear (or extruder gear) and the idler. The idler acts as the surface against which the drive gear pushes the filament, allowing it to “grab” the section of filament that sits between the gear and the idler. Because of its function, an idler needs to be made of a rigid material. However, it must also be made of a low-friction material so that it will contribute minimal resistance to the extrusion of the filament. For this reason, most idlers are made of either rubber wheels that rotate with the drive gear, or a PTFE tubing.
If you’ve already disassembled your extruder assembly, then it should be pretty easy to spot a worn-out PTFE tubing. A visible “brim” on the surface of a PTFE tubing is a good indicator that it needs to be replaced. Disassembling and putting together an extruder assembly is a lot of work, so you might as well replace the PTFE tubing of your extruder when you clean the drive gear.
Final thoughts
It can be particularly frustrating having your 3D printer not extrude anything, especially if you’ve been looking forward to starting a new project. However, as you’ll soon learn, patience is something you’ll need a lot of when you take 3D printing as a hobby or as a profession. None of the fixes we have listed here for extrusion failure are excessively complex, but you’ll need to a bit of patience in cleaning up disassembling parts, cleaning them up, and putting them together.