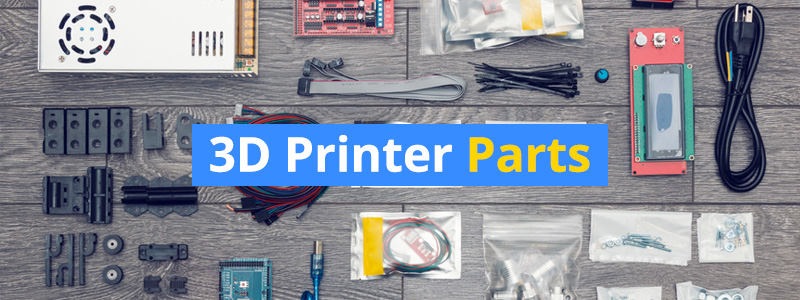
Parts of a 3D Printer

The best way to get into 3D printing is to start from the bottom. Before you start shopping for the best 3D printers for beginners or the best budget 3D printers, you should learn about all the parts of a 3D printer. That’s what this guide is all about.
This guide will give you an in-depth look at all the components that make a 3D printer run, from small parts to large ones. More specifically, this guide focuses on Cartesian 3D printers, which are the most recommended for beginners, but we also touched upon delta 3D printers in some sections.
Controller Board
The controller board, also referred to as the motherboard or mainboard, is the brain of the 3D printer. It’s the one responsible for the core operation, directing the motion components based on commands sent from a computer and interpreting input from the sensors. The controller board’s quality has a major effect on the overall performance of the 3D printer. A machine made of high-end parts from top to bottom won’t be able to print as well as it should if the controller board is crap.
Filament
The filament is the material used to print objects on a 3D printer. It’s the equivalent of the ink used on a regular office 2D printer. It comes in a spool, which is loaded into the spool holder of the 3D printer, with the end of the filament inserted into the extruder. There are different kinds of filaments, each with their own properties and pros and cons.
When it comes it filament compatibility, not all 3D printers are on the same level. Some are versatile enough to print with all sorts of materials, including exotic ones, while others can only print with PLA, the most basic filament. There are also 3D printers designed to only accept proprietary filaments. The majority of 3D printers on the market use filaments with a diameter of 1.75 millimeters, but there are some models that use filaments with a larger diameter, such as the Ultimaker 3 and the LulzBot TAZ 6.
Frame
The frame is the chassis of the 3D printer. It holds the other components together and is directly responsible for the stability and durability of the machine. These days, 3D printer frames are made of either acrylic or metal, but in the early days of consumer-level 3D printers, wood is often the go-to frame material.
3D printers with a metal frame are the most recommended simply because they are more stable and more durable. Going for a metal-framed 3D printer doesn’t necessarily mean you have to cough up a lot of money, though. As evidenced by the Monoprice Maker Select v2 and the Monoprice Select Mini v2, there are budget 3D printers under $300 that come with an aluminum frame.
Some 3D printers also have an enclosed frame, which protects it from dust and other particles as well as curious fingers who have no business being near the heated components. An enclosure allows for a more stable temperature in the print area, which is beneficial to certain advanced materials. There are semi-enclosed 3D printers, too, which usually come with covered sides but have an open front and/or top. The Ultimaker 3 is a good example of a semi-enclosed 3D printer.
Cartesian 3D printers have a different mechanical arrangement on the frame than delta 3D printers. Cartesians have a simple XYZ arrangement while deltas have three arms that move all over the place. Delta 3D printers are actually a lot cooler to watch while they print.
Motion Components
The motion components are the parts responsible for the movement of the 3D printer in the three axes. They are the ones that move the print bed and the print head. Basically, the controller board directs how the 3D printer should move while the motion components are the ones that do the actual moving.
Stepper Motors
The stepper motors, which are run by stepper drivers, are the keys to the mechanical movement of a 3D printer. Stepper motors are connected to all three axes and drive the print bed, the print head, and the threaded rods or leadscrews. They make a full rotation in increments or steps, hence the name, making them more suited for 3D printers than a normal DC motor. The print head also comes with a stepper motor that drives the extruder feeding movement.
Belts
In a Cartesian 3D printer, the belts, which are connected to motors, move the X-axis and the Y-axis from side to side and are integral to the overall print speed and precision. In a delta 3D printer, belts are often used to drive the movement on the Z-axis. A loose belt can ruin an entire print. That’s why many 3D printers come with tensioners. Belt tensioning devices keep the belts in optimum tightness and provide an easy way to adjust the belt tightness.
Threaded rods
In the Z-axis, the movement relies on threaded rods, which are also connected to stepper motors. As the threaded rod rotates, the print head moves up or down. In the case of the Ultimaker 3 and other similar 3D printers, the print bed is the one that moves. Some people confuse a threaded rod with a leadscrew. While both have the same function and are similar in appearance, they have different characteristics. A leadscrew offers a smoother movement but has a higher price on average.
Threaded rods or leadscrews can also be used to the drive the movement along the X and Y. But most 3D printers use belts because they are cheaper, lighter, and faster. On the other hand, threaded rods or leadscrews offer more precision but are heavier and more expensive. If you’re building a 3D printer from scratch and want an extremely durable machine with an all-metal profile you might want to consider threaded rods or leadscrews on all axes.
End Stops
Simply put, end stops are like markers that allow the 3D printer to identify its location along the three axes, preventing it from moving past its range, which can result in hardware damages. While many 3D printers use mechanical end stops, there are also those who use optical end stops.
Power Supply Unit (PSU)
The power supply unit supplies power to the entire 3D printer. No need for an elaborate explanation for this component. The PSU is either mounted on the frame or housed in a separate controller box together with the user interface. It’s a lot better if the PSU is mounted on the frame as it translates to a smaller overall machine footprint.
If you want to print with more advanced materials on a regular basis, make sure you have the right PSU for the job, as some are not built for high-temperature prints. Cheap 3D printers like the Anet A8 often come with an underpowered PSU good enough for PLA but not for ABS and other materials that need a sustained heating for an extended period. Also, make sure the PSU is compatible with the voltage used in the country you live in. A lot of users have made the mistake of not paying attention to the voltage setting before plugging their machines into a power socket.
Print Bed
The print bed is where the extruder deposits the filament to form a solid object. Calling back to the 2D printer analogy earlier, the print bed is the equivalent of a piece of paper. It’s either heated or non-heated, with the latter being common among starter 3D printers like the FlashForge Finder and the Dremel Digilab 3D20. A non-heated print bed is good enough for PLA, but for high-temperature materials, a heated print bed is a must in order to cut down on warping issues, improving the overall print quality.
Most 3D printers come with an aluminum print bed, but there are also models that have a glass print bed out of the box. The MakerGear M2 and the SeeMeCNC Rostock MAX v3.2 are examples of glass bed-equipped 3D printers. Both types of print beds come with pros and cons. An aluminum print bed heats up faster while a glass print bed is flatter and easier to maintain. When choosing between the two, it’s often a matter of personal preference.
A 3D printer with a manual bed leveling system has a set of thumbwheels under the print bed. These small mechanisms are used to adjust the alignment of the print bed. Some 3D printers are easy to level while others can be a pain, sometimes due to the poor design of the thumbwheels.
Cartesian 3D printers have a square or rectangular print bed. Delta 3D printers, meanwhile, have a circular one, which puts a limit on the kinds of objects you can print. A delta print bed is also completely static, unlike a Cartesian print bed, which usually moves along the Y-axis. Once a delta print bed is calibrated, you’ll never have to touch it again for a very long time.
Print Bed Surface
As the name suggests, the print bed surface or build surface is what goes on top of the print bed. It helps the object being printed stick to the platform and allows for easier removal of completed objects. There are different types of print surfaces, with BuildTak and PEI being the most common.
All types of print surfaces have pros and cons, so your choice depends on personal preference and also the type of material you want to print with. When the print surface is not sticky enough or has too much adhesion, users often resort to other materials for additional effectiveness, the most popular of which are hairspray and glue.
Print Head
The print head or the extruder is the component that turns the filament into a 3D model. It’s separated into two sections: a cold end and a hot end. To put it simply, the cold end clamps the filament and pushes it down to the hot end while the hot end, which ends with a nozzle, melts the filament and deposits it onto the build platform.
The extruder is made up of smaller parts, each with their own dedicated function. The filament drive gear or extruder drive gear pushes the filament into the hot end. The heat sink and the heat sink fan make sure the filament doesn’t get melted before it reaches the nozzle while the heater cartridge is the one that actually heats up the filament. The thermistor or thermocouple is the temperature sensor for the hot end. And finally, the cooling fan cools the filament as soon as it is deposited on the print bed, helping it hold its shape. The behavior of the cooling fan depends on the type of filament.
You probably noticed we skipped the nozzle, which is located at the tip of the hot end. That’s because we wanted to write a longer description for it. The nozzle is where the melted filament comes out. It comes in different sizes, with 0.4-millimeter nozzles being the default for most 3D printers. The smaller the nozzle, the higher the print detail. On the flip side, the larger the nozzle, the faster the print speed. Thankfully, you can easily swap out nozzles, so you can change your setup depending on how fast you want to print or how detailed you want the 3D models to be.
A 3D printer with an automatic bed leveling system or an assisted manual bed leveling system also comes with a sensor or probe on the print head. An auto-level probe scans multiple points on the print bed to determine the alignment of the build platform. A 3D printer with an auto-leveling system does all the hard work for you while a 3D printer with an assisted leveling system still requires you to manually adjust the thumbwheels.
Feeder System
Cartesian and delta 3D printers use either a Bowden feeder system or a direct feeder system. In a Bowden setup, the cold end and the end are separate from each other, and by which we mean the cold end is placed in a different location on the frame. A Bowden setup uses a filament tube to direct the filament into the hot end. Due to the lighter load, the print head moves faster, which means you get faster prints.
In a direct setup, the cold end and the hot end are connected. Although a Bowden setup is also capable of producing great results when printing with a flexible material, many people often turn to a direct setup when dealing with that type of material.
Dual Extrusion
3D printers have either a single extruder setup or a dual extruder setup. The former is pretty much self-explanatory, so we’ll just focus on the latter. A dual extruder 3D printer is a 3D printer that can use two different filaments at the same time. There are two kinds of dual extruder 3D printers: a machine with dual nozzles housed in a single print head and a machine with independent dual print heads.
With a dual extruder 3D printer, you can print with two colors without changing the filament in the middle of the print and create more complex 3D models that require water-soluble support materials. A dual extruder 3D printer with independent print heads – like the MakerGear M3-ID and the BCN3D Sigmax – can also print two copies of the same 3D model at the same time.
User Interface and Connectivity
A 3D printer with an LCD user interface can work as a standalone machine. In other words, you can control it without a computer connection. Most 3D printers come with a frame-mounted interface, but there are some models that come with a separate controller box that houses the interface – like the Tevo Tornado and the Creality CR-10S.
An onboard user interface allows you to check and adjust the machine parameters as well as initiate the filament loading/unloading process. In addition, a 3D printer with an auto-leveling system or semi-auto leveling system includes an option on the interface that activates the leveling system.
There are different kinds of user interfaces, the most common of which is a basic LCD interface operated via a knob, a dial, or a set of buttons. Some 3D printers come with a full-color touchscreen interface, such as the Dremel Digilab 3D40. There are also 3D printers with Wi-Fi connectivity, allowing you to connect to a local network just by going through a simple setup on the onboard interface.
With a Wi-Fi setup, you can start, manage, and monitor your prints from your computer or smartphone/tablet while lounging in another room. For 3D printers without a remote print management option out of the box, you can set up OctoPrint.
File Transfer Options
Most 3D printers can connect to a computer via a USB cable, with a few models also capable of connecting via Ethernet. A lot of users frown upon a cabled connection because a computer-related issue – like a forced shutdown – can affect the print progress, not to mention such a setup requires your computer to be open throughout the duration of the print. Some 3D models can take an entire day to complete.
That’s why many 3D printers come with an SD card slot or a USB flash drive port for standalone prints. When in standalone mode, the 3D printer can read compatible files loaded in the SD card or USB flash drive and print them after just a few simple commands on the interface.
excellent information, thanks!
it very help full for the person who didn’t know about 3d printing
hi
it is good information. if you know what is the best 3D printer that can very very fast print the eye wear glasses and prscription lenses
hashem
The picture diagram of parts does not display.