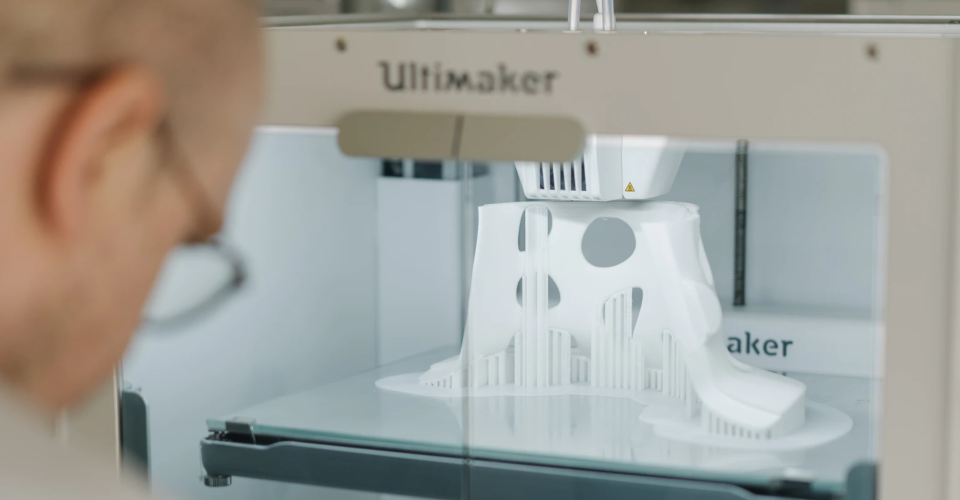
How Much Power Does It Take to Run a 3D Printer?

Anyone who has done any research about 3D printing knows that a single 3D printing job could take up to 12 hours or more This has proven to be one of the most intimidating aspects of this technology. Not many people are comfortable leaving a piece of high-temperature equipment running for so long and frequently unattended.
There’s also the matter of power costs. Would it be really expensive to run a 3D printer for the better part of a day? To answer that question, let’s take a deep dive into the power consumption of a 3D printer.
How much power does a 3D printer consume?
As with any piece of equipment or household appliance, different models of 3D printers may have different levels of power consumption. To answer this question more comprehensively, we need to look at several 3D printers positioned at different levels of the power consumption spectrum.
Power consumption of different 3D printer models
Let’s start with the Monoprice Mini Delta. This is a budget 3D printer that costs less than $200 with a very small footprint and a delta-type orientation. Despite the barebones design, the Mini Delta is designed to work with high-temperature filaments like ABS.
On the surface, it seems like the Mini Delta is a solid option for the power-conscious user. The figures reinforce this assumption – the Mini Delta consumers up to 45 W of power during preheating and ramps up to 60 W during actual printing. The added power consumption is likely due to the stepper motors running and the control board performing more complex operations.
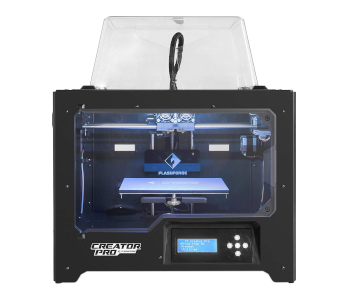
To scale things up a bit, we’re looking at the Flashforge Creator Pro. This is a high-end FDM printer with dual extruders, a fully enclosed print chamber, and a built-in exhaust and filtration system. Few desktop-scale FDM printers can rival the sophistication of the Creator Pro. As you would expect, it’s also a lot more expensive than the Monoprice Mini Delta.
It’s easy to see how the Creator Pro would consume more power. It has a large heated bed, two extruders, a display light, and an exhaust fan continuously running. The preheating stage of the Creator Pro consumed 300 W of power. This figure stabilized to 250 W by the time operation started, perhaps as a testament to how the enclosure does a great job of minimizing heat loss.
In terms of kWh, you can expect a 3D printer to consume anywhere between 0.06 k to 0.25 kWh during normal operations.
The actual dollar cost of running a 3D printer
All this talk of power ratings leads to this discussion – how much does it really cost to run a 3D printer? For sake of simplicity, let’s assume an average electricity cost of 20 cents per kWh. This should be higher than the power costs in most states in the US, although there are certainly some countries where electricity is more expensive.
Using our earlier figures, it should only cost 1.2 to 5 cents to run a 3D printer for an hour. Over a 12-hour period, this will translate to 14.4 cents to 1 dollar. This is surprisingly cheap, especially if you own a 3D printer that is less advanced than the Flashforge Creator Pro.
Compared to other electronics
For better context, let’s compare the power consumption of 3D printers compared to other common household appliances and electronics:
| Device or appliance | Power consumption in kWh |
|---|---|
| Laptop | 0.06 |
| 43-inch LED TV | 0.58 |
| Computer monitor | 0.25 |
| Fridge | 0.10 |
| Game console | 0.12 |
Based on this table, running a Monoprice Mini Delta is no more expensive than keeping your laptop plugged in – something that you probably already do daily. Running a Flashforge Creator Pro is a little more expensive and is probably closer to the cost of playing on a console. If you’re into gaming, then keeping a console turned on for 12 hours is probably something you’ve done as well.
This puts the power consumption of 3D printers in a more relatable perspective. Using a 3D printer isn’t really all that expensive in terms of power costs. Don’t forget to factor in other factors, though, such as the cost of the filament and any other supplies needed for 3D printer maintenance.
Measuring your actual power consumption
Although 3D printers should have a power rating, these numbers are given as a range. Knowing exactly how much power a 3D printer is drawing is quite complex. This largely depends on several factors including the printing temperature, bed temperature, rate of heat loss, and the rate at which the various stepper motors run.
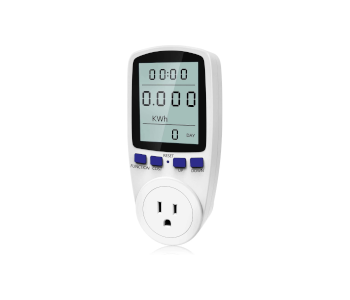
If you really want to get accurate numbers on how much power your 3D printer is using, then you can just get an inexpensive power meter.
The kuman Electricity Usage Monitor is a very good option, although there are probably a few dozen others out there. You can even set it to display the actual cost of running your 3D printer by inputting the power rates in your area.
Tips on reducing power costs when running a 3D printer
We would be remiss to write an article about 3D printer power consumption without giving you a few pointers on how to save on power costs. They may not be expensive power-wise, but penny-pinching here and there can build up to significant savings if you spend a lot of time 3D printing. Here are a few tips to keep your 3D printing power costs down:
Use an enclosure
Most of the power that a 3D printer draws goes into its heating elements. This includes both the hot end nozzle and the heated print bed. This cannot be avoided, especially if you’re printing with a filament that requires high temperatures and is prone to warping.
A 3D printer with hot components naturally loses this heat to the environment. This means that the heating element of the 3D printer needs to run continuously to compensate for the heat loss. This is especially significant if you’re 3D printing in a room with frequent gusts of wind or on a particularly cold day.
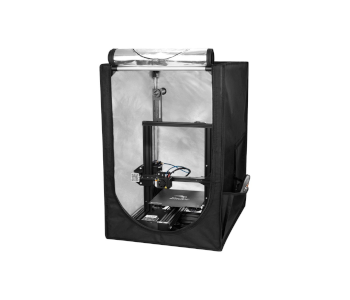
By simply reducing the rate of heat loss, you can already save a lot on the power costs of 3D printing. An enclosure is a great add-on to reduce heat loss. It can also help with common issues such as warping and poor layer adhesion.
If your 3D printer does not come with a built-in enclosure, then you can just buy cheap third-party alternatives. This enclosure from Creality is a good example because it is made of fireproof and dustproof material. If you’re really on a budget, then you can even DIY an enclosure.
Reduce printing time
A job that can be completed in 10 hours instead of 12 would inevitably be consuming much less power. There are two great strategies for reducing printing time – increasing the printing speed or using thicker layer settings.
A word of warning – both options have drawbacks. The precision of details, dimensional accuracy, and layer adhesion may suffer if you are printing too fast. Printing with thicker layers is a strategy you should consider only if you’re printing simple models that do not have a lot of intricate details.
As long as you know what you’re doing, making a few tweaks to reduce power costs should not hurt the quality of your finished product.
Do calibration prints

A lot of the expenses of 3D printing go toward failed prints. In many cases, a 3D printing issue will require a do-over of the entire project. Poor dimensional accuracy, delaminated layers, warping – these are things that can no longer be repaired once they become apparent.
Not only does starting over increase your power expenses, but it also puts your precious filament and productive time to waste. To avoid such major errors, it is more prudent to do calibration prints.
Calibration prints are small models that test your 3D printer’s performance. A good model should be able to test several parameters all at once. This all-in-one 3D printer test model checks overhang performance, stringing, tolerance, and performance in sharp corners. This small XYZ calibration cube is best for fine-tuning your printer’s dimensional accuracy.
If all other calibration tests aren’t enough for you, then there’s the ever-reliable Benchy. Considered the all-around torture test for 3D printers, printing a perfect Benchy is probably a good indicator that your 3D printer is all set for whatever project you’re working on.
Final thoughts
Running a 3D printer for a 12-hour printing session might feel like it would leave a dent in your monthly power expenses. The good news is that a small 3D printer isn’t going to use up much more power than your laptop.
This is not an excuse to run your 3D printer with disregard for power consumption. With a shortage of renewable power sources, all of us are responsible for using electricity conscientiously. By eliminating do-overs, reducing printing time, and minimizing heat loss, you can greatly reduce the power draw of a 3D printer. Those few dollars that you save can go towards getting premium or fancy filament.