Understanding 3D Printer Retraction – What Causes It and How to Fix It

As we’ve often mentioned, getting good results out of your 3D printer usually involves things going wrong initially and you adjusting your printer’s settings to solve these problems. The great thing about 3D printers is that they are equipped with so many tools that you can tweak and adjust to help you out in any situation. Whether you’re running into clogged nozzles, warped prints, or prints that collapse, there’s probably a feature in your 3D printer or slicer software that is specifically designed to help you solve the problem.
One of the most useful built-in features in 3D printers is retraction. Retraction can easily be activated through your slicer software and can even be tweaked through a few settings. How does retraction work and when should you be using it? What are the best settings for retraction?
What is retraction, and how does it work?
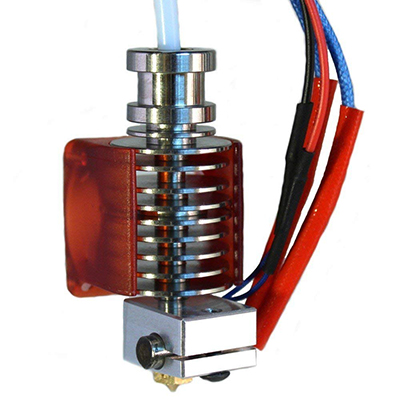
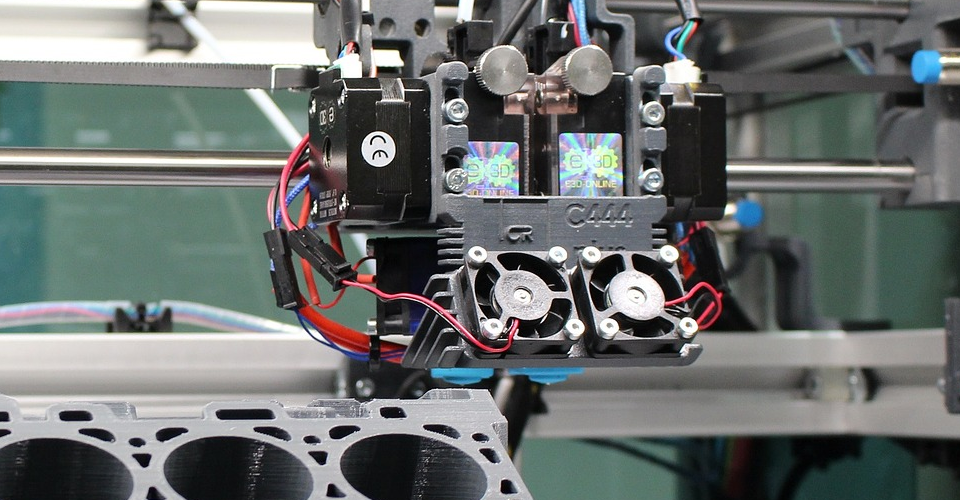
To understand retraction, we must first briefly discuss what extruders are and how they work. The extruder of a 3D printer is the mechanism that conveys the filament from the spool to the hot end. The extruder ensures that the filament is fed to the hot end in a consistent and controlled manner.
An extruder “grabs” on the filament using a motor-driven gear and an idler made with a high-friction material. Stepper motors are used for extruders since they translate the continuous rotation of the motor into a series of equal intervals or “steps” of the gear shaft. There are some variations of the basic extruder design, such as those that use two drive gears instead of a drive gear-idler combination, but the working principle is essentially the same.
Under normal circumstances, the extruder rotates towards the direction that delivers the filament to the hot end. This works well enough if the design allows for continuous printing. However, there are also designs that require the print head to travel across the build platform without laying down any filament. In these types of situations, it is often better for the extruder to “retract” a portion of the filament.
Retraction works by making the drive gear rotate at the direction opposite to its normal operation. This action pulls back a short segment of the filament away from the hot end. Keep in mind that the portion of the filament that has already gone past the hot end has already melted and can no longer be pulled back. However, by retracting some of the filament, the pressure on this melted portion of the filament can be reduced.
When should you use retraction?
When a print head has to move between non-contiguous sections of a design, there’s a risk that the portion of the filament that already melted will ooze out of the nozzle. Known as “stringing” or “oozing,” this is an incredibly common problem in 3D printing that is characterized by prints having very thin strands of unwanted extra filament.
Solving the stringing problem is the primary purpose of the retraction mechanism. By pulling back a segment of the filament and relieving some of the pressure on the molten plastic that is right at the tip of the nozzle, you have a very good chance of solving your stringing problem.
Tweaking your retraction settings
Of course, eliminating stringing isn’t as simple as turning on retraction in your 3D printer and leaving it be. There are a few adjustments to the retraction settings that you’ll need to make depending on the design you’re printing, your filament, and the type of extruder you are using.
1. Direct extruder vs. Bowden extruder

There are merits to the use of both direct extruders and Bowden extruders. Direct extruders have a much simpler design that places the extruder assembly right at the top of the heating element. Bowden extruders position the extruder gears away from the hot end, which keeps the print head lighter and less prone to movement errors.
When you establish your retraction settings, you will need to take into consideration whether you have a direct extruder or a Bowden extruder. Since there is a much longer segment of filament between a Bowden extruder and the heating element, the settings for the retraction speed and retraction distance will also need to be adjusted.
2. Minimum travel distance
The minimum travel distance tells the 3D printer if it should activate retraction when crossing over across non-contiguous sections of your design. Setting this to a very low value may help avoid stringing problems, but having your extruder retract more often than necessary can really slow down your printing process. Frequent retracting can also result in the extruder gears grinding down on your filament, which can eventually result in a clogged nozzle.
Two factors come into play when setting the minimum travel distance: your printhead’s travel speed and the type of filament you are using. You can set your printhead to move faster, which will give less time for the molten filament to ooze out. However, a printhead that moves too fast also tends to overshoot its destination. It also creates more vibrations. A combination of a printhead that drifts from its intended position and a wobbly build platform is a recipe for a poor-quality output.
Filaments that print at higher temperature are generally more “fluid” when molten, making them more likely to ooze out. If you are printing with filaments that require a high printing temperature, such as ABS or Nylon, then you may need to set your minimum travel distance at a lower number.
If you’re still trying to get a feel for the best settings for the minimum travel distance, we suggest starting with a very low setting of 1 millimeter. You can then try to increase this setting by 0.5-millimeter increments until you can get the print head to travel as far as possible without any stringing problems.
3. Retraction distance
The retraction distance is the length of filament that the extruder will pull back once retraction is engaged. Setting this too low may not be enough to relieve the pressure on the molten filament at the tip of the nozzle while setting it too high will mean that it will take more time for the extruder to engage the filament back towards the nozzle. Worse, retracting too much filament can cause deformation inside the extruder assembly, which can result in a clogged nozzle.
A rule of thumb in setting the retraction distance is not to set it higher than the distance between the extruder and the nozzle. Obviously, this will vary across different 3D printer and extruder models. For printers with direct extruders, a range of 0.6 to 2.8 millimeters is recommended. The recommended retraction distance for Bowden extruders is much higher, somewhere between 8 to 16 millimeters.
For best results, you can start at the lowest possible retraction distance settings and adjust it by 1-millimeter increments until no stringing can be observed. This is a good compromise that improves the output’s quality without compromising on printing time.
4. Retraction speed
The retraction speed is the rate at which the extruder pulls back on the filament. A high retraction speed is obviously ideal since it removes the pressure from the molten filament as quickly as possible. However, pulling back the filament too aggressively can result in the filament getting stripped by the gears of the extruder. This is a much bigger problem, as you’ll probably need to open up the extruder assembly to clean off the plastic material from the teeth of the extruder gears.
Again, the characteristic difference between direct extruders and Bowden extruders need to be considered in setting your retraction speed. The larger distance between the extruder and the hot end in a Bowden setup means you’ll need to pull in the filament just a little faster. A retraction speed between 35 to 45 mm/s should do for a Bowden extruder. If you use a direct extruder, you can go a bit slower, somewhere between 25 to 40 mm/s.
A lower setting is gentler on the filament, so we recommend starting at the lowest setting and working your way up at increments of 5 mm/s until you no longer run into any stringing.
Testing your retraction settings
If you’re going through a trial and error process in an attempt to get the best retraction settings, it can be very frustrating to do it on the actual design you are trying to print. You can waste a lot of time and filament material if the settings you have dialed in don’t turn out to be those that work.
To help your sanity, we recommend using a small design that has been made specifically to test your retraction settings. You can try this design that can be printed in 10 minutes or less and uses than 1 gram of filament material. There’s also this four-cube design that is just as robust in testing your retraction settings but uses quite a bit more filament.
With these calibration models, you can test different retraction settings without spending too much time and wasting a lot of filament. Once you’ve got the optimal settings, you can confidently move on to printing the real thing.
Final thoughts
The primary role of your 3D printer’s extruder is to deliver the filament from the spool at a controlled and consistent manner. That’s not all it’s capable of, though. By running the stepper motor of the extruder assembly at the reverse direction, an extruder can pull back on a short segment of the filament. This retraction feature is a very powerful tool in troubleshooting some of the most common problems in 3D printing.
If your print comes out with unwanted strands or blobs of excess filament, then the retraction feature is one of the first things you can turn to. Adjusting the retraction settings can take a bit of trial and error, but the mechanism isn’t complicated.