3D Printer Tape – Which Adhesive Tape Should You Use?
Getting perfect bed adhesion is one of the foundations of creating a high-quality 3D printer product. Good bed adhesion does not just get the print to stick to the bed – it must also prevent issues like warping and layer shifting. This is considerably easier said than done.
A go-to material to achieve this purpose is simple adhesive tape. However, not just any adhesive tape will do. In this article, we’ll take a look at the best types of tape to use in 3D printing, as well as the merits and drawbacks of each option.
Why use tape?
There are several different options for enhancing bed adhesion in 3D printers, but tape remains one of the more popular. This can be easily attributed to one characteristic – tape is very inexpensive but offers good reliability. Even if you used a roll of tape that costs less than $5, you can likely get your 3D print to stick as long as you use the proper techniques.
The tape also has the added benefit of being easy to remove. This allows for gentler handling of the finished 3D print during removal. You can simply allow the tape to peel off the print bed, eliminating the need to lift the print off with a scraper. If you’re planning to print a very delicate design, then
The application of the tape, however, is another matter entirely. Applying tape to a print bed is a slow and deliberate process. The tape strips have to be perfectly parallel with each other and their edges have to coincide but not overlap. Experience makes this step easier but not exactly less tedious.
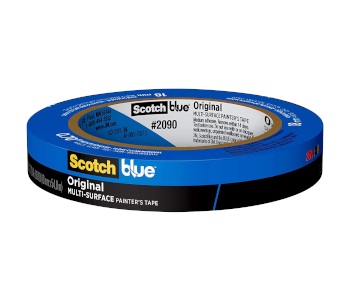
Blue painters’ tape

The most common type used in 3D printing is blue painters’ tape. Take note that painters’ tape does not necessarily have to be blue. The blue color became popular because this was the color of the original ScotchBlue Multi-Surface Painters’ Tape. However, you can also find ‘generic’ painters’ tape which can be white, yellow, or green. The color does not matter, but we recommend getting one from a reputable brand.
The special characteristic of painters’ tape is that it can be removed without leaving any residue. It is a little easier to remove than masking tape. This can be both a good and a bad thing. It makes removal of finished prints easier but can also result in it coming off mid-print. If your layer of painters’ tape is getting removed too easily, then it’s probably a low-quality roll.
Blue painters’ tape is best used for prints that do not a heated bed. The tape is primarily made with paper and is not exactly heat-stable. It’s an inexpensive and easily available option for printing with PLA or TPU.
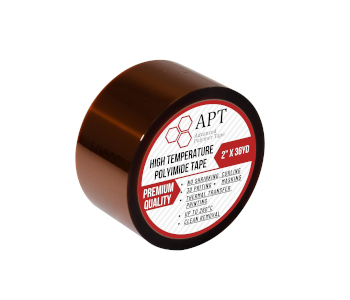
Kapton tape

Kapton tape (or more technically, polyimide tape) is commonly used to wrap around electrical cables and wires. Aside from providing some electrical insulation, Kapton tape is very durable and has good thermal stability. It is these same characteristics that make Kapton tape an excellent choice for 3D printing.
When printing on a heated bed, Kapton tape is considered to be one of the best options for bed adhesion. Its heat stability means that its adhesive does not break down at elevated temperatures and is not transferred from the tape to the print bed.
Kapton is slightly less flexible than blue painters’ tape. This makes the application and removal of Kapton tape more difficult. Kapton tape is prone to trapped bubbles when applied, although this can be avoided with some experience and by simply taking it slow. It’s also harder to remove, so you’re better off just taking them off in separate fragments as they rip off.
Another common strategy is to apply some hair spray on top of a layer of Kapton tape. This improves the adhesion of the print to the tape. This might be a necessary modification in some cases, given how smooth the surface of Kapton tape is.
Kapton tape is about twice as expensive as blue painters’ tape. Given how their suitable applications do not overlap, it is common to stock both blue painters’ tape and Kapton tape if you use 3D printers heavily.
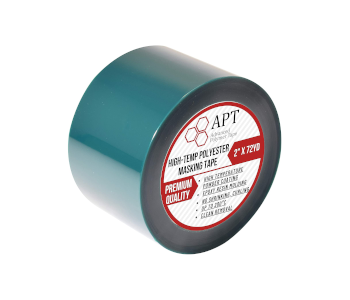
Polyester tape

Not as common as the first two options is polyester film or PET tape. These can be sold by brands that specialize in 3D printing accessories. The major strength of polyester tape is that it is extremely heat-stable, making it the best choice for printing on a heated bed. The tape can withstand temperatures of up to 200 C without the adhesive breaking down. Removal of the tape is easy even when exposed to these temperatures.
A unique trait of polyester tape is that you can apply it to a build plate while it is still wet with a soap and water mixture. This gives more allowance for the tape to be repositioned and adjusted to remove air bubbles. You will have to wait a few hours for the entire build plate to completely dry before starting with the print.
Polyester tape is very strong and has a better likelihood of not tearing apart after just a single use. It’s a good option if you don’t like having to replace the tape layer in your build plate after every project. This also somewhat justifies the price point of polyester tape. It is a little more expensive than Kapton tape and easily around three times more expensive than blue painters’ tape.
Polyester or PET tape is still an unconventional choice for 3D printing, mostly because it is not as easily accessible. If you can get your hands on one, we suggest giving it a try. With good results, the polyester tape may just completely replace the Kapton tape in your inventory.
Best practices on using tape for 3D printing
As simple as they may seem, there is considerable technique needed to make adhesive tape work for your print bed. Here are a few tips in mind to avoid the common problem of 3D printing tape.
Clean the print bed before use
Not even the best tape can stick to your print bed if it has not been cleaned properly. Make sure that your print bed is free from any dirt or dust before applying tape. Be careful not to leave fingerprints, as well – the oil from your fingers can make tape come off easily.
If your 3D printer has a removable print bed, then you can wash it with some soap and water and wipe it dry with a clean cloth. Applying some acetone is also an option, especially if you need to remove any adhesive residue.
Apply tape diagonally
Tape can fail when the motion of the print head is parallel to the direction of application of the tape. The problem is that the print head can move in multiple directions. The best way to neutralize this problem is to apply the tape in strips that are oriented diagonally. It’s best to start this with the longest diagonal distance between the corners of the print bed.
Apply the strips perfectly every time
Do not underestimate the task of laying down tape on the print bed. This is a task that is best done slowly and carefully. You will want to avoid getting any bubbles trapped between the print bed and the tape. The tape strips also have to be placed perfectly side-by-side with each other. They should have no gaps and should not overlap, either.
The keyword here is perfection. Anything less than perfect and your print runs the risk of suffering from poor bed adhesion because of an uneven printing surface. This can be enough to completely ruin a print.
If you find a strip out of place during application, it is usually better to take it off and start over again. This is a better use of time than going ahead with the print just to have it fail and still end up reapplying the tape layer. Try to get the tape layer perfectly every time – it will get easier the more you do it.
Final thoughts
Adhesive tape is one of the most basic tools you can have in 3D printing and also one of the most essential. Our recommendation is not to cheap out on your tapes and buy them from fairly popular or reputable brands. You are going to save yourself from a lot of headaches if you can get your prints to stick to the build platform.

