Everything You Need to Know About 3D Printing Extrusion Multiplier

The extrusion multiplier is a slicer setting that helps determine the flowrate of filament through the extruder. Making adjustments to the extrusion multiplier can help avoid issues such as poor bridging, stringing, missing layers, or under-extrusion. However, other calibration methods can be done to improve the extrusion performance of your 3D printer.
Developing expertise in 3D printing means taking a deep dive into the parameters and values that contribute towards the quality of a 3D printed output. One of the more important parameters is the extrusion multiplier. What exactly does this parameter do and when should it be adjusted?
What is the extrusion multiplier?

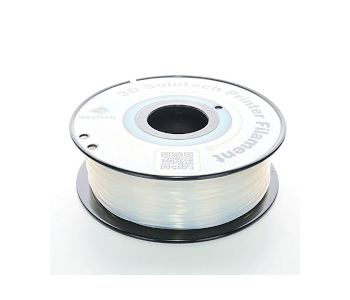
The extrusion multiplier is more commonly known as the flow of filament through the extruder. Different slicers can call it by different names, but it is often expressed as a percent. The default setting for the extrusion multiplier is 100%. This can be increased or decreased depending on any perceived issues in the output of the 3D printer.
At this point, it is prudent to point out that the extrusion multiplier is not equivalent to the steps per millimeter value or “E steps” of your 3D printer. This refers to the slicer setting that tells the 3D printer the number of steps that the motor should turn to extrude exactly one millimeter of filament. This value is embedded into the G-Code that a slicer generates and cannot be easily edited via the slicer interface. It also requires a completely different calibration process.
The extrusion multiplier is a setting that is much simpler to adjust. You don’t need to go into the G-Code – just open up your slicer and look for the ‘Extrusion Multiplier’ or ‘Flowrate’ parameter.
When is extrusion multiplier calibration needed?
You can choose to adjust your extrusion multiplier whenever you encounter extrusion issues. This can be either over-extrusion (strings, blobs, uneven layers) or under-extrusion (poor bridging, gaps, missing layers).
Calibrating your extrusion multiplier becomes likely if you are switching from two vastly different filaments. Different materials can have different melting or extrusion behaviors which you will need to consider when setting up your 3D printing parameters. Doing a calibration may also be necessary when replacing components in your 3D printer such as the nozzle or the PTFE tubing.
However, you should not jump right away into doing an extrusion multiplier calibration as soon as you encounter problems with extrusion. There are so many other factors that can create such problems. Make sure that you are printing at the proper temperature and that you only use cooling if necessary. Most notably, calibrating your 3D printer’s E-steps should be done before adjusting your extrusion multiplier.
How to calibrate your extrusion multiplier
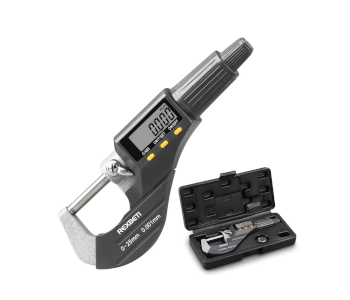
The first step in extrusion calibration is taking accurate measurements of your filament’s diameter. This is best done using a digital micrometer or digital caliper. Take diameter measurements at ten different points in the filament, write them down, and take their average. Use this value as the input filament diameter in your slicer.
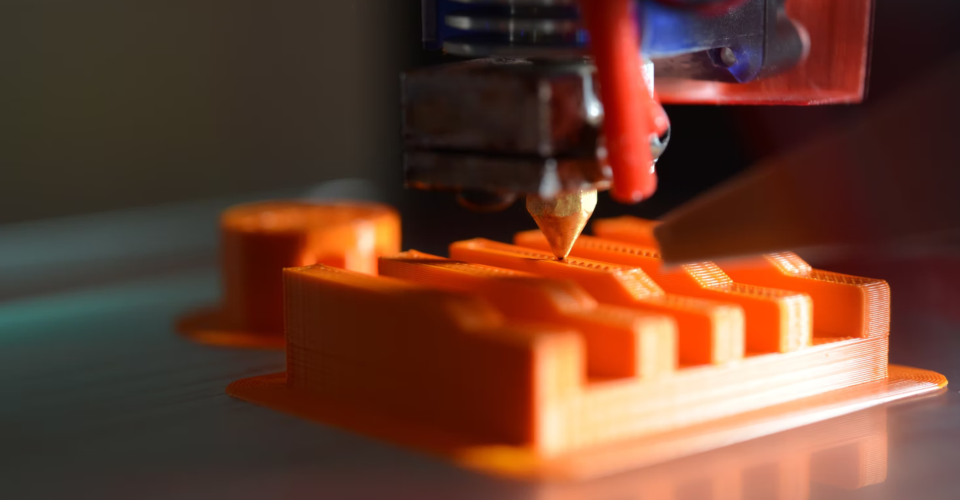
To calibrate your extrusion multiplier, you need to print a model with walls that are exactly one layer thick. This hollow calibration cube will do nicely. The cube was modeled to have a wall thickness of exactly 1 millimeter, so make sure to use this value as the extrusion width. Input the recommended slicer values for the filament that you are using.
Once the calibration cube has been printed and cooled, use the digital caliper to take measurements of the thickness of each of the walls. For the purpose of this example, let us say that the actual measured width turned out to be 1.05 millimeters. To calculate the new extrusion multiplier, use the formula:
New extrusion multiplier =Original extrusion multiplier × (Extrusion width)/(Actual width)
New extrusion multiplier =1.00 × (1.00 mm)/(1.05 mm)
New extrusion multiplier =0.95
This gives us a new extrusion multiplier of 0.95 or 95% of the original value. Plugging this value into your slicer should yield substantial improvement in terms of quality and accuracy. If you’re still not satisfied with the result, you can run the calibration a second time. However, a second calibration typically results in a much smaller improvement.
Other 3D printing calibration tips
If you’re experiencing calibration issues, changing the extrusion multiplier should not be your first recourse. Calibrating the extrusion multiplier is a minor move – it will not solve other problems related to the quality of your filament or other slicer settings. Here are a few boxes to tick off before you mess around with the extrusion multiplier:
Check filament condition
If your filament was not stored in a manner that protected it from humidity, then it will very likely create extrusion problems. Trapped moisture in the filament tends to expand and vaporize in the hot end, creating pressure inside the extruder and leaving gaps in the printed layers. Before you start tweaking anything in your slicer, make sure that you are working with filament that has not absorbed a lot of moisture.
Tweak the printing temperature
The temperature of the filament plays a huge role in defining its flow characteristics. Whether you’re experiencing under-extrusion or over-extrusion, you can try changing the printing temperature by 5 °C increments to try and solve the problem.
Take note that you should also watch out for other problems when making changes to the printing temperature. Increasing the temperature diminished bridging performance and makes overhangs more likely to collapse. Decreasing the printing temperature is great for retaining fine details but drastically diminishes bed adhesion and layer adhesion.
Calibrate the E-steps
The “E-steps” is the number of steps that the extruder motor rotates to extrude exactly one millimeter of filament. Your 3D printer probably already has a set E-step value but this tends to drift over time as the condition of the extruder gear and idler gear changes.
If you are noticing a consistent error in extrusion that can no longer be remedied by changing other slicer settings, then it may be time to do an E-step calibration. This requires a rudimentary understanding of G-Code and how the code can be edited.
The process is quite long, so we will just point you to our past article on extruder calibration. You are still going to need a digital caliper or micrometer to do this calibration, so it’s a good idea to invest in one if you want to achieve high-precision 3D printing.
Doing these three steps should already result in a marked improvement in the extrusion performance of your 3D printer. Changing the value of your extrusion multiplier can be considered as a fine-tuning step to make the extrusion as precise as possible.
Final thoughts
The extrusion multiplier is a slicer setting that indirectly determines how much filament your 3D printer extrudes within any given period. The default setting of 3D printers is typically sufficient for most applications, but you can do a quick calibration to fine-tune its extrusion performance.
Despite the significance of the extrusion multiplier, it should not be the first value to be changed when you start encountering extrusion problems. After all, even a well-calibrated 3D printer cannot produce good results if you’re working with wrong settings or a poor-quality filament.