3D Printing Filament Sticking to Nozzle – Causes and How to Avoid It

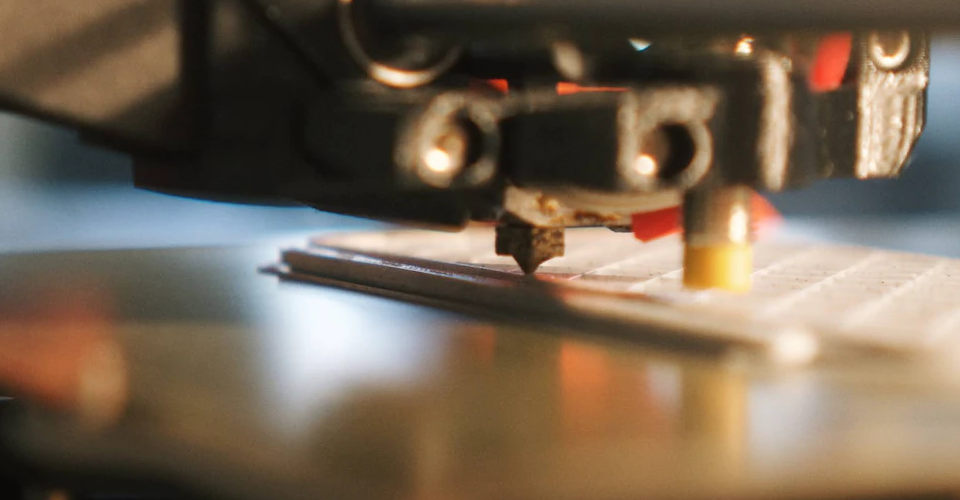
The foundation of filament-based 3D printing is centered on the process of hot filament being extruded through a nozzle and laid down on the print bed. However, what if something goes wrong with this essential process? What if the filament refuses to stick to the print bed but sticks to the nozzle instead?
Obviously, you can’t get any 3D printing done when this kind of problem comes up. What could cause the filament to stubbornly stick to the nozzle? What can you do should you run into this issue?
What causes the filament to stick to the nozzle?
Hot filament will have a tendency to cling to any surface it comes in contact with. This includes both the nozzle and the print bed. Your goal is to make the conditions just right for the filament to prefer to stick to the print bed rather than the nozzle. When these conditions aren’t met, then you end up with filament sticking to the nozzle.
Here are some possible causes of this problem:
The nozzle is too far from the print bed

This is the most common cause of a filament refusing to stick to the print bed. As a rule of thumb, you want the Z-offset of your print head to be about 80% of diameter of your nozzle. This should be just small enough for the nozzle to “press down” on the filament but not drag it around.
This mechanical push goes a long way towards promoting good bed adhesion. You can even try lowering the nozzle further by 0.02-mm increments until you’re satisfied with the results.
Print bed is not clean
A clean print bed is essential to good bed adhesion. Any traces of dust, grime, oil, or residual adhesive needs to be removed from the print bed before starting any 3D printing project. If you are using a glass bed, be careful not to get any fingerprints on it when mounting it on your 3D printer. Use a pair of gloves if needed.
Poor print bed adhesion
There are two parameters to adjust in your print bed to ensure good adhesion – temperature and the type of adhesive. Both of these need to be tweaked based on the type of filament you are printing with.
Are you printing with PLA or PETG? Then a heated bed might not be necessary, and plain old glue stick will work well enough. If you’re dealing with high-temperature Nylon or Polycarbonate, you will have to increase the bed temperature accordingly. This will also involve using heat-stable adhesives like Kapton tape or hairspray.
In some cases, the problem of filament sticking to the nozzle manifests in the form of the filament “curling” towards the nozzle. This is no longer a matter of bed adhesion – the filament might not even come in contact with the print bed!
When filament curling happens, it is almost certainly a sign of a clogged nozzle. Curling happens when the filament is extruded at an angle, instead of vertically straight. Fortunately, quickly diagnosing this problem also means that you can address it right away.
Other solutions you can explore
The nice thing about filament sticking to the nozzle is that it happens at the onset of a 3D printing project. This minimizes the amount of time and material that goes to waste before you can come up with a good solution. If you find that you cannot get that first layer to stick, here are some solutions that you can try:
Run a bed level calibration
Setting your Z-offset to promote good bed adhesion is futile if your bed is not completely leveled. Whenever you do something to your print bed, such as removing or installing a glass build plate, make sure to run a bed level calibration before printing.
You’re very lucky if your 3D printer comes with an automatic bed leveling function. If not, then you’re going to have to do it the old-fashioned way. A print bed should have an adjustment screw on each corner.
Try and stick a piece of thick cardboard between the print bed and nozzle at different points. This will serve as the baseline gap between the nozzle and the print bed. You want this cardboard to fit snugly at all points of the print bed, so move it around and do the same test at different parts of the bed. If there is a point where the fit is too loose or too tight, then adjust the screws as necessary.
Clean your nozzle
If you can see curling of the filament, then there is almost certainly something clogging your nozzle. You can try to dislodge it first with a steel brush. This usually works if the clogged material is not too hard.
A more reliable solution is the “cold pull” method. Take a piece of high-temperature filament (Nylon is a great option) and insert it upwards through the nozzle. Heat the nozzle to the melting temperature of Nylon and let it cool down again. This should have forced any residue in the nozzle to stick to the Nylon filament. You can then yank out the piece of filament, hopefully along with all the residue that caused the clog.
Clean your print bed
Proper print bed clean-up is essential in maintaining its adhesion. Avoid using any abrasive material when cleaning your print bed. This creates micro-abrasions on the surface of the print bed that can compromise adhesion with the filament.
Instead, just wash the print bed with soap and water and wipe dry with a piece of clean cloth. Should there be any adhesive residue, remove it using acetone. Make sure that the print bed is completely dry before 3D printing.
Increase printing temperature
Heat promotes better filament adhesion. If you’re having trouble getting your filament to stick to the print bed, then try increasing the printing temperature by increments of 5 °C. If you’re just having trouble with the first few layers, printing with high temperatures at the onset may already be a sufficient solution.
Keep in mind that high printing temperatures can also cause other problems such as stringing and poor bridging performance. If your base layers are already set, you may have to lower the printing temperature to avoid any undesired consequences.
Increase print bed temperature
A heated print bed is a huge advantage for bed adhesion. By keeping the filament near its glass transition temperature, a heated bed should create conditions that prevent filament from sticking to the nozzle.
As with the printing temperature, you can try to increase the print bed temperature by 5 °C increments until bed adhesion has been improved. Watch out for signs of an excessively high bed temperature, the most notable of which is the “Elephant’s Foot.”
Use a different adhesive
Depending on the filament you are printing with, achieving good bed adhesion may have different levels of difficulty. In most cases, the standard options of hairspray, blue painters’ tape, or Kapton tape already work well enough.
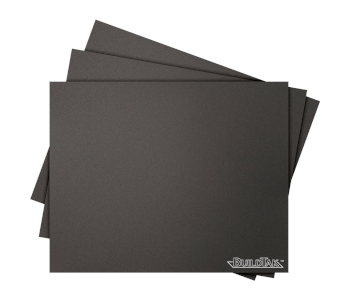
If you need more heavy-duty bed adhesion solutions, then you can try special build surfaces. BuildTak is a good option that works well for ABS, PET, and flexible filaments. BuildTak may be quite expensive but can be reusable if you’re careful with it.
Avoid cooling on the first few layers
The sudden drop in temperature as the filament exits the nozzle is one of the major reasons for poor bed adhesion. To get the filament to stick to the print bed, it is a good idea to slow down this cooling process as much as possible. This means turning off the cooling fan or the first few layers.
In some cases, you may need to go as far as printing with an enclosure. This preserves the temperature close to the print bed and prevents cooling caused by outside drafts.
Final thoughts
Watching out for potential problems is but a part of the 3D printing experience, especially at the start of a project. The filament sticking to the nozzle is the type of problem you can encounter before you have even printed your project’s first layer.
The good thing about this problem is that you don’t end up printing several layers before seeing that something is going wrong. It’s also an easy fix – if there’s nothing clogging your nozzle, then you just need to improve bed adhesion. Getting the filament to stick to the print bed is only the first step in a successful 3D printing project.