Tips on Using 3D Printing for Injection Molding

3D printing is a method typically used for low-volume manufacturing. Its ability to recreate custom and complex designs is tempered by the fact that it’s also very slow and can get expensive for high-volume orders.
However, there is still a way to harness the power of 3D printing for high-volume manufacturing. This is done by combining 3D printing with a relatively old-fashioned technique called injection molding. How do these two methods go hand-in-hand? What industries can benefit from this hybrid production technique?
What is injection molding?
Injection molding is one of the most common manufacturing methods, especially for plastic products. As the name implies, this method involves injecting a molten thermoplastic material under high pressure into a prefabricated mold. A single mold can be used several thousand times, making injection molding an economical and rapid technique for manufacturing a high volume of orders for the same part or product.
The majority of the time, skill, and cost needed in injection molding go towards fabricating the mold. After all, the quality of the mold will dictate the quality of all the parts created from it.
CNC machining is the typical technique used to create the metal molds for injection molding. The problem with this approach is that it’s quite expensive and time-consuming. A metal mold is practical if you’re planning to make 10,000 to 20,000 parts, but what if you only need a few hundred? This is where 3D printing can prove useful.
How does 3D printing come into the equation?
There are two ways to use 3D printing for injection molding – either for creating a prototype or to create the mold itself. These two methods vary greatly by approach and will likely require different 3D printing technologies.
3D-printed prototype
To 3D print a prototype, you will only need to create a digital model of the part to be reproduced. This will be the “master model” of your part and will be the basis of the mold or die. A prototype can be 3D printed using either an FDM or SLA printer. If there are minor imperfections in the prototype, these can still be remedied during post-processing.
Once the prototype is to your liking, it’s time to create a die or mold out of it. For plastic parts, the most common die materials are either silicone or polyurethane. Silicone has excellent workability and heat-resistance but has a long curing time. In contrast, polyurethane cures in less than ten minutes but you’ll have to work very quickly with it.
3D-printed mold
Alternatively, you can use 3D printing technology to create a mold directly. Since the assumption is that you will need the mold to be as detailed and accurate as possible, the recommended technology for this technique is resin-based SLA 3D printing.
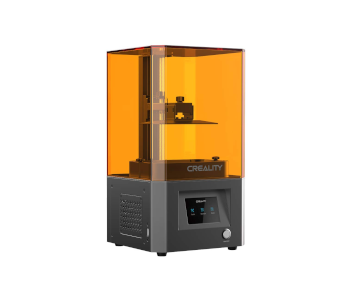
Compared to FDM prints, SLA prints are stronger, more dimensionally accurate, and can capture a finer level of detail. SLA printers are usually more expensive, but there are now affordable desktop-scale options like the Creality LD002R Resin Printer.
To 3D print a mold, you will need to start with a 3D model of the part you intend to reproduce. You will then need to create a “negative” copy of this model. The easiest way is to create a box that is larger than your model and “subtract” your model from the box. This should create a cavity that will then act as your mold. You will then need to split this box somewhere, which will be the mold’s parting line.
Take note that the model does not need to be upright in the mold box. The box also does not need to be split right in the middle. There are several different approaches to 3D printing a mold and getting it perfect for your design will likely require some trial and error.
One thing that makes this method challenging is that not all 3D printing resins are suitable for injection molding. You’re going to need a material that can withstand high temperatures but also has good flexibility for mold removal. These are likely expensive. Some good options are the High Temp Resin from PHROZEN or the glass-filled Rigid 10K from Formlabs.
The pros and cons of 3D printed molds or prototypes
As with any novel technique, 3D printing as an aid for injection molding is only beneficial when it is used under the proper circumstances. It’s not an all-around method and will never fully replace CNC machining. Here are some of the advantages and drawbacks of this approach.
PROS
Inexpensive
Compared to the cost of a CNC machine and metal raw materials, the 3D printing method is a lot cheaper. You can even end up with several rejected molds and it still won’t cost as much as a single mold made of stainless steel or titanium. This makes a 3D printer-based method compatible with small-scale businesses.
Allows for quick design revisions
Whether you do 3D printing or CNC machining, you will start the process by designing the part you want to reproduce in 3D modeling software. The difference between the two lies in how much time it takes and the cost of creating a mold or prototype.
Since 3D printed molds and prototypes are so cheap, it’s not a big deal to go back to the drawing board to make minor adjustments. Machines parts do not have this kind of luxury.
Design freedom
3D printing is an additive manufacturing method. In contrast, CNC machining is subtractive. A huge advantage of an additive method is that it’s capable of creating designs that would have been too complex or literally impossible for subtractive manufacturing. This unequaled design freedom has allowed jewelry makes to creates earrings and pendants unlike anything we’ve seen before.
CONS
Lacks durability
The mold in injection molding goes through an exceptional level of mechanical stress. It has to withstand cracking brought about by a high temperature gradient and the strain of the mold removal process. Multiply this by the number of injection molding cycles and you will start to realize how vital the durability of the mold material is.
Unfortunately, there is no way for a 3D printer resin, silicone, or polyurethane to be as durable as metal. This limits the longevity of a 3D printed mold. Careful handling is also encouraged when using a plastic mold for injection molding.
Not suitable for very high-volume production
Metal molds are rated to last up to 20,000 cycles before they have to be replaced. With a 3D printed mold, you will be very lucky to get half this number of cycles before it breaks down.
A 3D printed mold is still the more practical option if you need to replicate a part up to several hundred times. Once you’re in the neighborhood of a few thousand injection molded parts, you might seriously want to consider investing in a machined metal mold.
Tips on designing molds for 3D printing
Here’s the top tip if you’re planning to design a mold for 3D printing – you’re probably not going to get it right the first time. Trial and error is a natural part of the 3D printing process, especially if you’re doing something as unconventional as creating a mold.
Include air vents in the design
Air vents that run from the edge of the mold to the inner cavity are a crucial part of mold design. They allow for air to run out of the cavity during injection molding. This reduces internal pressure and mechanical stress to the mold, which should help it last longer. Air vents also prevent the flashing of the thermoplastic material in the gate area.
Use a 2-degree draft angle
Avoiding perfectly vertical angles is standard practice in mold design. Altering the angle even just by 2 degrees makes mold removal a lot easier. This is beneficial in reducing turnaround time and the chances of the mold falling apart prematurely.
Embed metal rods or supports
If you plan on using the same mold for a hundred or more cycles, consider adding hollow channels on the edges of the mold. Placing metal rods in these channels greatly increases the robustness of the mold. It also reduces the warping of the plastic material during the repeated heating and cooling cycles, ensuring that dimensional accuracy is preserved longer.
Plan for dimensional deviations
Speaking of warping, you need to accept that it’s a natural part of subjecting materials to extremely high temperatures and cooling them down. If you need an extremely high degree of dimensional accuracy for your injection molded parts, this warping is something you will need to anticipate. Every resin behaves differently, so you may need to print your mold multiple times before you can get this right.
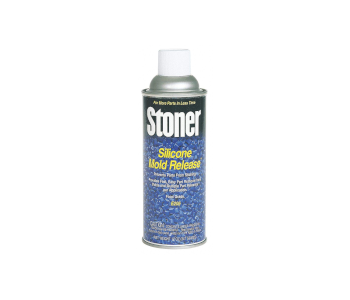
Don’t forget the mold release spray
Whatever material you’re working with, don’t’ forget to use mold release spray every step of the way. Neglecting this is the most certain way of ending up with a damaged mold when the time comes for mold removal. A can of mold release spray is inexpensive and easy to find.
Final thoughts
Using 3D printed molds for injection molding is a beautiful example of combining the old and the new – two established manufacturing methods that apparently complement each other. While 3D printing isn’t about to completely replace CNC machining yet, it provides a simpler and cheaper alternative.
Just keep in mind that all the usual rules on mold design still apply with this more modern method. The only difference is that you have a lot more room for error because a 3D printed mold does not need a large investment.