What Are G-Codes and How Are They Used in 3D Printing?

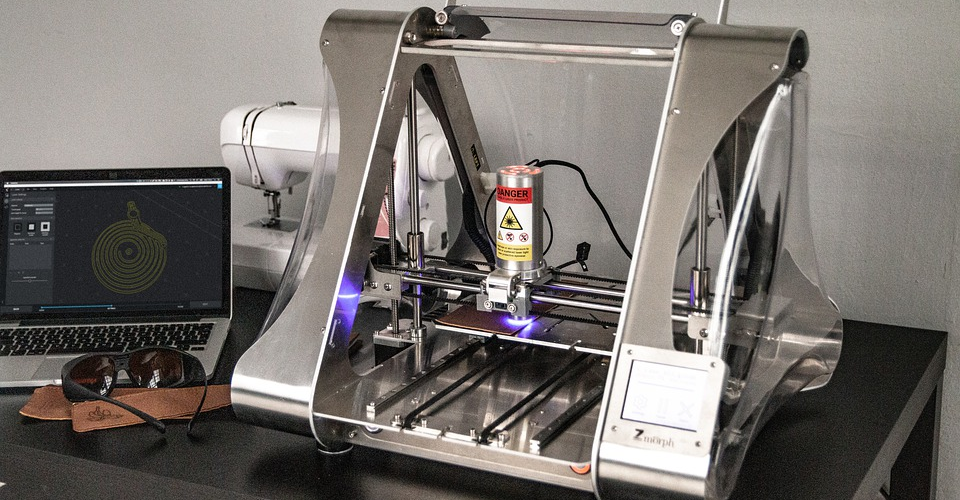
3D printers have greatly benefitted from the great strides that manufacturing technology has made over the last couple of decades. Not only are 3D printers incredibly small and highly precise, but they are almost fully automated. This move to automation has assured that modern manufacturing equipment are less prone to errors that are inherent with manual operations.
At the heart of any automated process is a standard programming language. In 3D printing, this programming language is known as the G-Code. What exactly is G-Code and how does it help people communicate with 3D printers?
A brief history of G-Code
G-Code is pretty easy to spot, as its commands are prefixed by the letter ‘G.’ Many references would say that the ‘G’ stands for geometric, but this is no longer a representative definition of the capabilities of G-Code. This may come as a surprise to some, but G-Code isn’t a programming language that is exclusively used for 3D printing.
Instead, it’s a programming language that was primarily developed for all types of computer numerical control (CNC) machines. These include both industrial-scale cutters, lathes, and mills and desktop-scale equipment like 3D printers.
The first use of a programming language for automation of industrial processes coincided with the development of CNC technology back in the 1950s. Back then, different organizations used different programming languages. As the decades went by, standardization efforts were undertaken by several countries culminating in the development of the RS-247-D by the Electronic Industries Alliance.
RS-247-D became the earliest version of G-Code, expanding into many forms through repeated revisions. Extensions and variations of G-Code are common even until now, especially across different machine tool manufacturers.
In its older iterations, G-Code lacked true logical relationships and cannot integrate loops and conditional operators into a program. Through the years, G-Code has evolved into a language that is almost similar to high-level programming languages. Compatibility problems brought about by subtle differences in G-Code implementation has been bridged by the use of CAD or CAM applications that can translate user-developed code into the appropriate G-Code.
Is it important to learn about G-Code?
It’s not unusual for someone to have already been working with 3D printers for some time and yet has never encountered a G-Code command before. This is because most slicer software will convert a 3D model into the appropriate list of G-Code commands, which will then be sent to the 3D printer. This is all done automatically, and the operator never has to see the G-Code commands that the software generates.
While a lack of knowledge about G-Codes isn’t crippling for a 3D printing professional, you can gain a better understanding of your 3D printer’s function by understanding how G-Codes work. Although the process of transforming a model to G-Code is practically made invisible by slicer software, they also offer an option to export the code as you can review and revise it manually. Taking a look at the code will help you tweak your printer’s performance, spot errors or failures, and do smart troubleshooting.
Knowledge of G-Code will come in handy if you’re working on a particularly complex design. Models with complex geometries and overhanging features can still fail while printing when using an automatically generated G-Code script. Knowing G-Code will allow you to dive into the code and make minor adjustments here and there. If you plan on doing this, then make sure that you also have a G-Code viewer and simulation tool on hand, because even the best coders make errors.
The good news is that it doesn’t take advanced coding skills to learn G-Code. If you’ve done any sort of programming, then you might find that G-Code is fairly easy. It is a programming language almost exclusively made of commands – it rarely relies on conditional loops or any sort of logic. The 3D printer merely executes the command line by line.
The basics of common G-Code commands
The best way to understand G-Code commands is to take a deep dive into the list of common commands used in 3D printing and analyze them one by one. At this point, we should note that not all commands used in 3D printers are G-Codes.
While G-Codes control the positioning of the nozzle in 3D space, there are also M-Codes that control the miscellaneous functions of the 3D printer. These include the commands for the heating of the nozzle and print bed, fan speed, and opening and closing of the bed enclosure.
Each command line starts with a generic G-Code or M-Code command, followed by a series of arguments. The requisite arguments will depend on the type of command to which they are attached to. For example, the following command line is going to look very familiar to anyone who has ever looked at the G-Code for a standard 3D printing project:
G1 X10 Y10 F2000.0 E0.055
This is basically a G1 command line followed by the necessary arguments on positioning, speed, and extrusion. We’ll attempt to make sense of this command line in the following sections.
Linear movement
More than 90% of a command list for 3D printing will start with G1, the code for linear movement. This command-line dictates the target position for the printer nozzle, as well as the speed at which the nozzle will travel.
The position argument of G1 is prefixed by the letters X, Y, and Z. The values appended to the letters determine the position of the nozzle based on the corresponding axes. In our first example above, the command will move the nozzle to position X10 and Y10 while its Z-position remains unchanged.
Take note that the movement of the nozzle may be based on either an absolute axis or its relative position. Setting the proper positioning system for a project is something that we’ll tackle later on.
The speed argument dictates how quickly the nozzle will move to the desired position, expressed in units of millimeters per minute. It is prefixed by the letter F. In our example, the nozzle will move at 2000 mm/min.
Lastly, you can command the printer to extrude a small amount of filament to compensate for the movement of the nozzle using the E value. This is often a very small value. In our example, the command is for the extrusion of only 0.055 millimeters of filament.
Set positioning mode
Before you can issue commands for the nozzle to move, you will have to let the printer know if the commands are based on an absolute or relative positioning system. In an absolute system, the nozzle will be moving relative to a fixed axis typically centered in the middle of the print bed. In a relative positioning system, all movement commands will be executed relative to the nozzle’s present position.
The positioning mode is established at the start of the program but can be changed midway. The commands are G90 for absolute positioning and G91 for relative positioning. This command does not require any arguments.
Extruder heating

There are two types of commands used to heat the extruder of a 3D printer. Either one of them achieves the goal of heating the extruder to the desired temperature. The M109 command prevents the program from proceeding to the next step until the target temperature has been reached. In contrast, the M104 command allows to program to proceed while heating is ongoing.
Both commands require the same set of arguments. The S value specifies the target extruder temperature. The T values are only necessary for multi-extruder systems – picking between 1 and 0 lets you choose which extruder to issue the heat-up command to.
Bed heating
The commands for bed heating are very similar to those for extruder heating – M140 and M190. The distinction between the two will also feel very familiar. The M190 command will put the rest of the program on hold while the bed heats up, while the M140 command will let the program continue to run.
One thing to remember is that it takes much longer to heat up a print bed than an extruder. For this reason, most slicers will place the bed heating step much earlier in the program. Even then, it’s not uncommon for a printer to pause its program while waiting for the print bed to reach the target temperature.
As printers will typically only have a single heated bed, only the S value is required as an argument for the M190 and M140 commands.
Fan speed
If your printer comes with a cooling fan, you may set its speed using the M106 command. The only argument needed for M106 is the S value, which basically determines the speed of the cooling fan. The S values range from 0 (off) to 255 (full power). The argument can be set to any integer within this range.
Nozzle homing routine
One of the most important commands is G28, which performs a nozzle homing routine. This is something that you will want to do both at the start and end of each printing project.
When this command is issued, the nozzle will move to the designated home position, which is usually at a far corner of the print bed. This establishes a fixed starting point for all succeeding nozzle movement commands.
The G29 command can be issued with no arguments, which the machine will assume to mean that the nozzle will travel to the home position in all three axes. Particular axes can be indicated by adding them as arguments (i.e. G28 X Y; to home the nozzle at the X and Y axes).
Overwrite the existing axes
Using the G92 command, you can overwrite the absolute coordinates of any of the axes, thus creating a new reference point for all succeeding movement commands. This can be done to any of the X, Y, and Z axes but you will need to specify them in the arguments. Otherwise, any unmentioned axes will remain unchanged.
The most common use of the G92 command is to re-establish the E axis or the position of the filament. By issuing the command G92 E0, the current position of the filament is set to E = 0. This means that all succeeding extrusion commands will measure the length of filament to the filament’s current position. This is particularly important when starting on a new layer or when commanding the extruder to retract a specific length of the filament.
How to practice writing your own G-codes
The best way to get understand G-codes would be to write them yourself and see how the printer responds to your commands. This can seem like an intimidating proposition, as you would naturally be scared of messing up your 3D printer. Fortunately, there are simulation tools that can provide a safer learning environment.
Slicer software like Cura or Simplify3D comes with a G-code viewer module. The viewer allows you to run a G-code script and visualize the path that the extruder will take had you been running the code on an actual printer. If you don’t have access to these software platforms, then you can even use this free online tool, which works much the same way.
When you’re still learning about G-code, a good G-code viewer and simulation tool can save you from wasting time and filament on failed prints.
Final thoughts
We may be able to trace the origins of G-Code to the large industrial equipment used in manufacturing facilities. For those of you who are into 3D printing, all you need to know about G-Code is that it is the language that a slicer software uses to communicate with the 3D printer. Basically, the slicer converts a 3D model into a series of commands for the 3D printer to follow.
In most cases, a 3D printing professional would not have to bother with G-Code, instead letting the slicer software do all the work. However, knowledge of G-Code is instrumental in achieving advanced feats of 3D printing, particularly in the reproduction of complex models. G-Code can also be used as a diagnostics tool if you are experiencing problems with your 3D printer.
Compared to other programming languages, G-Code is very simple. It has no variables or loops. Instead, it’s just a long list of commands. By practicing with actual G-Code scripts and simulating the results, you can be an expert in no time.