10 Tips on Designing Models for 3D Printing

3D printing technology offers a unique combination of design freedom and ease of reproduction. In the space of a few hours, you can come up with your won unique 3D model and turn it into a physical object, all without the use of expensive molds and heavy-duty machining tools.
However, not all 3D models translate well into 3D printed objects. Some may be harder to pull off than the others. If you’re designing your own models for 3D printing, there are certain factors that you will need to consider. To help you plan ahead, there are some of the best tips from 3D printing and modeling experts.
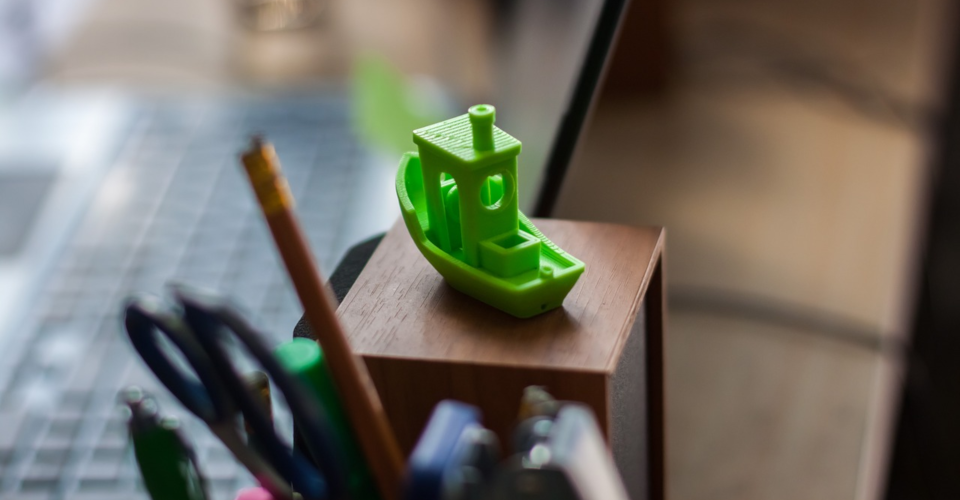
1. Reduce supports by following the 45-degree rule
Overhanging features aren’t really huge issues when it comes to 3D printing because you can easily remedy the problem by adding support structures. However, many 3D printing professionals consider the addition of supports as a last resort. Not only do they consume a substantial amount of filament, but the process of removing them may damage the finished print or result in uneven surfaces.
If you are designing your own model, then you can make a couple of deliberate decisions to reduce the need for supports. The 45-degree rule is one that’s easy to follow and remember – any incline that goes beyond 45 degrees will need a support structure to support its weight. If necessary, you can also add a chamfer, which is a wider incline split into 45-degree segments. Even pushing the 45-degree boundary would be pushing the limitations of the strength of the filament material, so we suggest keeping all inclines close to only around 30 degrees.
2. Consider adding anchors to avoid supports
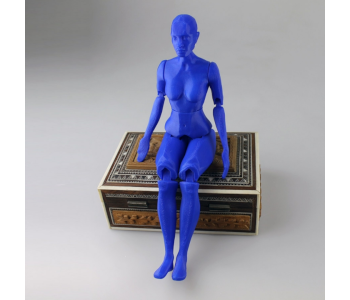
While we’re on the topic of reducing supports, one of the more creative ways to pull this off is to integrate supports into your design. There’s no single way to do this – it truly is up to how creative you are.
This is not a new concept. Based on studies of ancient sculptures, sculptors have often resorted to using ‘hidden’ supports so that their works – typically made of much heavier metals or marble – don’t collapse under their own weight.
If you are designing an action figure, then make the figure lean on a signpost or a pillar. You can even plan way ahead and make your figure pose in such a manner that avoids any overhanging features. The beauty of this approach is that you do not end up compromising your design by altering the geometry of certain features. You can also be sure that the quality of your model is preserved, even if you end up distributing it for free on any of the various 3D model download sites.
3. Understand bridges and the concept of droop
As its name implies, a bridge is a horizontal feature that has no support underneath and is connected to other parts of the model at its terminal ends. This can vary across different filament materials and nozzle diameters, so it’s worth the time and effort to discover the limits of your printer and filament.
The worst thing that could happen with a bridge is that it completely buckles under its own weight. If this happens, you will almost certainly need to add support. Even if you do manage to pull it off, a bridge will almost always suffer a certain degree of droop.
Droop refers to the sagging of the bridge, most visibly at the middle part. How bad the droop is will depend on the length of the bridge as well as the weight of the filament. As a rule of thumb, bridges shorter than 36 millimeters can be expected to have a droop of up to 0.5 millimeters. The droop increases up to 5 millimeters for bridges that are longer than 60 millimeters.
4. Orient based on resolution and strength
3D prints made using FDM technology naturally come out with visible layer lines. This is an inherent consequence of the reliance of FDM printers on relatively wide nozzles. However, the resolution along the z-axis can somewhat be controlled by setting the thickness of these layers. Resolution on the x-axis and y-axis, however, is determined by the size of the nozzle.
This is something you may need to consider if your model has very fine details. If you want precise details in your model, then it would be best to have those details oriented along the z-axis. While it’s true that models can be rotated along any axis in the slicer software, you still need to keep in mind that resolution is not equal among all three axes.
If you are designing a part that is meant to bear a significant load, you may also need to consider the strength limitations of FDM printing. Basically, the layer lines are the print’s weakest points – any stress parallel to them can cause them to get pulled apart from each other. For best results, it would be best to design your model so that any stress is applied perpendicular to the layer lines.
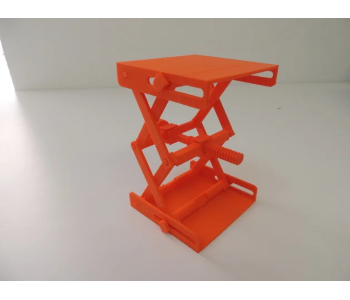
5. Split the model into multiple parts
If you are designing a model for printing on a desktop 3D printer, then the limitation on build size is something you may need to consider. After all, your 3D printer may not be large enough to create that action figure or prop you’re designing.
Splitting the model into multiple parts can also be advantageous if you want to avoid having too many support structures on your print. For instance, splitting the model into two or three parts and orienting them in different directions may mean each part would have fewer overhanging features. This is worth the effort just to avoid the hassle and extra filament that support structures demand.
There are a couple of different ways that you can split apart a model. You can simply cut them in certain sections, which means you’ll need to glue the parts together once they are all printed. You can also design snap-fit or press-fit connections, which have the advantage of being non-permanent. The second option can be useful for large props or prototypes that you’ll need to take apart for transportation and put together again, such as those used in conventions or exhibits.
6. Consider 3D printer tolerances based on nozzle size
There’s only so much detail that a 3D printer can reproduce, especially given the size of its nozzle. This holds true for any axis. Moreover, plastic filament naturally expands as it cools. This phenomenon is something you’ll need to consider when managing your expectations of how detailed a model can be when printed.
A good rule of thumb to follow is that the effective size of a filament when it is extruded and cooled is around 1.2 times the diameter of the nozzle. For a standard 0.4-millimeter nozzle, this translates to 0.48 millimeters. This means that the features of your model need to be at least 0.48 millimeters or larger on each axis.
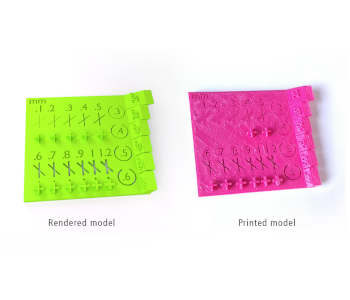
Tolerance refers to the distance between two nearby features that is just large enough for them to not fuse with each other. Again, the effect of thermal expansion is something you’ll need to consider when designing for tolerances. The problem is that there isn’t a single tolerance value that applies to all filament material and nozzle sizes. Your best bet would be to print this test template to check for the acceptable tolerance for your setup.
7. Consider the material

When designing a 3D model, it is only prudent to think of the specific filament material you intend to use. After all, different plastic materials behave differently. For instance, the thermal expansion coefficient of a plastic will have to be considered when deciding on the resolution and tolerances of a 3D model.
Hardness and flexibility are also properties that you need to consider, especially when designing functional prototypes. For example, flexible filament may not be appropriate for designs with press fit or snap fit connections. If you need a model with flexible hinges, the choice of wall thickness for such a section will depend based on the hardness of the plastic.
There are a handful of other printing parameters that can be affected by the type of material you use, ranging from subtle ones to those that are much more pronounced. Bridging failure, stringing, and warping, are only some of the problems that you can possibly avoid if the filament material has been considered in the design process.
8. Avoid warping by removing sharp corners

Add mouse ears to your model Warping is one of the biggest problems that a 3D printing professional can encounter. This is especially true when printing with high-temperature filaments, such as ABS or Nylon. Solving the warping issue takes a monumental effort, from tweaking the temperature settings to painstakingly applying adhesives to the print bed. Fortunately, you can take steps in the design process to stave off the warping problem.
The most common manifestation of warping is when the corners of the base layers of the print lift off the print bed. The corners are especially prone, as these are the points where the thermal stress generated by thermal contraction accumulate.
One of the smartest ways to avoid warping is to avoid this accumulation of thermal stress by designing rounded corners. This results in a more even distribution of thermal stress not only on the base layer but also for the rest of the print.
While using rounded corners is not an assurance that you will no longer run into a warping problem, it should help avoid the issue from manifesting
9. Add mouse ears to your design

There are about a dozen possible solutions to warping but most of them are steps that you need to take when setting your printer or slicer parameters. Just like rounding of corners, the addition of mouse ears is typically something you’ll need to do in the design phase.
Mouse ears are basically small disks located on the corners of the base layer of the model. The idea is to increase the surface contact between the corners of the model and print bed in a bid to prevent these corners from lifting off. Some slicer software platforms offer the option to add mouse ears to models before printing, although not many of them do. In the case of the latter, mouse ears will have to be added to the original 3D model.
The use of mouse ears allows you to retain the sharp edges in your model. However, you’ll have to live with the fact that your finished print will have mouse ears on its base. It would be a good idea to integrate mouse ears into the overall aesthetic of your design. Unlike support structures, mouse ears are practically impossible to remove without ruining the rest of your print.
10. Adjust your STL export settings as needed

The STL file format is the format of choice for most 3D printers, mostly because of its compact file size. This is possible because 3D models in the STL file format are represented using a series of tessellated triangles. This is a method for “simplifying” a 3D model by reducing each curved surface to small triangles that interlock with each other. Despite the drop in resolution, the quality of STL files is often good enough for 3D printing.
When exporting a model from a CAD platform to the STL file format, you have full control of the resolution of the file, or how many triangles the surface of the model will be made out of. As you would expect, a low-resolution file is smaller and easier to share but may result in a more “pixelated” appearance. One the other hand, high-resolution files are highly detailed but are much harder to upload or send.
When choosing the resolution of an exported STL file, the purpose of the file must always be considered. Do you need to send the file as part of your professional work, or are you just uploading it to a free site for fun? Does the model have a lot of fine details that will make a high-resolution rendering worth the added file size?
In any case, a maximum file size of 100 MB is often a good rule of thumb to follow. Most free-to-download sites have also set it this limit, likely as an effort to optimize their server storage.
Final thoughts
Most people who get into 3D printing likely start with downloading free 3D models from sites like Thingiverse. There’s nothing wrong with this. One of the best things about 3D printing is how easy it is to get into as a hobby. The active online communities of generous 3D modelers have been a huge part of this movement.
However, there’s a different level of novelty behind the idea of coming up with your own 3D models and recreating them in real life through a 3D printer. This is literally ideas coming to life. However, not all 3D models are made to translate well to 3D printing. There are few rules of thumb to follow to ensure the best quality of 3D prints, or just to make the 3D printing process a more pleasant experience.