3D Printing a Raft – Why and When You Should Do It

3D printing is as much a science as it is an art. Aside from playing around with models to produce the best-looking prints, a 3D printing professional also needs to understand the subtleties of the technology to solve the problems that are bound to come up now and then.
One of the most persistent problems that 3D printing professional encounter is warping or curling. Fortunately, the 3D printing community has come up with various ways to counter this problem. One of these is building your print with a raft. If this confuses you, then read on as we discuss what a raft is, when it’s appropriate to use a raft and the consequences that come along with it.
A little background on warping
To understand why printing a raft has become a common practice, we need to understand the mechanism that results in the warping or curling of a print. The fundamental principle that makes Fused Deposition Modeling (FDM) printing possible is the ability of thermoplastics to conform to different shapes when heated to their melting temperature. In a desktop 3D printer, this heating process happens in the hot end nozzle, after which the melted filament is laid down on the build platform.
As soon as the filament exits the nozzle, it starts to cool down. The cooling process continues after the filament has been placed on the build platform, eventually making the final print more durable. The problem is that cooling proceeds in an uneven manner: the outer layers, being more exposed to the atmosphere, cool down at a faster rate. This tends to stress buildup on the outer edges of the build. If the build has sharp edges, these tend to receive the brunt of the thermal stress, resulting in these corners “curling upwards.”
What is a raft and what is its point?
Measures to avoid warping focus on two things: reducing the thermal stress due to uneven cooling or improving the adhesion of the first layer to the build platform. There are probably more than a dozen ways to achieve these goals, such as building an enclosure to slow down the cooling process or using adhesives on the print bed.
By far, printing a raft is one of the easiest methods to avoid warping. Most slicer programs have a pre-programmed function to quickly add a raft to an existing 3D model. But what is a raft, exactly?
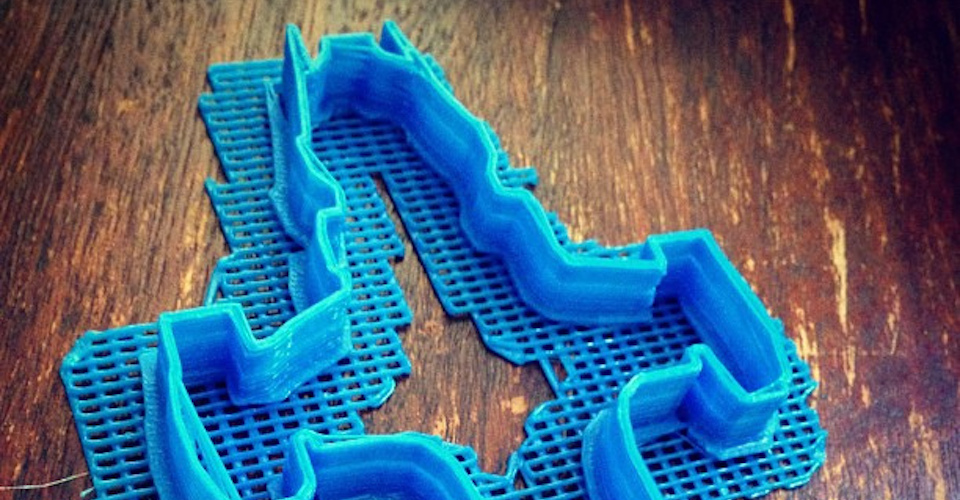
A raft is a horizontal mesh of filament that is laid down directly on the build platform. Your print is then deposited on top of this raft instead of on the platform’s surface. By having a larger surface area, a raft can help a print stick to the build platform. By having the bottom of the print in contact with another layer of plastic, contraction due to rapid cooling is also reduced, thereby reducing thermal stress.
Despite how simple a raft looks, most slicer programs allow you to make fine adjustments to how the raft will be built to optimize its performance. You can specify how far the raft will extend from the bottom of the print, how thick the raft layers will be, and how far the first layer of your build will be separated from the raft. The separation distance is particularly tricky, as it involves a balance between keeping your build bonded to the raft while keeping it far enough so that the raft can be easily removed post-printing.
How is a raft different from a brim and a skirt?
If you’ve read a discussion on rafts, then you’ve probably also heard of skirts and brims. These are all closely connected, with one being preferred to the others depending on the application and the particular problem you are trying to solve.
Skirts are one of the simplest ways to slow down the cooling of your first layer. Instead of a whole layer, a skirt is merely a single loop of filament that spans the perimeter of the base of the build. It is not in contact with the build itself, which eliminates the complication of having to remove it later on. The primary purpose of a skirt is to prime the extruder so you can establish a smooth flow of filament by the time the extruder gets around to printing your build. You can also choose to build a skirt made of multiple layers, which blocks air flow around the print to slow down the cooling of the build’s bottom layers.
A brim looks a lot like a raft. The difference is subtle: while a raft is a whole layer that sits below the build, a brim is a layer that merely extends from the edges of the build. It is essentially an extra-wide skirt that holds down the edges of the build, thereby helping with bed adhesion and preventing warping. A brim is often preferred to a raft since it prints faster, uses up less filament, and can be more easily removed from the final build.
When should you be printing a raft?
Despite the numerous advantages of using a raft, not all situations call for it. After all, you wouldn’t want to be unnecessarily using up your precious filament printing a raft when it’s not needed. There are particular scenarios where a raft could be useful.
1. When using materials prone to warping
There are just certain filament materials that are more prone to warping than others. A convenient dichotomy to exhibit this is between PLA and ABS: while printing with a raft is rarely done with PLA, it’s a measure that is more common when using ABS. Even with other measures to prevent warping, such as applying ABS glue on a heated bed, printing with a raft is still highly recommended.
2. When you are experiencing poor bed adhesion
The biggest advantage of using a raft is the large surface area it provides for the build to stick to the build platform. The bottom layers of a raft are commonly printed thick and slow, resulting in a very strong solid mesh. This is especially useful when your design does not have a completely flat base, which brings us to the next item.
3. When your model has poor contact with the build platform
While models for FDM printing are usually deliberately oriented to have a wide a base as possible, there are times when this just isn’t possible. If you have a design with narrow legs, then you can easily reinforce these legs with a raft. Aside from enhancing bed adhesion by increasing the contact surface between the print and the build platform, a wider base also helps support the weight of the rest of the print.
What’s the disadvantage of printing a raft?
Printing a raft isn’t the kind of thing you would want to do with every single one of your prints. There are several good reasons why you would want to hold back on printing a raft when it’s not needed.
1. Wasted filament
Despite its usefulness, the raft is still not a part of your build. Once you have removed the raft, it’s pretty much scrap material. While making a single print with a raft does not sound like such a big deal, multiplying it by the dozens of prints you can make with a single spool will translate to a lot of wasted filament. It’s just impractical to use a raft when it’s not necessary.
2. Poor finish of the bottom surface
If you use a glass heated bed, you probably appreciate how prints come off with perfectly smooth bottom surfaces. When you use a raft, you lose this crucial benefit. Much like the surface of your print, the top surface of the raft is far from being perfectly flat. This will translate to a print with a relatively rough bottom surface. If you post-process your work to get a perfectly smooth finish, then using a raft will just be more work for you.
3. Hard to remove
The major reason for avoiding rafts when they are not necessary is the fact that they can be very difficult to remove. Since the raft will be bonded to your print using the same mechanism that bonds the layers of your print together, removing it is usually not as simple as “popping” it off. You might need to use a spatula or even an X-Acto knife and using these tools can result in damage to your print. Prints with thin or narrow supports are particularly vulnerable to this.
Our advice is to assess carefully if a raft will be needed for your print before going ahead and using one. A design with a large, flat base will typically not need a raft. You can also resort to more conservative methods, such as using some form of bed adhesion or adjusting the temperature of your heated bed.
Final thoughts
The use of rafts to enhance bed adhesion and reduce warping has been a firmly established practice in the field of 3D printing. It’s so useful that slicer programs typically come with options to easily add a raft to an existing design. However, it should not be treated as the “go-to” solution when it comes to designs or materials that are prone to warping.
Using a raft introduces another set of problems that you will have to contend with. Understanding the material and knowing the best combination of printing speed, printing temperature, bed temperature, and bed adhesion methods that will result in a high-quality print is still the more sustainable solution to a warping problem. When all these efforts still fail, then go ahead and print that raft.
Image from eyeknownuffin on Flickr.