3D Printing Rafts, Skirts, and Brims: When to Use Them
3D printing, whether you do it professionally or for fun, can feel like a constant struggle to cope with problems that pop up continuously. Warping is one such problem that feels like it’s part and parcel of the whole 3D printing experience.
If you have dabbled into 3D printing using any slicer software, then you have probably seen options for adding rafts, skirts, or brims to your model. These are useful tools in certain circumstances, given that you know how to use them. If you continue to have problems with warping (among others), then these options may be exactly what you need.
What is a raft?
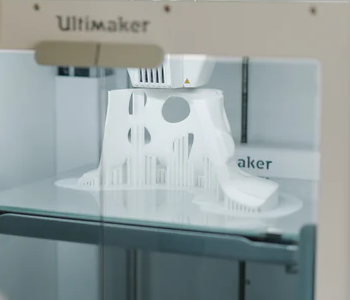
A raft is an entire extra layer that sits between the bottom layer of your model and the print bed. It acts as a sacrificial layer to aid in bed adhesion and is primarily used to avoid warping issues. A raft enhances bed adhesion as it has a typically more extensive profile than the model’s base layer, thus increasing the surface of contact with the print bed. If you are printing with filaments that are prone to warping, such as ABS or Nylon, then printing with a raft is one of the more reliable solutions.
On the flipside, printing with a raft also has a few drawbacks. It consumes a lot of filament material, which effectively goes to waste. If you’re printing with expensive filament, then printing with a raft can quickly become a relatively costly measure. It also adds even more plastic waste to a practice that already normally generates a lot of plastic waste.
We’ve written and read a lot about how problematic removing support structures are, but can you imagine having to remove an entire extra layer? That is another problem posed by using a raft – the fact that you will need to remove a whole super-strong layer at the bottom of your finished print. This can cause significant damage to your print, especially if your design has a lot of intricate details.
Even if you do manage to get the raft layer off without causing damage, you will then have to deal with a rough bottom layer that gains no benefit from a smooth glass print bed. This is going to add to the work during post-processing, although this sure sounds like a good tradeoff for a print that did not warp.
To succeed in using a raft, it must have a thick base layer that is printed slowly for maximum bed adhesion. You can also control how many layers you want your raft to be printed with. More layers typically help in smoothening your model’s base layer but will obviously use up more filament.
Most importantly, there needs to be ample separation between the top layer of the raft and the base layer of the model. This greatly facilitates the removal of the raft once the printing process is finished. A good rule of thumb is to set a separation distance of around 0.1 mm.
What is a brim?

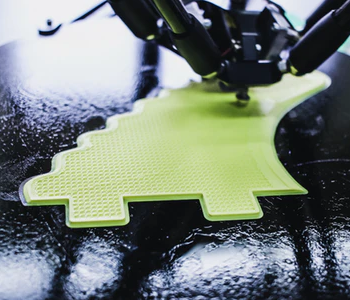
A brim looks a lot like a raft, except for one crucial difference – it does not add a whole extra layer underneath your model’s base layer. Instead, printing a skirt only adds extra material to the outer edges of the model. This helps with bed adhesion by simply increasing the surface of contact with the print bed, thereby preventing warping problems.
The upside of using a brim is that it does not consume as much filament as a raft, which means less of the filament goes to waste. However, it still achieves the same objective of avoiding warping and is a little easier to remove. If you’re printing with a glass bed, using a brim instead of a raft also means that you still gain the benefit of achieving a perfectly smooth bottom surface.
Brims can also be useful as mechanical supports for narrow features or support structures that have a very low contact surface with the print bed.
When printing with a brim, the only relevant setting you need to input in your slicer software is the brim’s line count. This determines just how thick the brim is along the horizontal plane. A thicker brim provides better mechanical support and bed adhesion, but also consumer more filament and is harder to remove.
Keep in mind that removing the brim from the edges of your model’s bottom layer will inevitably result in rough edges. This isn’t usually a big problem, as the uneven features can be easily sanded smooth. However, removing the brim can damage any intricate details located along the edge of the finished print. If you have such a model, then you might be better off with the raft option.
What is a skirt?

A skirt is the most different between the three “remediation” options in this article in that it’s not a tool for improving bed adhesion or for avoiding warping problems. Instead, the primary purpose of a skirt is to initialize the extruder to ensure a smooth flow of filament or to detect problems before printing of the actual project starts.
A skirt is basically only an outline of the base layer of the model, printed quite a distance away from the base layer. You can think of it as a brim that is not in contact with the actual model. Since it does not touch the object being printed, it affords no bed adhesion enhancement. On the upside, you also won’t have to worry about removing a skirt once printing has been completed.
The skirt is printed as the first step of the process, even before any filament for the actual project is extruded. This allows the user to check for any problems prior to printing, allowing them to step in and make corrections immediately. A skirt doesn’t use much filament, so you won’t be wasting a lot of material even if you have to go through the skirt printing process repeatedly.
If you’re printing with a filament that is sensitive to warping, then a skirt might help by slowing down the cooling process. A skirt acts as “insulation” for the base layer, restricting airflow and slowing down heat loss to the environment of the printing chamber. Granted that this insulating effect isn’t much, but a skirt can still help without the complications of printing with a raft or brim.
When printing with a skirt, there are only a few parameters to take note of. You can increase or reduce the number and layers and outlines of a skirt for any given model. Although a minimum number is usually sufficient for priming an extruder, you can choose thicker skirts if your model has a small outline. For printers with multiple extruders, you can set a skirt to be printed with any or all of the available extruders, thus giving you the flexibility of choosing which ones to prime.
When to use each one
As with any tool, the effectivity of rafts, brims, and skirts relies on recognizing when and how to best use them. To help with this decision-making process, here are a few basic guidelines.
Use a raft when…
- You are printing with a filament that’s particularly prone to warping. This can include high-temperature filaments such as polycarbonate, nylon, or ABS. By printing an entire sacrificial layer, a raft provides the maximum protection against warping problems. Just take note that you may need to take additional measures to completely avoid warping, such as using a heated bed and placing an enclosure around the print chamber.
- You don’t mind additional post-processing. An unfortunate consequence of printing with a raft is that you will inevitably end up with a bottom surface that is rougher than ideal. This will take a bit of work to smooth and can add a few hours to the total turnover time of any project.
Use a brim when…
- Warping is only a minor problem. By increasing the contact surface with the print bed, a brim can go a great way towards preventing warping. Compared to a raft, the bed adhesion upgrade that a brim provides is still inferior. However, a brim can offer such a benefit without the difficulty of removing a raft.
- Your model has narrow supports. Aside from enhancing bed adhesion, a brim can also provide mechanical support to any feature in your model that has a narrow base. A brim can even be used to enhance support structures. By extending the contact area of narrow features, you can prevent them from breaking off and getting distorted while printing.
Use a skirt when…
- Printing with untested filament or extruder settings. When printing with filament they haven’t tried before, most people would have to experiment with extruder settings to get results they are satisfied with. Testing can be a painstaking process that might have to involve printing actual models. This is partly the reason why the Benchy became popular as a “stress test” for 3D printing.
- Avoiding extruder issues before printing. A skirt allows for extruder and filament testing that does not consume much filament or takes up a lot of time. If you are heaving extrusion problems, then placing a skirt on your model is one of the easiest ways to hopefully solve that problem via priming. Regardless of the model, printing with a skirt is almost always a good idea.
- You need just a little protection against warping. Just to be clear, a skirt’s only contribution to avoiding warping is by restricting the flow of outside air close to the print’s base layer. The effect of this is small compared to more relevant measures such as making sure that you’re printing at the proper temperature and using an appropriate bed adhesion aid. However, printing with a skirt may just be that little boost you need to improve the quality of your finished prints.
In summary, printing with a skirt is almost always a good idea. Even if you’re not anticipating any problems, a skirt primes your extruder to reduce the chances of encountering any problems in your print’s base layer. It also doesn’t consume a lot of filament and poses no difficulty in removing.
On the other extreme of the spectrum is the raft, an entire extra layer that maximizes bed adhesion and is a very effective tool against warping. This reliability comes at the price of more filament consumption and the difficulty of removing it afterward.
Final thoughts
Rafts, skirts, and brims are some of the easiest tools in 3D printing that can help you address some of its most common problems. The option to add these features is built into most slicer software and can be enabled with just a few clicks. More important than knowing how to enable them is knowing when they should be used.
When used in the proper situations, the benefits of rafts, brims, and skirts far outweigh any of their drawbacks. If you’re having trouble with that particular model, why don’t you try printing with a raft or brim? This minimal-effort solution may just be what you are looking for.

