
10 Basic Supplies to Keep in Stock for 3D Printing

The right tools make it easier to do the job correctly – this is true with 3D printing is it is in any other craft. You never know when you’ll run into a problem over the course of 3D printing a project, or simply forget to keep some of the basic supplies in stock when you need them the most.
Depending on the scale of the project you’re working on, or the filament material that you’re using, the list of tools, supplies, and accessories you’ll need to have on hand can be very long. To keep things simple, we’re narrowing down the list to just these ten essential items.
What is this list for?
Before we start writing down what we believe are the essential supplies for 3D printing, we’d like to clarify what this is list includes. These are SUPPLIES, not tools. This means that these items are consumable by nature. Thus, screwdrivers, engraving tools, and pliers, although just as essential to 3D printing, will not be found in this list. This is a guide of items to keep in stock because you are very likely going to need them at some point.
1. Alcohol wipes
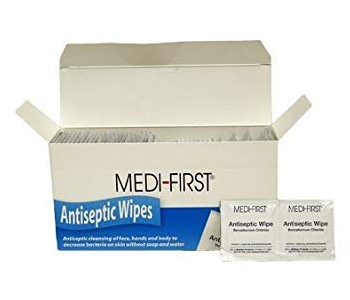
Let’s start with something incredibly cheap and basic: alcohol wipes. We recommend this pack of 100 individually wrapped alcohol wipes from Medique, although any similar product you can get from a local pharmacy or grocery will do perfectly fine.
What are you going to use alcohol wipes for? A lot of things, actually. We like to give our 3D printer parts and tools a quick wipe-down before and after every use just to remove any residual plastic particles that may have been released during the printing process. This keeps your tools in good condition to be used at a moment’s notice and wards off any erosive effects of residual particulate matter.
More importantly, alcohol wipes are very useful in cleaning off your build platform before you start any new 3D printing project. When setting up a build platform, it’s almost unavoidable to touch its top surface with our fingers, which tends to leave oil residue. This oil greatly reduces the ability of the plastic filament to the platform’s surface, which could lead to a host of first layer problems. A quick wipe with these alcohol wipes is absolutely necessary, even if you intend to apply some adhesion aid to your build platform.
2. Vacuum-sealed containers
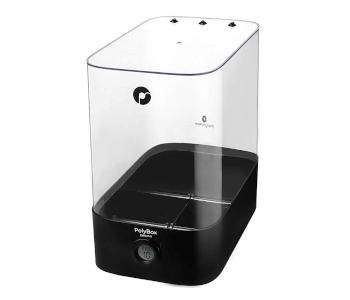
When it comes to 3D printing filaments, moisture is the enemy. Filaments are naturally hygroscopic materials, which means that they readily take up moisture from the environment. If you use a filament that hasn’t been sufficiently dried in your 3D printer, the trapped moisture will expand in the hot end nozzle and cause the formation of bubbles that can eventually burst, leading to prints of poor quality. Worse still, the bubbles could burst inside the nozzle and cause clogging.
To make sure that you avoid filament moisture problems, you need to keel all your filament spools inside airtight vacuum containers. There are a lot of options out there. You can get this fancy Polybox from Polymaker which actively extracts moisture and keeps your filament at less than 15% humidity, or this inexpensive package of five plastic containers with plastic clasps and vacuum seals.
Even some standard freezer bags or vacuum storage bags can do the job well enough if you don’t have enough space in your workshop for these large containers. If you decide to go the cheapest route, we advise throwing in a handful of desiccant pouches to help absorb extra moisture from your filament.
3. Desiccant pouches
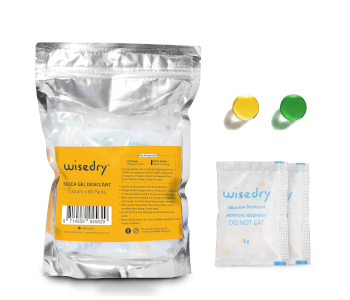
Unless you have the time to dry your filament in an oven before use or a fancy container with active dehumidifier capabilities, you will need to store your filament with something that will draw out its moisture. This 60-pack bundle only costs around $10 and should last you for a really long time.
Your filament absorbs a good deal of moisture every time you take it out of its airtight container. This moisture again needs to be removed once you put it back. Throwing in at least five of these small desiccant pouches with your filament should do the job.
Desiccant doesn’t last forever, though, as they can still get saturated with moisture. You’ll need to swap out your old ones for fresh desiccant pouches every now and then, so it’s always a good idea to have ample supply all the time.
4. Acetone
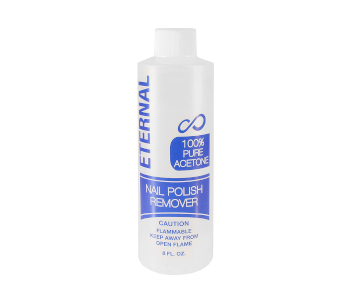
If you work with ABS frequently, then acetone can be one of the most versatile tools that you can have on stock. Acetone readily evaporates at room temperature, so you can’t really store an open bottle for long before it all dries out. For this reason, we don’t recommend getting a huge bottle – this 8-ounce bottle of pure acetone should be just enough for what you need without letting a huge portion of it go to waste.
The unique characteristic of acetone is that it’s the perfect solvent for ABS. This can be used in two major ways: for creating ABS glue as an adhesion aid, or for finishing an ABS print.
ABS glue is basically a solution of ABS plastic dissolved in a bit of acetone. This solution can be applied to a heated printing bed is one of the best ways to keep your ABS print to stick to the build platform. As anyone who has even printed with ABS can tell you, warping and adhesion are two of the biggest challenges with ABS. Making your own ABS glue is an effective and inexpensive solution to this problem.
When an ABS print is exposed to acetone in controlled conditions, the acetone melts a very thin layer of the ABS, resulting in a consistently smooth surface. Finishing an ABS print using an acetone vapor bath is one of the best uses of acetone and one of the most reliable finishing methods. Acetone can also be used to “glue” separate ABS parts by binding them at the molecular level. Considering the many ways that acetone can be used for 3D printing, it’s considered prudent to always have a bottle of it on hand.
5. Dust mask
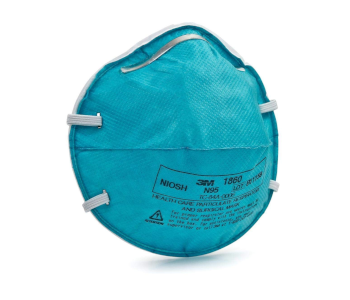
Whenever you do any sort of 3D printing, it’s always a good idea to do it in a well-ventilated place. Depending on the filament you are using, heating up the plastic material can release a bevy of noxious or irritating gases that can be harmful with prolonged exposure. Even if a filament doesn’t release any odor, the 3D printing process itself tends to result in the release of plastic microparticles that can wreak havoc on your respiratory system.
Even with a good ventilation system, we still highly recommend having another layer of protection in the form of an N95 dust mask. A mask with an N95 rating can filter out PM2.5 particles such as fine dust and pollen – more than enough for the plastic particles of 3D printing. They are also really cheap, as this pack of 20 masks costs less than $20.
We know that wearing a dust mask for a long time isn’t exactly comfortable. The mask makes breathing hard, and the straps are necessarily tight so that the mask fits snugly over your face. Feel free to step out of your workshop every once in a while so that you can breathe freely. However, this dust mask is an absolute necessity if you are going to work closely with your 3D printer, so make sure to always have them on stock.
6. Sandpaper
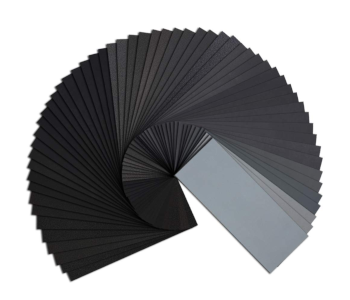
Finishing takes a 3D print to a whole new level. If you’re striving to give your prints a professional quality, then you need to do some amount of finishing on them. Whether you simply want to polish your prints or give them a coat of paint, you have to start at one step: sanding.
Sanding eliminates the surface imperfections that are inherent to FDM printing and the relatively smooth surface that sanding creates acts as the foundation for more advanced finishing methods. To get good results, you’ll have to sand your print using a multi-step method and work your way up to finer grit sandpaper. This 48-piece set of sandpaper from 48-grit to 3000-grit should be more than up for the job.
One other thing we like about this set of sandpaper from Keama is that they are waterproof. This makes them suitable for wet sanding – a process in which you keep your print constantly wet while sanding, which mobilizes the particulate plastic and helps accelerate the sanding process. While this step is optional, we find that wet sanding simply results in a smoother finish in 3D printed objects.
7. Glue stick

Who would have thought that a simple glue stick that you can find in any schoolkid’s bag could be an incredibly useful tool in 3D printing? The unassuming glue stick is still the most widely used adhesion aid because of how cheap and accessible it is, and yet, surprisingly effective. This pack of three sticks should be enough for you to get through a couple dozen of 3D printing projects.
Many 3D printing professionals prefer using glue sticks because of how easily it can be applied. Unlike ABS glue or tape, glue stick application only takes a couple of seconds and it would be very hard to do it improperly. Glue stick also comes off when you lift your print off a built platform, which means that it doesn’t leave much of a residue. Even if it does, glue stick is water-soluble, so you can just wipe off your build platform with a wet cloth to clean it up.
We also really like the “disappearing” purple hue of this glue stick, which takes out the guesswork of determining when the glue has dried. This means that you don’t have to touch the glue to check if it’s dry and risk leaving your dirty fingerprints all over the build platform.
8. Blue painter’s tape
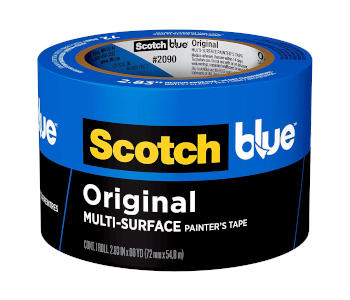
Another item in our list of things that have been repurposed for 3D printing is blue painter’s tape. Blue tape has the unique property of not leaving behind any residue when it is removed, which is important for both the quality of your print and the integrity of your build platform. For ease of applications, we like getting tape that is as wide as possible – this 2.83-inch roll of Blue Painter’s Tape from Scotch fits the bill.
Blue painter’s tape has proven to a lot of common filament materials, such as PLA or PETG. It works best on a non-heated printing bed. The advantage of using tape for bed adhesion compared to any sort of glue is that you can simply allow the tape to peel off when you need to remove your print. Since blue tape is so cheap, you don’t have to feel bad about throwing it away once you’re done.
Applying tape on a build platform can be a bit of a headache. You need to make sure that the tape has no wrinkles and that no strips are overlapping. You also need to re-do the entire application every time you start a new project. The results are well worth the effort.
9. Brush-on coating
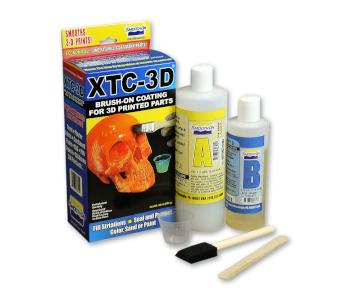
Remember when we said that you’ll need to sand your 3D prints to achieve a professional finish? Well, it doesn’t quite end there. To really make your project stand out, you’ll have to apply a coating to smooth out those small surface imperfections and give it a sleek polish. This Smooth-On 3D Print Coating is an excellent short cut to achieving this look with minimal effort.
This coating material is compatible with ABS, PLA, and most other 3D printing materials. The coating fills in all those small holes left over from the sanding process and is self-leveling, so you should end-up with those pesky brush strokes on the finished product. Aside from giving your print a visually pleasing sheen, the epoxy material hardens into this impact-resistant coating that can be further polished and painted on.
Since the epoxy coating is made with two parts that need to be mixed together, you can create a batch that is just enough for what you need without compromising any of the leftover coating. This bottle should be enough for about a few dozen 3D printing projects depending on size. It does not contain any toxic chemicals, although we would still be careful with it around kids.
10. Super glue
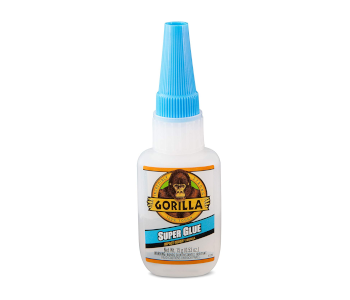
What better way to end this list than with good old super glue? For all the fancy items that we’ve listed here, we still wouldn’t start any 3D printing object if we didn’t have at least a single tube of super glue in our toolbox. This pack of Gorilla Super Glue with two tubes is enough to tide us over several months of 3D printing.
What would you use super glue for? Just about anything you can imagine! We mostly use super glue to put together projects that have to be printed in separate parts or to repair minor damages in projects that we don’t want to do all over again. Thick glue can even be used to fill gaps that could come up if you run into a problem with your 3D printer.
Super glue is a much more versatile alternative to other means of sticking together 3D printed parts, such as acetone. If we had to choose between the two, we’d go for super glue at any time.
Final thoughts
It only takes a bit of preparation to make sure that you get the best results out of your 3D printing projects. In addition to the right tools, you need to make sure that you have all these essential supplies readily available in your workshop. Are there any other supplies that you like stockpiling beside your 3D printer? Tell us about them in the comments below.