A Guide to 3D Printing Support Structures in Cura

Support structures have often been described as a ‘necessary evil’ in 3D printing. They increase printing time, use up more filament, and can be tough to remove. However, there are ways to tweak the slicer settings in Cura to make support structures less obtrusive while still retaining their benefits.
Cura offers a wide range of options for optimizing the support structures in your 3D print. You can customize where support structures will be placed, their shape and density, and even whether they will be printed using a second extruder.
Optimizing your supports to make them less wasteful and easier to remove will involve developing a deep understanding of all the customization tools that your slicer offers. In this article, we will go through all the options in Cura one by one.
Why and when are supports necessary?
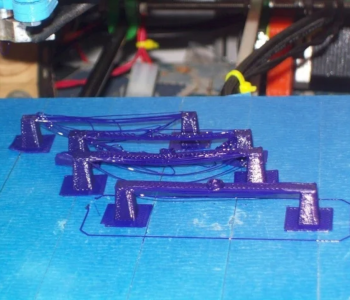
When designs for 3D printing get fancy or complex, they will typically end up with overhang features or bridges. These are features that do not have enough reinforcing material underneath them to support their weight. In these, cases support structures will be needed.
Despite the benefits of having supports, placing too many of them can also be problematic. Printing support structures takes extra time and filament. They can also be very hard to remove in post-processing. Having too many support structures increases the likelihood of damaging the print because of the tedious removal step.
The common piece of wisdom is to only use support structures judiciously. This does not mean that they have to be avoided, but there are ways to reduce the material used on supports or make them easier to remove.
There are two basic rules that will help you decide if a feature needs support:
- The 45-degree rule states that any feature angled more than 45 degrees from the horizontal will likely need to be supported by a support structure to keep it from collapsing.
- Bridges that are longer than 5 millimeters will have to be supported underneath.
Keep in mind that these are not hard and fast rules. Both the maximum angle and bridge rules can shift depending on the filament you are using, your slicer settings, and your 3D printer. You can play it safe by using lots of supports or very gradually optimize your support settings by making several small changes.
Enabling supports in Cura
The first thing to do upon opening Cura is to go to “Print Settings,” click “Custom,” select “Configure Setting Visibility,” and “Check All.” This will give you access to settings that would otherwise have been hidden.
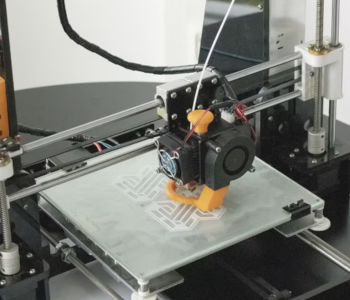
To start creating supports, just scroll down to Support Settings and click “Generate Support.”
Printing supports with a dual-extruder 3D printer
If you have a dual-extruder 3D printer, you can designate one extruder to print the support structures. This is a very common strategy that makes support removal a lot easier by using soluble filament material such as HIPS or PVA.
You can designate a “support extruder” in Cura. You can also sub-divide the extruder assignment into separate sections:
- Support infill
- First layer support
- Support interface
- Support roof
- Support floor
These options can be useful when you need stronger supports for certain sections of the print, or if you just want the interface of the supports to be easily removed.
Support structure
You have two options for the overall structure of the supports. The ‘normal’ option creates the usual straightforward column of filament. This is the more common option and has better compatibility with all the printing profiles used by Ultimaker 3D printers.
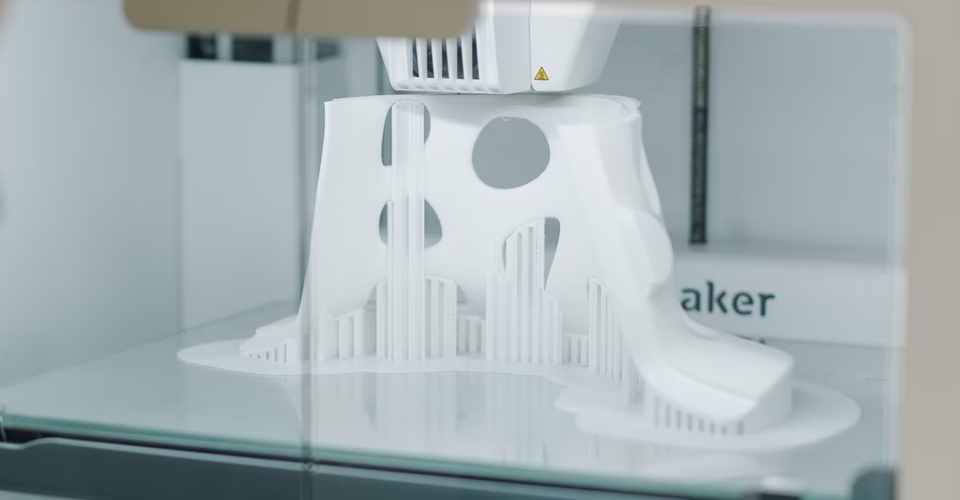
The second option is to use ‘tree’ supports. This creates supports that branch out from a smaller base. This option offers several advantages including reducing printing time, less filament usage, and fewer points of contact with the base of the print.
When you choose the tree setting, you will have to tweak it with a few unique parameters:
- The tree support branch angle sets the maximum overhang angle of the tree supports, particularly for the branching sections. The default setting of 40 degrees usually works pretty well.
- The tree support branch distance determines how far apart the points of contact will be between the tree supports and the base of the print. A smaller distance is more stable but is also more difficult to remove.
- The tree support branch diameter sets the diameter of the branches at the points where they touch the base of the print. A support with a wider diameter provides better support and stability but is also harder to remove.
- The tree support branch diameter angle determines the angle at which the branches grow. Setting a bigger growth angle means that the base of the tree supports will have to be wider. This uses up more filament and takes longer to print but is more stable.
- Increasing the tree support collision resolution makes the support less likely to get into a collision with the model. This should make removal easier at the price of reduced stability.
Tree supports are quite effective but are less predictable than the standard support structures. If adding structures is something new to you, then we recommend sticking to the normal option.
Support placement
One of the first options presented to you upon clicking the command to “Generate supports” is between “Everywhere” or “Touching Buildplate.” This choice determines exactly where the supports will be generated.
Choosing the everywhere option will create supports for all overhang features and bridges in your model, regardless of what is directly underneath those features. This means that you can possibly end up with supports that are anchored to another part of the print.
Again, this is the option that provides better stability at the cost of increased printing time, harder support removal, and higher filament usage. Enabling the option to build supports everywhere ensures that you will spend lots of time removing blemishes during post-processing. This option is more viable if you’re using a soluble support filament.
The alternative is to only generate supports in places where it will be touching the build plate. This will drastically reduce the number of support structures that will end up in your final print. This should result in a much cleaner print. However, there is also a probability that some of the overhang features in your model will end up lacking the necessary supports.
Overhang angle
Although the rule of thumb states that all features angled at more than 45 degrees from the horizontal require supports, this is a value that adjusts in Cura. Reducing this angle will generate more supports, while fewer supports will be generated with a larger overhang angle. If you just want supports only for horizontal bridges in your model, you can increase this parameter to 89 degrees.
It’s tough to tell exactly which angle you should use for optimal results. 45 degrees is considered by most people to be a safe bet, but you may even have to set a lower value for exceptionally dense filament such as those that are filled with wood or metal particles.
Support pattern
Much like most of the rest of your print, support structures are mostly hollow inside. To keep them stable, they are reinforced by an infill pattern that provides mechanical strength yet also reduces filament usage.
The support patterns offered by Cura are pretty much just the same patterns available for infill:
- Lines
- Zigzag
- Grid
- Triangle
- Concentric
Of the five options, lines and zigzag are the easiest to remove but also have the lowest strength. Both grid and triangle are very strong and are consequently tough to remove. Concentric is considered the middle-ground option.
Much like the infill pattern, the density of the support infill can also be adjusted in the slicer. The rationale for adjustment should be quite intuitive. Increasing support density creates more rigid and resilient support structures at the price of more difficult removal and longer printing time. If support strength is not as critical, then reducing infill density is more practical and easier to deal with in post-processing.
Conversely, you can set a support line distance instead of a density value. This sets the distance between the supports instead of designating it as a percentage.
Normally, the support infill pattern is printed with no need for a surrounding support wall. After all, the aesthetic of the support structures is not important at all. However, Cura still offers an option to add a support wall line count should you wish to make your support structures more reliable. This will likely only be necessary if you’re printing with special support material like PVA or HIPS.
It is also possible to set the support infill line direction. The effect of this is more pronounced in infill patterns that strictly use parallel lines such as lines or zigzag. The default setting for this parameter sets the infill direction at 45 degrees. Shifting the lines around can be beneficial if there are sections of the overhang features that are exceptionally heavier.
Z distance

The Z distance determines the vertical separation distance between the model and the support structures. This setting is further divided into two parameters – the top distance and the bottom distance. The top distance applies to the separation of the top of the support and the bottom of the model. The bottom distance is the exact opposite, as it controls the distance between the top of the model and the bottom of the support.
The primary goal of the Z distance setting is to leave just enough of a gap between the support and the model so that the model does not collapse but the support is not exceedingly difficult to remove either. In any case, make sure that the Z distance setting is aligned with the Z-axis resolution of your 3D printer.
XY distance
Just like Z distance, the XY distance setting determines how far away horizontally the supports will be placed relative to the model. Increasing the XY distance creates a bigger gap, making it less likely that the surface of the model will be ruined because of support removal. However, this also increases the risk that some of the smaller overhanging features will end up lacking supports.
Support distance priority
When you designate both Z distance and XY distance values, there may be some parts of the model that end up going into conflict about which setting to implement. To avoid this conflict, you can set the support distance priority instead.
The way this setting works is that you tell the slicer whether to prioritize the Z distance over the XY distance and vice-versa. Should you choose the Z distance as the priority, you also have the option of specifying a minimum XY distance so that supports do not end up getting absorbed into the surface of the model.
Support brim
If the point of contact of support structures with the print bed is too small, they may end up collapsing due to lack of bed adhesion. To avoid this, you can choose to add a support brim to your model. This will add a few layers of extra filament on the inside of the support structures. This will beef up the infill to make support structures stronger. This has no effect on the difficulty of removal but uses up more filament and increases printing time.
Join distance
There may be times when support structures get lumped together so closely that it makes more sense to just print them together. Not only does this make the support structures longer, but it can also reduce printing time by eliminating unnecessary print head movement.
The join distance setting will determine the maximum horizontal distance value between two adjacent support structures before the slicer will just automatically join them together. Very thin support structures stand to gain to benefit the most from this setting. However, setting the join distance at a very high value can end up creating very dense and wasteful supports.
Minimum support area
Under the default settings, Cura will not discriminate against very small features as long as they satisfy the overhang angle qualifier. In some cases, this will result in tiny overhang features that are supported by similarly thin support structures that do not actually provide any mechanical reinforcement at all.
You can avoid this by setting a minimum support area. This filters out very thin support structures and makes the finished product look a lot cleaner. Just be careful not to set too high a value as some of the smaller overhang features can end up collapsing.
Use towers

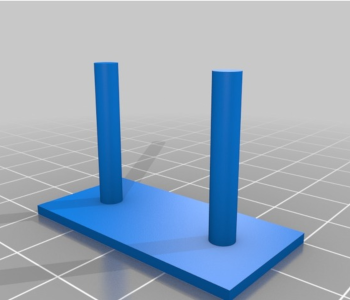
When you set a minimum support area, you have the option of adding supports for the very small features using towers. As the name implies, towers are straight and relatively narrow columns that provide mechanical reinforcement but do not have huge footprints.
You can alter the appearance of towers by adjusting the tower diameter setting. Towers taper near the top to minimize the point of contact with overhang features. This point of contact and the taper angle can also be controlled using the maximum tower-supported diameter and tower roof angle parameters.
Enable support interface
It’s no secret that having a dense distribution of support structures can make the bottom surface of a model uneven. This can take a lot of work to sand smooth during post-processing. A possible solution to this is to print your supports with an interface – a fairly dense skin of filament on the roof of the supports. This makes the bottom surface of the model smoother but is also more difficult to remove.
When you enable support interface, you will be given additional options for how the interface will be printed:
- Support interface density
- Support interface thickness
- Support interface resolution
- Support roof pattern
You also have the option of designating different settings for either the support roof or floor interfaces.
Final thoughts
Many people, when they need to add supports to their 3D printing models, just click the “Enable support structures” command and call it a day. Even without doing any tweaks, supports actually work most of the time. However, understanding the finer points of support settings can help you save a lot of time and effort in post-processing.
Cura offers some of the finest and most precise options for customizing support structures. If you’re having too much trouble removing supports or end up with highly uneven surfaces, there is probably a setting in there that can help you.