Everything You Need to Know About 3D Printing Support Structures

If you’ve been doing 3D printing long enough, then you’ll know what support structures are: a necessary evil that consumes more filament, makes the printing process longer, and adds more work to post-processing. In some cases, though, including supports for your design is simply unavoidable.
What are support structures anyway and why are they needed? Is there a way to go around the need to include support structures? If they are necessary, then what can you do to make them easier to remove? We’ll discuss all that and more in this detailed guide.
Why are support structures necessary?
There are two factors inherent to FDM printing that makes support structures necessary. First is the essence of additive manufacturing – the fact that objects created by FDM printing have to be built layer by layer, from the base upwards. Second is the fact that the molten filament that exits out of the nozzle does not develop rigidity instantly. It will take a few seconds before the filament solidifies enough to support its own weight, and several minutes before it can bear the weight of more layers built on top of it.
Depending on your design, your model may need to be printed with some parts that are not directly supported by any existing layers underneath. Because of the limitations we’ve outlined above, these parts could end up failing or collapsing. These parts could either be overhangs or bridges.
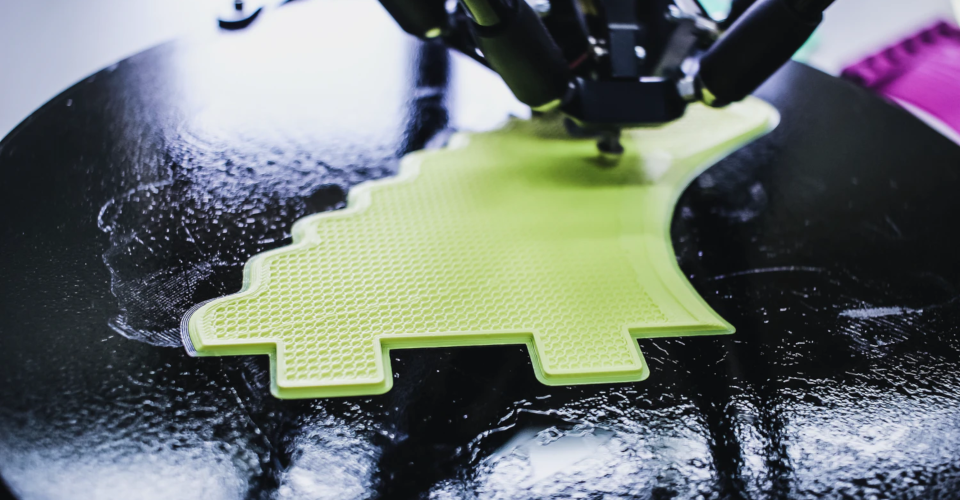
Overhanging features or bridges are the most typical candidates for a support structure. A support structure is an extra column or vertical structure that provides support to these overhangs or bridges. They are not part of the original design, which means that they need to be removed during post-processing.
The consequences of having too many support structures
Including support structures may seem like a great and smart idea to provide stability to your project while it prints, but there are several reasons for why they are called a “necessary evil.” Here are a few good reasons for why you would want to hold back on those support structures for your next build:
1. You end up consuming more filament
The most obvious consequence of support structures is that you end up using up more filament than you may have intended with your model. Depending on how many support structures you’ve decided to include, this increase in filament consumption can easily go up to 10% of the rest of the build. This might sound small, but it adds up over several prints.
Not only do you use up your filament spool faster, but it also means that you are generating even more plastic waste. 3D printing is an inherently wasteful process because of all the plastics being used, and more waste is definitely not what we need.
2. The print takes more time to finish
The printhead of your 3D printer can only move so fast. Even if support structures don’t need to be printed with very good detail, the time that the printhead spends moving to the support structures and extruding a small amount of filament could add up more than an hour to your total printing time.
It also means more power consumed to maintain the temperature of your printer and heated bed, and more movement for the stepper motors of your print head. Aside from the extra time to wait for your print to finish, you also end up with more power expenses.
3. Post-processing takes more work
The major reason why a lot of 3D printing professionals hate working with support structures is that they can be a pain to remove when during post-processing. First off, the extra contact area that support structures created with the print bed means that the finished print is harder to remove from the build platform.
If you’re printing support structures with the same filament as the rest of your build, then you’re going to have to remove them using clippers or other mechanical means. Aside from all the manual work this entails, it also introduces an extra step where you can end up damaging the print that you just finished. This is a particularly serious problem with super-durable plastic filaments such as PETG or Nylon.
Post-processing also adds extra production time on top of an already longer printing process. If you do 3D printing at any professional or commercial capacity, all the extra time spent means less time doing something more productive.
As you can tell, there are a lot of serious downsides to having too many support structures. This is why the first piece of advice we can tell you is to only use support structures when you need them. If you must, then use as few of them as possible.
How to minimize support structures
1. Not all overhangs and bridges require support structures
Here’s the first technique to avoid or minimize the use of support structures – not all overhanging features and bridges need support structures. The rules of thumb may vary across different filaments. Some filaments are inherently heavier than others, such as those composite filaments made with solid particles in a plastic matrix. The denser the filament, the less tolerance it has for overhanging features that don’t have support structures.
Here are the basic rules of thumb that work well for almost all types of filaments. In overhangs, you shouldn’t need to include a support structure if the angle of the overhang from the vertical is 45° or less. What happens at this angle is that the partial overlap of the layer with the layer directly below is enough to provide support.
In the case of bridges, you shouldn’t need a support structure if the bridge being printed is 5 millimeters or shorter. Such a gap is small enough for the filament to be supported at both ends, even without a central structure holding it up. Five millimeters isn’t a lot though, and you’ll likely find yourself going over this threshold more commonly.
2. Design your model with chamfers
If you have an overhang that goes beyond the 45° threshold, you can cheat a little bit by designing a chamfer under the overhang. A chamfer basically segments the bottom surface of an overhang such that each segment does not exceed the 45° threshold. The angle of inclination is increased by each step to eventually achieve the angle of the overhang.
It can take quite a bit of work to change up your model to include a chamfer. In most cases, the use of a chamfer is also visually apparent, so you might not want to pick this option if you’re going to be very particular about following a model.
3. Reorient your model to minimize support structures
It may not be immediately obvious because we’re so used to always seeing things at their upright orientation, but you might want to explore rotating your model around different axes. The goal is to orient the model in such a way that you minimize overhanging features. In some cases, printing the model vertically instead of horizontally can be considered an acceptable, if drastic, consideration.
4. Print a complex model in parts
Another non-obvious solution is to break apart a complex model with lots of overhanging features and print them separately. By printing an entire overhanging feature on its own, you can eliminate the need to include support structures. This is a good strategy if your primary concern is the quality of your output. However, it doesn’t exactly save up on the processing time. All things considered, you may even end up spending more time printing a project in separate parts than if you printed it as a whole but with support structures.
5. Include supports as part of your design
Another viable strategy is to not do away with support structures but, rather, to embrace them as part of your design. This takes a bit of creativity to pull off, and it may not always be possible without ruining the essence of your model. Does your figure have an outstretched hand? Try inserting a walking cane in there or a piece of cloth draped over the arm. There are endless possibilities in integrating “hidden” support structures in your design.
6. Cool your model rapidly as it prints
If you decide to proceed to print overhanging parts without support structures, then you need to have your cooling fan set to as high as possible. Cooling the filament allows it to attain rigidity to support its own weight. Keep in mind that you can also run into warping problems if you cool your print, so make sure to only use this technique with the appropriate filament.
Tips for the easy removal of support structures
It’s not always possible to completely eliminate support structures. It all depends on the complexity of your design and your willingness to compromise a little on your final print’s appearance. If you really must use support structures, then here are a few tips to make sure that you don’t damage your print during post-processing.
1. Use a soluble filament for support
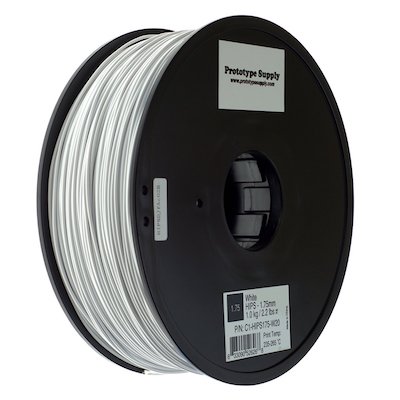
The easiest way to remove support structures would be to dissolve them away. This is an excellent option if your 3D printer is capable of extruding two types of filaments at the same time. There are two filaments that you can use to create soluble support structures: PVA, which is soluble in water, and HIPS, which is soluble in limonene. To be able to print with either one of these soluble filaments, the printing temperature of your main filaments needs to be somewhere within 10 °C of the optimal printing temperature of either PVA or HIPS.
The advantage of printing with soluble filaments is that the support structures can be removed cleanly without worrying about damaging the rest of your print. It’s also possible to place internal support structures that would have been impossible to remove using mechanical methods.
2. Adjust the Z-distance setting
What makes support structures so difficult to remove is how much contact they have with the main build. By reducing the contact area between the two, you can easily snip the support structures away using a pair of pliers.
Some slicer software platforms offer a Z-distance adjustment under the support settings. This leaves a very small gap between the top layer of the support and the bottom layer of the main print. The default setting for this parameter is equivalent to the layer height. If you’re still having problems detaching the support structures, then you can increase the Z-distance settings by increments of the layer height.
3. Use tree-type supports
The more common type of support structure is the linear or accordion supports. These consist of continuous columns of filament that support the entire bottom surface of the overhanging features. While these are reliable and can be used for just about any overhang shape, they are also notoriously hard to remove.
An alternative is to use tree-like supports. Much like its name, a tree-like support is broader at the bottom and tapers towards the top, resulting in less contact with the overhang. This makes the support easier to remove, although the small contact area may not be enough to bear the weight of overly heavy or large overhangs.
4. Use a heated knife to remove supports
If you can access the support structures using a knife, then a relatively low effort way to remove them would be to heat the knife over a flame and “melt” them away instead of cutting. Be careful not to heat the knife too much as you may end up with warped spots in your print where the plastic reacted to the residual heat.
Final thoughts
The ability to solve problems is one of the most important skills in 3D printing. You’ll continuously be encountering issues and will have to solve them with what tools you have.
In the case of overhangs and bridges, 3D printers always have the option to add support structures. This is a reliable solution, albeit one that consumes more filament and time, and required additional work.