How to Make Your 3D Prints Watertight
You have probably seen 3D models for containers, basins, and vases online that seem like they are fully closed and that they can hold fluids. This may not necessarily be the case. Layers may look like they perfectly align together on the surface, but small gaps can make your watertight project fail spectacularly.
Making a 3D printer watertight object is a lot harder than it sounds. You probably won’t get it right the first time, and there’s a certain level of luck involved as well. If you really must make watertight objects with 3D printing, here are some of our tips.
What is watertight?

Being watertight simply pertains to the ability of a container to hold water, or any fluid for that matter. This is a useful property if you’re printing a vase meant to hold flowers, or a watering can for your garden.
Despite the limitation of the technology, 3D printing is actually an excellent method for making watertight objects mainly because of the use of plastics. Being waterproof, plastics are some of the most reliable materials that are typically used for making watertight objects. An object cannot be watertight if it is not made of waterproof material.
There are certainly better options – vacuum injection of plastics is the usual process for making water bottles, after all. With a bit of tweaking, there is a way to make a 3D printer work for watertight projects.
3D printing tips for watertight objects
The main goal for this type of project is to make the layers of the 3D printer object as packed closely together as possible. There are several ways to achieve this by just making adjustments to your slicer settings. These methods can be combined to get better results.
Increase layer height
The layer lines will always be the weakest points of a 3D print, whether mechanically or for waterproofing. Printing with thicker layers will reduce the number of layer lines, thereby also reducing the points of failure.
If your model does not have a lot of very small details, then you might as well set your layer height to the maximum advisable value of about 80% of the nozzle diameter. You can even consider swapping out your stock nozzle for one that has a larger opening. This tactic works great for vases and large containers, and can even reduce the total printing time.
Increase printing temperature
Higher printing temperature promotes better layer adhesion. The more fluid-like characteristics of thermoplastics at high temperatures can help create stronger bonds between layers. This added bonding time makes gaps or holes less likely to form.
Again, this advice may not work as well when you’re working with highly detailed models. Printing at high temperatures can cause stringing problems, more so if you’re using a large-diameter nozzle. Filaments that are prone to warping, such as ABS or Nylon, may also be more challenging to print with when you’re using high temperatures.
Increase extrusion multiplier

When molten plastic is deposited in layers during 3D printing, a small amount of pressure is exerted on them by the nozzle. This facilitates good layer adhesion by essentially “squeezing” the layers together. One way to increase this pressure is by increasing the rate of extrusion of the filament. Pressing the layers together with more pressure makes it less likely for gaps to be left between the layers.
The extrusion multiplier can be increased either via the slicer settings or by making changes to the G-Code. Doing this essentially makes your printer over-extrude on purpose. Be careful when increasing the extrusion multiplier, and only do so in small increments. Excessively high extrusion values can result in clogging of the hot end.
Build thicker walls
Increasing the number of shells in your slicer means that a model will be printed with more outer walls. This is more of a “brute force” approach to lessening the chances of gaps or leaks. Somewhere between 3 to 5 shells is ideal.
In any case, making watertight prints will typically take more time and consume more filament. Take it slow, and don’t skimp on the filament used. It’s still more practical to try to do it right the first time than to go through several failed prints.
Proper filament selection
While all plastics are theoretically waterproof and can be used for watertight 3D prints, not all filaments are equally appropriate depending on your application. Some of you may be thinking of printing fancy cups for drinks, water bottles, or vases. In these cases, constant contact with fluids may cause some chemical reactions with the filament material.
It is a good idea to just avoid ABS altogether. ABS has toxic compounds that can leach onto any liquids or fluids. This is not safe for human or pet ingestion and can also be harmful to plants.
For items that will be in constant contact with water and other fluids, we also do not recommend using PLA. Although PLA breaks down to monomers that are generally safe for human consumption, it probably won’t be as long-lasting under wet conditions.
With all these considered, either PETG or Nylon is generally recommended for watertight prints. These are materials that are already being used in water containers anyway. As a final warning, 3D prints are generally not recommended for long-term contact with food or drinks unless you make sure to use food-safe filament and do post-processing to make the surfaces more hygienic.
Post-processing solutions

Most people who do watertight 3D prints do not actually succeed in achieving it during the 3D printing step. Fortunately, there is always post-processing. Much like how wood can be treated to make it less vulnerable to moisture, there are several surface treatment options to make 3D prints impervious to fluids.
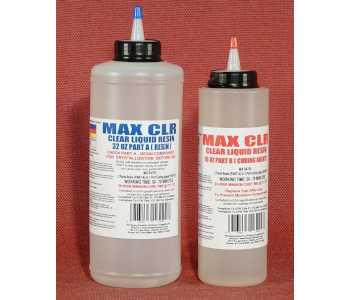
The most common advice in this situation is to use a two-part epoxy coating. There are lots of clear liquid epoxy resins out there that are easy to apply in thin, consistent layers. The beauty of this approach is that you can just add more layers to the epoxy coating if one or two is not enough to make your 3D print watertight.
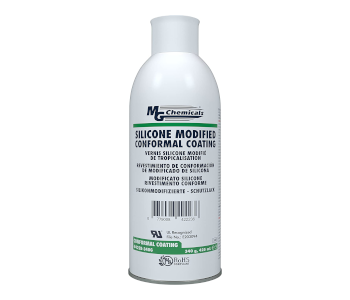
An even easier way to add a watertight coating to your 3D print is via a silicone coating aerosol spray, such as this one by MG Chemicals. Application via silicone coating is easier, faster, and more consistent. This is also excellent for protecting your 3D prints from the effects of excess moisture.
Keep in mind to use food-safe resin if you’re planning to use your watertight 3D prints for food contact. The Epoxy Resin System from MAX EPOXY SYSTEMS has been certified by the FDA as safe for brief-use food contact and should be good enough to use for cups, bowls, and vases.
A final word on food-safe prints
Before we wrap up this article, it is worth making a few more comments on the safety of using 3D printing to make food-safe containers. While we have already mentioned the importance of the proper selection of filament, the same standards should also apply to all the components of the 3D printer that come in contact with the filament. These include the extruder gears, nozzle, print bed, and PTFE tubing.
If you used to print filaments that are not food-safe, then trace residue from these filaments could have been left over in the extruder gears of the PTFE tubing in the hot end. For this reason, you will have to replace all these components with new parts. You will also want to swap out a stock brass nozzle for a new stainless-steel nozzle, as brass contains lead that may contaminate your 3D printed part.
3D printing objects meant for food contact is an entirely different ballgame. If this is something you plan to do regularly, you might even want to consider having a separate 3D printer just for food-safe projects. This should reduce the chances of cross-contamination and lessen the work of having to swap out printer parts.
Final thoughts
Making watertight 3D prints is challenging, but it’s not impossible. Certain slicer settings lend themselves well to watertight 3D printing, although using all of them simultaneously does not guarantee success yet. Fortunately, minor issues can still be remedied in post-processing.
If you are making watertight 3D prints that are meant for food contact, then there are a few additional food safety measures that you will need to have. This is an even more tedious task that may involve swapping out some parts of your 3D printer.

