ABL vs. UBL – How Are They Different?
A level print bed is at the very core of the fundamentals of good 3D printing. Without a properly leveled bed, you are not likely to get a hitch-free 3D printing process, or the finished print might be of poor quality.
Fortunately, automatic bed leveling features have made bed leveling a quick and painless process. There is still some confusion though between Automatic Bed Leveling (ABL) and Unified Bed Leveling (UBL). What are the differences between these two? Are there situations where you should be using one instead of the other?
What is bed leveling?
Bed leveling simply refers to the process of adjusting the level of a bed so that it remains equidistant to the nozzle at every point. This can also be referred to as “bed tramming” – a term that can be traced back to the more old-fashioned CNC machines.
Maintaining a trammed or leveled bed is a crucial part of ensuring good bed adhesion and consistent print quality. It may just be one of the few steps of regular maintenance that are considered the most important for good 3D printing performance.
Both ABL and UBL methods are versions of bed tramming that feature automation and the use of sensors. However, many experienced 3D printing users are also familiar with the manual process of bed tramming. This typically involves placing a thin object between the nozzle and the print bed and manually adjusting the level of the bed using the adjustment screws.
Manual bed tramming is a quick and effective method, but it cannot address issues related to beds that have already been warped. In such a case, ABL or UBL is considered the more appropriate solution.
Automatic Bed Leveling (ABL)

Automatic Bed Leveling (ABL) is a process that uses an automatic bed sensor to set the nozzle at a fixed distance from the print bed. The ABL method does not actually alter the level of the bed. Instead, an algorithm sets the nozzle height to account for minor variations in the print bed’s level.
ABL is a mesh-bed method. This means that it divides the print bed into several equal-sized sections and takes bed level measurements on these sections. The build surface is scanned, and the bed level data is used to determine the level of the print head during 3D printing.
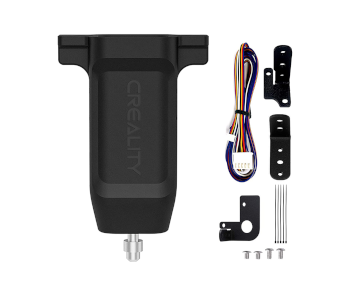
Central to the ABL process is the ABL sensor. This is a small sensor mounted to the print head that can use either inductive, optical, capacitive, or physical feedback to determine its distance from the print bed. The BL Touch sensor is the most widely used sensor for ABL, and it is compatible with a wide range of 3D printers.
Unified Bed Leveling (UBL)
UBL or Unified Bed Leveling is actually very similar to ABL that it can be tough to tell exactly how different they are. Just like ABL, UBL is a mesh-based method that automatically varies the nozzle height to account for discrepancies in bed level. UBL is a function that is available in Marlin firmware.
A key difference of UBL is that it uses a much more refined grid as the basis for level measurements. Most ABL methods use grids with 9, 16, or 25 sections. In UBL, the grid is typically at a magnitude of 81 or 100 sections. Just on this fact alone, a UBL grid can capture a higher resolution of deviations on print bed level.
You also technically do not need an ABL sensor to create a UBL mesh. Since this is a purely firmware-based method, it is possible to construct the grid using manual measurements. This is going to take a lot of time, but doing it with an ABL sensor is not quick either.
The essence of a UBL mesh is that the set of corrective parameters can be used several times. This is in contrast to a standard ABL mesh that needs to be re-measured when the actual values start to drift significantly from initial measurements. Since a UBL mesh is so fine, individual points can be tweaked to allow it to adjust to new conditions.
The downside, of course, is that setting up a UBL mesh can take a very long time compared to an ABL mesh. However, UBL meshes are long-lasting and do not have to be rerun for a very long time.
When to use ABL vs. UBL

ABL and UBL achieve pretty much the same results. It is a way to account for minor inconsistencies in bed level so that they do not compromise print quality or performance.
Of the two, ABL is the much simpler option. Initiating an ABL scan on your 3D printer firmware is fairly easy, and it does not take more than a few minutes. Starting at a small grid size is generally recommended for beginners. If you have not done any form of automatic leveling before, then a conservative ABL mesh should work best for you.
UBL has its uses, but it can a UBL mesh can be a pain to set up. With more probing points, it can also be a fairly huge time investment. Setting up a UBL mesh usually involves a greater degree of user intervention, so this is not something that we can recommend to beginners.
Overall, going the ABL route is the more practical option for most situations. Although ABL measurements may need to be repeated after a while, they usually do not take so much time to become bothersome. UBL is an excellent option if you want better control over your bed leveling grid, but it also needs more work and a better technical understanding of your 3D printer.
Final thoughts
ABL and UBL are both technologically advanced and sophisticated tools for maintaining a constant bed level. Such features are valuable if you want to avoid having to manually level or tram your bed repeatedly. They are also great for simulating a level print surface even when the print bed itself has been warped.
ABL is the simpler option of the two and the one that we would recommend to most users. Despite its limitations, ABL is fairly easy to implement, even for beginners who have never used a BL Touch sensor before. With more 3D printers including ABL as built-in features, it is quickly becoming the norm even for casual 3D printing.

