Best Settings for 3D Printing with ABS

As one of the toughest yet inexpensive plastics ever developed, ABS is also one of the most heavily used plastics in 3D printing. Despite this fact, ABS is also notorious as one of the most difficult to deal with. It’s often recommended that beginners stick to the more user-friendly PLA and PETG but working with ABS is a rite of passage that everyone needs to go through.
To help ease the task of overcoming this burden, we have compiled this list of best practices for 3D printing with ABS. There’s nothing new or exceptionally novel here – this is just a conveniently compiled list for your reference.
What problems to anticipate with printing with ABS
The best way to approach a situation is to know the problems you can potentially be facing. We’ll be taking this strategy in dealing with ABS by highlighting the most serious problems you’re likely to encounter and coming up with pre-emptive solutions.
Warping
Relative to other 3D printing filaments, ABS is a material that is often described as one that prints at high temperatures. While this gives ABS a characteristic heat resistance, it also makes it particularly prone to warping during the 3D printing process.
Warping is a natural consequence of the plastic material shrinking while it cools. This is especially pronounced with ABS because of the rapid temperature drop that the material experience once it is extruded and the fact that ABS becomes semi-solid way before it stops contracting. If you need your finished print to have accurate dimensions, you’ll have to plan for the effects of warping during the design phase.
Poor bed adhesion
The most common manifestation of warping in ABS is the base layer of the print lifting off the print bed, typically at the corners. This isn’t directly a fault of the material itself. In fact, ABS has high surface energy which bonds well with adhesives, paints, and other plastics.
To identify why ABS exhibits poor bed adhesion, we have to go back to the phenomenon of warping. When a material warps, it contracts across all directions. Ideally, the adhesive forces between the print bed and the base layer will counteract the thermal stress that this contracting effect creates.
However, this thermal stress tends to accumulate around sharp corners in the print’s base layer. This is the reason that failed ABS prints are typically characterized by corners that “lift off” or “curl” away from the print bed. Unfortunately, this can no longer be remedied and the print will have to be redone from the beginning.
Fumes
As anyone who has ever worked with ABS will readily tell you, it releases an unpleasant odor when it is heated. This isn’t just a matter of the smell being irritating – these fumes can have toxic compounds that can have long-term effects. This isn’t unique with ABS as 3D printing with plastics inherently causes respiratory hazards, but the importance of good ventilation is a lot more pronounced when working with ABS.
The best settings and printing parameters for ABS
Take note that implementing these measures provides no guarantee that your ABS print will proceed with no issues. There’s still a huge variability in the performance of 3D printers and 3D printing filaments that hitting the perfect combination of printing parameters typically still involved a good amount of trial and error.
What we are presenting here are generally accepted good practices when working with ABS. Even if they don’t yield perfect results, they should provide a good starting point for tweaking and fine-tuning your printer settings.
Print bed preparation
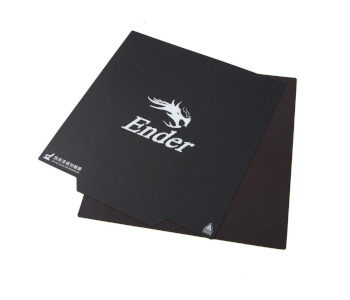
Since bed adhesion is an issue with ABS, it’s important that the print bed itself is as clean as possible. For printing with ABS, we recommend using a glass print bed because it heats more evenly and it’s easier to clean. We recommend buying borosilicate quartz glass cut exactly to the dimensions of your printer’s build platform.
To clean a glass print bed, simply wash it with soap and water. It’s best to air-dry it to prevent any pickup of dust. Be careful when handling the glass bed and make sure that you don’t get any oil on it from your fingers – wear latex gloves, if you must.
Before starting any 3D printing project, take a few minutes to run through your printer’s bed leveling protocol. Some printers can do this automatically, but it’s also little trouble to do it yourself. Simply place a thin sheet of cardboard or an index card between the nozzle and the print bed and adjust the bed leveling screws until the card can be held snugly across different points on the print bed.
Bed adhesives
Once you have the glass print bed cleaned and leveled, it’s time to apply some adhesive. This will greatly aid in bed adhesion and counteract the effects of warping.
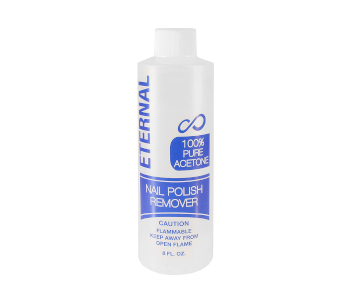
By far, the best adhesive to use with ABS is an adhesive that is also made with ABS. This is called either ABS juice or ABS glue. Either way, it is a solution made by dissolving small pieces of ABS in acetone. You can probably buy pre-made ABS juice but it’s much easier to just do it yourself.
If you don’t have acetone or can’t be bothered to mess around with solvents, the next best option is to use Kapton tape. This is a tape that’s very similar to painters’ tape in that it does not leave any residue when it is removed, but Kapton tape is a little more heat-stable. Apply a single layer of Kapton tape over the glass print bed, making sure that there no overlapping sections that will cause the print bed to be not perfectly flat.
We find that glue sticks get mixed results just because different brands of glue sticks have different degrees of heat stability. If you do have one lying around, then it won’t hurt to give it a try since it’s very easy to apply.
Enclosed print chamber
An enclosed print chamber isn’t a standard feature in many desktop 3D printers, but it can make a huge difference when printing with ABS. An enclosure doesn’t have to be fancy – you can make one out of PVC pipes, wooden slats, and plastic sheets.
The main purpose of an enclosure is to maintain an elevated temperature around the print chamber. By eliminating the cooling effect of exposure to the environment, you can slow down the rate at which the hot ABS cools down and hopefully temper the effects of warping.
The fact that an enclosure also helps slow down the spread of the unpleasant fumes that ABS emits is a nice little bonus. In some 3D printers with built-in enclosures, these fumes are filtered out before being vented to the atmosphere.
It hardly needs to be said but we’ll say it anyway – you should not have the cooling fan enabled when printing with ABS.
Bed temperature
A heated print bed is necessary when printing with ABS. Since the glass transition temperature of ABS is at around 105 C, setting the print bed a little higher – about 110 C – is recommended.
The purpose of the heated print bed is to reduce the effects of warping by halting the cooling process of the base layer and emitting additional heat for the rest of the print chamber. Keeping the ABS material above its glass transition temperature also keeps it from completely solidifying, retaining its malleability to slightly deform to absorb the thermal stress.
Extruder temperature
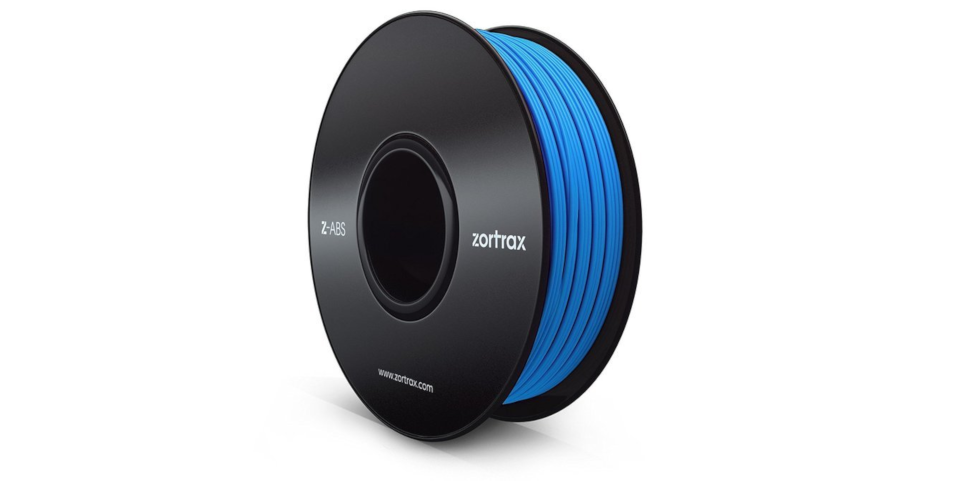
Most references indicate a range of 210 to 250 °C for the printing temperature for ABS. This is a very wide range that considers slight variations in the composition of different ABS filament brands. When in doubt, it would be best to go with the recommended values of your filament’s manufacturer.
If you’re having trouble getting your ABS prints to look good, then we suggest trying to print at the lowest possible temperature. This should reduce the effects of warping. However, you need to watch out for signs of under-extrusion such as small holes or gaps in each layer. Should this be the case, increase the extruder temperature in increments of 5 °C until these imperfections are no longer apparent.
First layer height and printing speed
Since we’re anticipating warping issues with ABS, it’s worthwhile to pay extra attention to the base layer. A common strategy is to increase the thickness of the base layer and reduce its printing speed.
Increasing the thickness of the base layer allows it to more firmly stick to the print bed. The common practice is to set it at 1.5 times the thickness of the other layers. This creates a ‘squishing’ effect on the base layer, significantly increasing its contact area with the print bed.
Reducing the print speed (about 70% of the normal print speed) merely gives the ABS material time to cool down and develop rigidity before the onset of increased thermal stress.
OPTIONAL: Raft or brim
If you still run into warping problems despite using an ABS adhesive, a heated printing bed, and a print chamber enclosure, then you can add a raft or a brim to your model using your slicer software. Both strategies serve to increase the contact area between your print’s base layer and the print bed to enhance bed adhesion. The downside is that you will inevitably end up using more filament to print a raft or brim, and this extra material will have to be disposed of later.
OPTIONAL: Remove sharp corners
This is quite an extreme measure to address warping mostly because it can affect the aesthetics of your finished product. As we’ve mentioned, thermal stress tends to accumulate around sharp corners just because they have nowhere else to go. This results in the characteristic ‘curling’ of these corners as the ultimate result of warping.
A drastic way to avoid this problem is to avoid sharp corners altogether. If you have the luxury of revising your model, you can turn those sharp corners into curved ones. The benefit of this approach is that it allows for more even distribution of thermal stress and should help avoid any occurrences of curling. Take note that the thermal stress will still be there, so the usual strategies of bed adhesion will still be necessary.
Final thoughts
ABS may seem like an intimidating material for 3D printing beginners, but it is one that you almost inevitably have to work with. It may be a bit more challenging to work with than PLA or PETG, but it’s really not that hard once you’ve learned the tricks.
The tips we have provided here should provide a good jump-off point for developing strategies specifically for your filament and 3D printer. Take note that every combination is unique – what works for one might not work for another. As long as you know which problems to anticipate and the science behind 3D printing, it shouldn’t take long to come up with a reliable 3D printing strategy.