ABS Not Sticking to Bed – How to Solve

Using a heated bed with adhesive and an enclosure can massively help in avoiding bed adhesion issues when 3D printing with ABS. You can also modify your slicer settings by adding a raft or brim or by increasing the infill density for the first bottom layers. A combination of these possible solutions will likely be needed – ABS is notoriously prone to warping.
Getting a perfect first layer is a literal foundation to a perfect 3D print. Achieving this, however, is much easier said than done. This challenge is further compounded when you use a filament as prone to warping as ABS. If you’re running into problems getting your ABS to stick to a print bed, then check out all the possible solutions below.
Why does ABS warp so easily?

Despite being a popular material for 3D printing, ABS also has a nasty reputation of being tough to work with. Getting a perfect first layer is difficult with ABS because of its tendency to warp, resulting in the corners of the first layer curling away from the build plate. What is it about ABS that causes this behavior?
The first factor is the accumulation of thermal stress in the material as it cools down. Although this is a natural phenomenon, ABS is more prone to this because of its high printing temperature. The larger thermal gradient generates more thermal stress. If left uncontrolled, this can cause deformation that is the principal symptom of warping.
Compared to PLA or PETG, ABS has low surface energy. This simply means that getting it to stick to other surfaces or materials is more difficult. There always needs to be some modification done to get ABS to stick reliably to the print bed so that it can resist the effects of warping.
This does not mean that ABS is the most difficult filament to work with. There are other 3D printing filaments that are just as complicated, or even less forgiving. Polypropylene comes to mind as an example of a filament that is even more prone to warping.
Working with ABS serves as a good introductory lesson to high-temperature 3D printing and how to deal with bed adhesion issues. If you can learn to print with ABS perfectly, you will be better equipped to handle the more stubborn filaments.
For the rest of the article, we will be going through all the possible solutions to get your ABS filament to stick to the print bed. Take note that you may need to combine several of these methods to be successful.
Level your print bed
Whenever you’re running into bed adhesion issues, the first area you should scrutinize is the print bed itself. Is it clean of any residual adhesive, dust, or oils? Is it free of any major dents or scratches? Any debris or surface imperfections can compromise adhesion with the print bed regardless of the type of filament you’re using.
It is considered good practice to level your print bed regularly. This helps ensure that you do not experience localized bed adhesion issues. Printing with a level bed also helps avoid several quality-related issues such as under-extrusion and a clogged nozzle.
If your printer has an automatic bed leveling feature, then there is no excuse not to run it before starting a new project. You can also do this manually by inserting an index card between the bed and the nozzle and making sure that the fit is snug but not too tight. It takes some practice to do this properly, but you can do this in less than 5 minutes.
Use a glass build plate
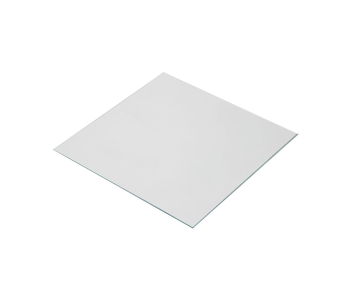
If you’re still printing with the stock build plate of your 3D printer, then we suggest trying to upgrade it with a borosilicate glass alternative. These are not expensive and should be easily available in any store that sells glass products.
What’s the advantage of printing on glass? For one, glass is a lot more robust than the usual build plates made of aluminum or polymer material. It does not scratch as easily and does not dent even when heated and cooled repeatedly. This makes glass a lot easier to clean up, whether you do it with soap and water or a solvent like acetone.
Another benefit of using glass is that it heats up more evenly. Conductive materials like aluminum tend to create “hotspots” centered around the heating element of the build plate. With glass, these hotspots are avoided, and more consistent bed adhesion can be observed.
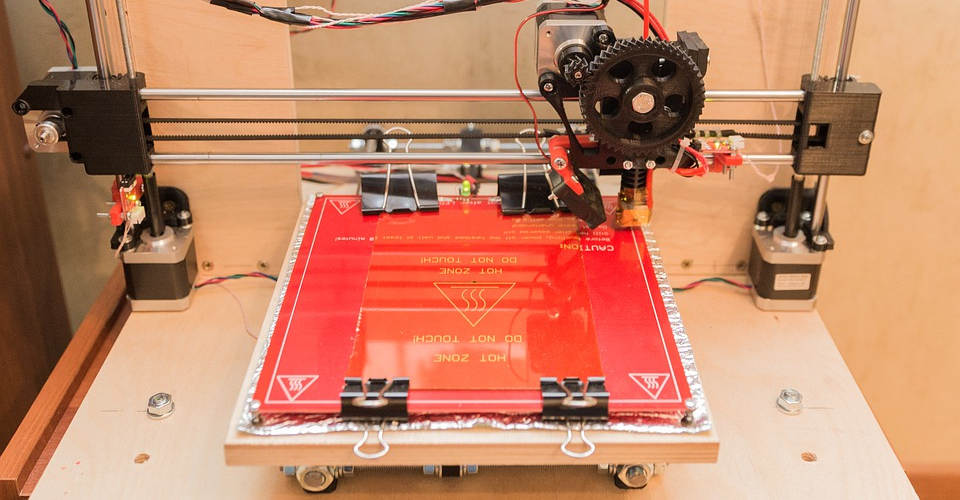
Use a heated build plate
The best tool you can use to prevent warping is a heated build plate. The goal of this build plate is to maintain the temperature of the first layer of ABS near the glass transition temperature. Not only does this help improve bed adhesion, but it also maintains the state of ABS that allows for redistribution of thermal stress.
The ideal bed temperature for ABS is anywhere between 100 to 110 °C. Take note that some 3D printers, particularly the less expensive ones, cannot attain this value of bed temperature. Before your print with ABS, make sure that your 3D printer is equipped to provide the ideal conditions for ABS.
One pitfall of relying on a heated bed for improved bed adhesion is assuming that all areas in the print bed are at the same temperature. If you have an infrared thermometer, you can quickly check the actual temperature of the different zones of the print bed. To avoid this, make sure to give the 3D printer enough time to pre-heat and try to place the base of your model on the bed’s hottest zones.
Apply adhesive to the print bed
The naturally low surface energy of ABS makes it pre-disposed to detach from the print bed. This becomes a warping problem because the deformation of the plastic as it cools down tends to pull the first layer away from the print bed, creating the characteristic curved corners of warped prints.
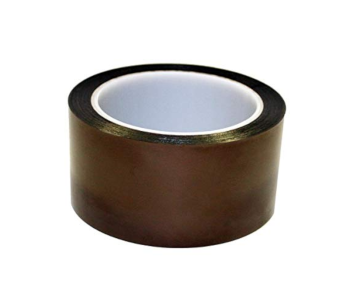
To enhance bed adhesion, a common practice in 3D printing is to apply an adhesive on the print bed. For ABS, you just need to make sure that the adhesive you will be using will remain stable when exposed to elevated temperatures. There are several good candidates – glue stick, hairspray, or Kapton tape are all valid options.
Many professionals would agree that the best adhesive for ABS is ABS juice. This is a solution that you can prepare by dissolving about 8 inches of 1.75-mm ABS filament in 3 oz of acetone solvent. You want the resulting solution to be slightly thicker than water but not like a paste. You can adjust the ratios accordingly to achieve the proper consistency. It is best to use naturally colored ABS for this.
A word of warning – it is possible to put too much adhesive on your print bed. Remember that you want your base layer to stick to the bed to prevent warping but not to stick too well that it becomes excessively hard to remove. Just try to apply a thin and even coat of adhesive on the bed, and make sure to clean off any residue before you work on your next project.
Turn off the cooling fan
Rapid cooling is one of the biggest culprits of warping. When filament cools down quickly, thermal stress accumulates without giving the material time for it to become redistributed. Not only can this cause warping, but it can also result in dimensional inaccuracy and distorted features.
To avoid warping of ABS, one of the first things you should check is if the cooling fan has been turned off for the entire print. Some people would say that it’s fine to activate the fan for the first few layers, but we find that this is an unnecessary risk. ABS has a high glass transition temperature and will develop rigidity even without the aid of a cooling fan.
Control the ambient temperature

Sometimes, just turning off the cooling fan is not enough. If the ambient temperature of your workshop is low, then the natural drafts could be enough to cool down ABS enough to cause warping. To prevent this, it would be best to print with an enclosure.
There are now many 3D printers that come with built-in enclosures. This is true even for the fairly inexpensive desktop-scale models. If you are yet to buy a 3D printer, this feature is something you may want to consider.
Don’t worry if your 3D printer does not have an enclosure. You can just make one yourself. There are lots of DIY instructions on making a 3D printer enclosure online using cheap materials like wooden sticks, PVC pipes, and plastic sheets. However, these materials are at risk of catching fire, especially considering the temperatures you will be dealing with when printing with ABS. You can also use heat-resistant materials like metal and glass but these are more expensive.
Rotate your model
An element of warping that is often neglected is the footprint of the model. This determines the total contact area of the model with the print bed. The use of this element is actually quite counter-productive – you want to rotate the model such that the contact area is reduced.
The reason for this strategy is that having a greater contact area also increases the effects of warping on the material. While it’s true that bed adhesion improves with a larger contact area, this effect is not enough to offset the increase in warping forces.
Print with a raft or brim
If the footprint of your model is too small, then there’s also a chance that its bed adhesion will suffer. However, increasing the footprint also increases the warping forces. How can this conflict be resolved?
An option you can explore is to add a raft or brim to your model. This increases the footprint of the model by printing sacrificial material on the bottom or around the bottom layer of the model. This technique enhances bed adhesion while retaining the model’s small footprint.
Take note that printing with a raft or brim will significantly increase filament usage for your project. You will also have to deal with removing that raft or brim during post-processing. For these reasons, this is not a very popular option for 3D printing users unless all other solutions have been explored.
Print with reduced infill
By now, we already know that using more material for the bottom layers of a model increases the warping forces and makes warping more likely. Aside from reducing the footprint of the model by changing its orientation, you can also try to print with fewer bottom layers and at a lower infill density.
Getting the perfect balance of bed adhesion and infill density is very tough because of how important infill density is to the mechanical integrity of the whole piece. We suggest sticking to a safe value of 15% to 25% and only adjusting if bed adhesion continues to be an issue despite all the other solutions in this list.
Final thoughts
If you encounter bed adhesion problems when printing with ABS, don’t be disheartened – practically every single person who has tried 3D printing has gone through the same experience. As tough as ABS may seem to use, it’s the perfect gateway to the more advanced level of 3D printing.
You don’t really need to come up with your own ways to solve the bed adhesion problem. It is a problem that has been encountered and resolved countless times before. All you need to do is to copy what other people have done and try to understand which solution works for your situation.