3D Printing with ABS: How to Set Up Your Print Bed

In the world of 3D printing, ABS has gained a reputation primarily for two things. The first is for being a robust material. ABS is tougher than most plastics, has excellent heat stability, is chemically stable, and can withstand a greater deal of repetitive impact.
The second thing it’s known for is being terribly difficult to work with. ABS warps heavily, leading to countless hours of frustration who choose to print with it. While there are many facets to resolving this issue with warping, we’re going to focus on only one part of the 3D printer – the print bed.
What’s the deal with ABS?
Warping is a problem that’s hardly unique with ABS. In fact, it’s a fairly common issue when it comes to printing with filaments that require high temperatures. ABS does get a bad reputation simply because it’s one of the most commonly used 3D printing filaments.
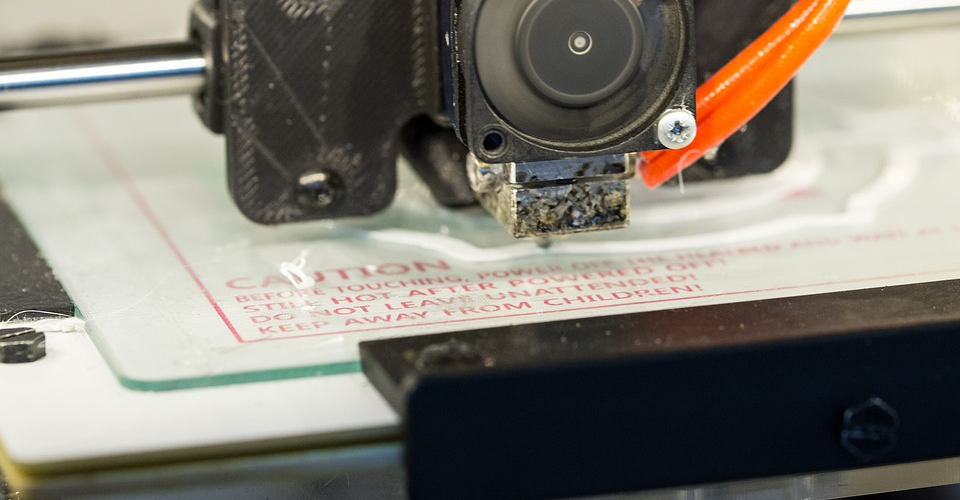
Warping is a byproduct of the large temperature difference between the filament’s printing temperature and the prevailing atmospheric temperature. Just like any material, ABS expands when it is heated and contracts when it is cooled down. The cooling process starts as soon as the filament exits the nozzle and gets laid down on the print bed. The large temperature gradient means that this cooling down process proceeds very quickly.
The base layer of a print will naturally stick to the print bed, especially if it has been treated with an adhesive. However, the thermal contraction of the material as it cools down will oppose the force that compels the layer to stick to the bed. This thermal stress builds up as more material is extruded onto the print bed, most of which accumulate around the sharp corners of the model.
Warping occurs when the accumulated thermal stress becomes too much for the adhesive forces to counteract. This typically results in the corners of the print’s base layer lifting off the print bed. This ruins the overall dimensional accuracy and visual appeal of the model. A warping issue is simply unacceptable, especially for professional 3D printing projects.
The approach to avoid warping is two-fold – reduce the thermal stress and improve the bed’s adhesive properties. The print bed plays an essential role in achieving these goals, as we shall see later on.
Use a glass print bed

If you don’t have a glass print bed, then go get one before you print with ABS. A glass print bed is simply a sheet of glass that you can clip onto your existing bed. Make sure you get one that is made of borosilicate glass, as these have a more consistent composition and smoother surfaces. Any sheet of glass that is 3 to 4 centimeters will do. You should be able to get a sheet of glass cut to the exact dimensions of your 3D printer at any respectable shop.
There is a multitude of benefits you can get with the simple addition of a glass print bed. Because of low thermal conductivity, glass heats up uniformly, albeit also quite slowly. However, this also means that glass can better withstand changes in temperature without experience drastic or sudden cooling.
Borosilicate glass has a very smooth surface that provides a better medium for ABS to stick to. This also helps prints remove much more cleanly and results in perfectly smooth bottom surfaces.
Clean the bed before use
Any residue on the print bed, especially oils from your fingers, can drastically reduce the effectivity of bed adhesion. Even residual adhesive would be problematic as it will prevent you from getting a print bed surface that is perfectly even.
For this reason, it’s highly crucial that you always clean your print bed before use. The nice thing about a glass print bed is that you can simply remove it from your 3D printer and run it under the tap with some soap. That should remove even the most stubborn residual adhesives. Let the glass bed dry completely.
Handling the glass bed and installing it onto your 3D printer without leaving fingerprints is quite tough. Should there be any residual oils on the glass bed, a quick wipe with some acetone should sort it right out.
Use an appropriate adhesive
Now that we’ve got a clean, even bed that responds well to heating, it’s time to apply some adhesive. A good adhesive will help keep the base layer of the base sticking to the print bed. This is a brute force method that uses adhesive properties to directly counteract any accumulation of thermal stress in the material.
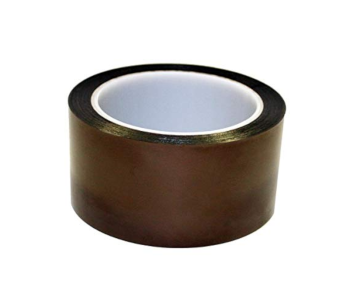
In selecting an adhesive, you must keep in mind that the print bed will be heated to temperatures much higher than usual. Thus, you must choose an adhesive that maintains chemical stability at elevated temperatures. This quickly narrows down the selection – hairspray and Kapton tape are two of the most common options.
What we find most effective is ABS glue, which is an adhesive made by dissolving ABS filament in some acetone. The best thing about ABS glue is that you can just make it yourself. The typical recipe is 100 centimeters of ABS filament dissolved in 50 mL of acetone. It might be easier to make your own ABS than to buy a commercially prepared one, as they are quite rare.
Regardless of which adhesive you end up using, remember that less is more – a very thin layer often yields better results.
Level your print bed
One of the things you need to make sure is that as much of the base layer as possible comes in contact with the print bed. This stresses the importance of avoiding gaps or uneven layers by perfectly leveling your print bed just before printing with ABS.
The good news is that most 3D printers available today, even the desktop-scale ones, come with some sort of automatic or semi-automatic bed leveling feature. Even if this isn’t the case, it’s easy enough to level your bed manually with just a piece of an index card or cardboard.
To manually level your bed, start by setting the height of the nozzle to the zero or home position. At this level, the index card should just be able to slip between the nozzle and the bed with minimal resistance. Move the nozzle around the bed at random points while doing the index card check. If there are spots that are too loose or too tight, you can simply adjust the height of the print bed by turning any of the adjustment screws.
Manual print bed leveling is easy, but it can take time. Adjusting one corner of the bed may affect all other corners, so you may have to move your nozzle around several times to get the perfect fit. There are a lot of 3D printing experts who stand by the manual leveling method, saying that it produces much more consistent results. We suggest that you give it a shot.
Heat the bed to the appropriate temperature
The last step coincides with the beginning of the 3D printing process. The objective of printing on a heated bed is to reduce the temperature gradient of the filament as it exits the nozzle, slowing down the cooling process and reducing the generated thermal stress. The heat from the print bed also increases the overall temperature of the platform, especially if you have a bed enclosure.
Remember that putting a glass print bed on top of your build platform will greatly increase the time needed to achieve a uniformly heated bed. The appropriate bed temperature for ABS is 110 °C, just a notch higher than its 105 °C glass transition temperature. At this temperature, ABS is just fluid enough to enhance bed adhesion but is not quite soft enough to deform.
Final thoughts
The measures we’ve listed here are by no means a complete list of the steps you can take to reduce warping when printing with ABS. There are a lot that we have not mentioned here – ensuring proper extrusion temperature, removing sharp corners from the model, and printing with a brim or raft, among others.
In any case, what you do with to prepare the print bed is highly essential to avoid warping. More than just a platform for the print to stand on, the print bed acts as the anchor to which it binds to. The biggest challenge is getting that first layer right – get that out of the way, and you should be golden