How to do Acetone Vapor Baths for Smoothing of 3D Prints

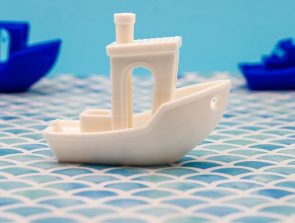
Making your own 3D prints is great fun but coming up with something professional looking means that there’s more work to be done after the actual printing step. Due to the working principle of Fused Deposition Modeling (FDM) printing, 3D prints innately come out with layer lines. If you want your FDM print to come out with a perfectly smooth finish, you will have to do some post-processing.
Acetone vapor baths are one of the most popular and reliable ways to get a smooth finish in 3D prints. What is the principle behind this process? How is it done? Read on for our comprehensive guide on acetone vapor baths.
What filament materials can be smoothed using an acetone vapor bath?
The bad news is that acetone vapor baths don’t work for all types of 3D printing filaments. On the flip side, an acetone vapor bath is the perfect smoothing solution for the super-popular ABS. There are also other filaments that work well with acetone, including HIPS, PMMA, ASA, and Polycarbonate.
Other filaments are simply unaffected by acetone or are prone to get damaged by it. If you are working with PLA, then head on over to our detailed guide on how to finish or paint your PLA print.
How does an acetone vapor bath work?
To simplify the discussion, let’s assume that we are working only with an ABS print. ABS is highly soluble in acetone. In fact, dissolving ABS in acetone is how you get ABS glue. The idea of immersing your ABS print in acetone vapor is for the outermost layer of the print to dissolve, effectively hiding the imperfections of the original print.
Why not just wipe the surface of the print with acetone? Or quickly dip the print in acetone? While these are perfectly valid alternatives, it is hard to get the level of uniformity of finish that you can get with a vapor bath by directly applying acetone to the surface of the print. Direct application of acetone also tends to result in drip marks or run-off channels forming being incorporated into your print’s surface, which will look unforgivably bad.
The main idea behind doing an acetone vapor bath is the slow and controlled manner in which the acetone vapor will melt away your print’s surface. This allows you to step in at any moment since you probably still want to preserve some of the details in your print. Vapor also has the advantage of being able to get into the smallest nooks of your model, so you always end up with a uniform finish.
Steps on smoothing your 3D print using an acetone vapor bath
If it sounds like doing an acetone vapor bath will work for your print, then it’s time to roll up your sleeves. This procedure was crafted so you’ll only need to use items you have lying around the house (aside from the acetone, probably). First, gather all the things you will need:
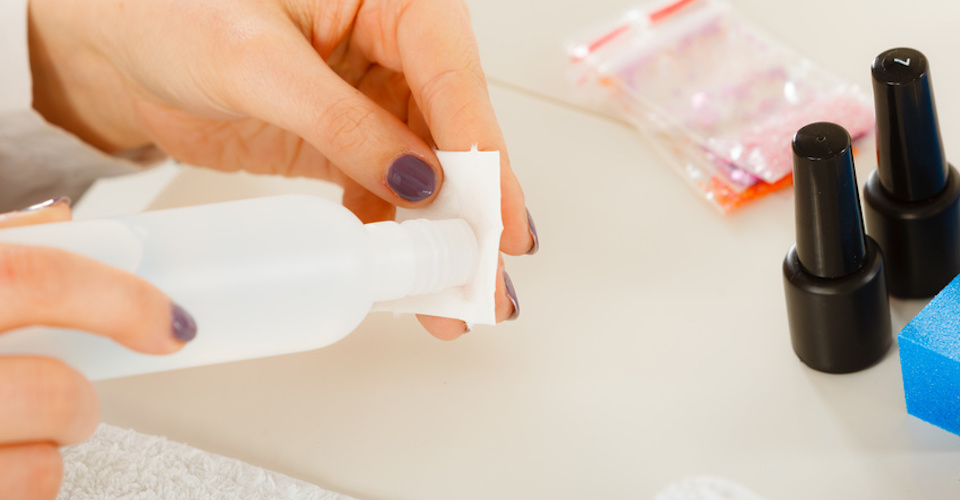
- A small bottle of 99.5% acetone (you are only going to need a small amount)
- A plastic tray
- A small metal platform where you can place the model on
- A drinking glass
- Paper towel
- Timer
This procedure assumes that you are working with a print that is small enough to fit into a drinking glass. Should your print be bigger, then you are going to need a bigger, acetone-proof container. Glass is recommended so you can keep an eye on your print as the vapor bath proceeds. In any case, you only need to scale up the whole process for larger prints.
To begin, place the metal platform on top of the plastic tray. The print will then be placed on top of this tray, so that it does not come into contact with any excess acetone that drips into the plastic tray. Ensure that the print is in a stable position, as falling off the platform can permanently ruin it.
Stuff the paper towel on the bottom of the drinking glass, ensuring a snug fit, so it does not fall off when you turn the glass over. Pour the acetone into the paper towel, just enough so that the paper towel is completely wet but not soaking. Turn the drinking glass over the plastic tray, completely enveloping the print atop the metal platform.
The acetone vapor bath will start at this point. Acetone is a highly volatile compound that readily turns into vapor even at this room temperature, and this vapor will slowly fill the inside of the drinking glass. Some of the acetone vapor may escape through the bottom of the inverted glass – you can line this space with additional paper towels soaked in water.
Start the timer and check your print in 15-minute intervals. As time goes on, you should notice a sheen developing on the surface of your print as the acetone melts away its rough edges. Depending on how rough the initial print was and how big your build is, the smoothing process can take between 15 minutes to an hour.
This is the most important thing to keep in mind once the acetone vapor bath has started: you need to stop the bath when you think that the smoothing process is about halfway done. Even when you remove the print from the container, the residual acetone that remains on the surface of the print will continue to melt away the ABS. Wiping it off is not an option, as you are bound to make marks on the print’s surface. The smoothing process will only stop once all the acetone in the print’s surface has vaporized away.
Once you remove the print from the acetone bath, keep it in a dust-free spot as the melted surface can easily entrap loose dust particles. At this point, the structural integrity of your print is likely to have been severely compromised, so handle it with care. After about 30 minutes, the surface of the print should have developed a more solid ‘skin’ that is impervious to dust. At this point, you may speed up the removal of residual acetone by pointing a fan on your print.
Depending on the size and complexity of your print, the whole process of removal of acetone can take several hours to a few days. Just be patient – all the hard work is over, and you only need to wait.
Important tips
Smoothing ABS prints using an acetone vapor bath is a relatively easy method because it’s mostly passive, but you will be handling somewhat hazardous chemicals. Don’t be complacent, and always practice proper safety precautions.
1. Do it in a well-ventilated area
As we mentioned, acetone easily turns into vapor even in room temperature. The moment you open the bottle of stock acetone, a small portion of the vapor starts to escape and can readily be inhaled. When you remove the drinking glass to retrieve your print, it releases a significant amount of acetone vapor near you. Acetone vapor has a very solvent-like smell that can be irritating for some people, although you’ll need to inhale a large amount for it to be hazardous to your health.
The more pressing hazard of acetone vapor is due to its flammability. In the presence of an open flame, acetone vapor can burn very quickly. This is why it’s recommended to do this process in an open or well-ventilated area where acetone will not accumulate.
2. Wear proper PPE
Inhalation may not be a huge concern but coming into contact with acetone can cause your skin to become red and irritated. Acetone vapor can also be irritating to the eyes, causing a burning sensation. Short, intermittent exposures with acetone are fine, as you’re not likely to suffer any long-term consequences. However, wearing gloves and goggles is well worth the effort so that you can avoid irritation on your hands and eyes.
3. Use high-quality ABS
This is not at all related to safety but can have significant consequences on the quality of your finished print. Cheap ABS filament typically comes with additives composed of other plastics, which may not react similarly to acetone. Prints made with these filaments, when subjected to an acetone vapor bath, tend to come out with pock-marked surfaces since some of the plastics do not end up dissolving. To be sure, get your ABS filament only from well-known and reputable manufacturers.
Final thoughts
Finishing your 3D print to get a smooth finish takes it from good to great. Learning how to finish your prints is a useful addition to your set of skills, especially if you’re aiming to use your 3D printing abilities professionally.
Fortunately, smoothing ABS prints via an acetone vapor bath is an easy and almost effortless process. It does involve handling of potentially hazardous acetone but keeping yourself protected is not difficult at all. Best of all, smoothing via a vapor acetone bath produces consistent and reliable results. Once you get the hang of the process, you can easily adjust the time it takes to get the level of smoothness or detail that you want.