AEB and HDR: What are They and How are They Different from Each Other?

Even before camera drones were a thing, we already had excellent digital cameras, and DSLR cameras that were beginner-friendly yet came with an array of professional features. The experience of the camera industry proved to be very beneficial to camera drones, as many of them were able to integrate the many innovations that camera manufacturers have worked on through the decades.
Two features that have become increasingly common for modern camera drones are AEB and HDR. If you’ve ever owned a camera or smartphone in the last ten years (and who hasn’t?), then you’ve probably seen these acronyms on your device’s interface. What do AEB and HDR do, and how are they related?
What is AEB?
AEB stands for Auto-Exposure Bracketing. By the “Auto” qualifier, this also means that there is such a thing as Manual Exposure Bracketing also exists, but we’ll get to that later. The AEB feature has been around for a long time, but what exactly does it do?
For professionals, taking the “perfect shot” typically doesn’t mean taking just one shot. They have a lot of things to contend with – moving subjects, bright glares, unflattering shadows, and lighting that is generally not perfect.
There are a lot of elements in every image, and not all of these elements receive an equal amount of lighting. This is where the difficulty lies. Focusing on one area of a still can serve to white out another area and darken others. Either way, the result is the same – you lose out on details and vibrancy of colors.
Exposure bracketing, in general, is a method by which you capture several shots of the same scene set at different exposure levels. This is typically done in three’s: a normal exposure shot, an over-exposed shot, and an under-exposed shot. These images are then combined in post-processing, choosing the best areas from each shot to create a composite image that preserves as much of the details as possible.
As its name implies, manual bracketing achieves this effect manually. This means that it’s up to the photographer to take the first shot, adjust the exposure, take another shot, and repeat the process until they are satisfied. This is the way that the technique was done before AEB became a thing.
The problem with this process is that it takes a really long time to finish a single shot. During that time, subjects may move, lighting conditions can change, or the camera may shift ever so slightly. Any of these issues can be problematic when it’s time to stack the images on top of each other.
Simply put, AEB mode does all of the grunt work for you. Different cameras have different ways of executing AEB, but they usually provide options for how many shots to take and the different exposure levels for each shot. You then only need to press the shutter once, and the camera will take multiple shots.
The output of shooting in AEB is a series of images at different exposure levels. You would then need to transfer these images to your PC and combine them using a professional photo editing tool. Adobe LightRoom seems to be a popular choice. These extra steps take a bit of time and a bit of skill in the part of the photographer, but the results are certainly worth the effort.
PROS
1. More control
Since the creation of the composite is entirely in your hands, you will have better control of how the final image turns out. There may be parts of the image that you’d like to pay special attention to, or you may retain a bit of contrast for dramatic effect.
2. Bracketed shots are conserved
Since the individual shots at different exposure levels are retained in your workstation, it’s possible for you to repeat post-processing indefinitely. If you or your client aren’t satisfied with how the composite image has turned out, then it’s a great relief that you can always go back to the original shots. No photographer likes to do reshoots – they are costly, time-consuming, and very frustrating.
CONS
1. Slow and tedious process
There’s a price to pay for the control that AEB mode gives you over the quality of the final image. Since post-processing has to be done manually, it will take up more time and will mean additional work for you. If you run a photography business, you will need to take into account the cost of the photo editing software.
2. No real-time preview
Cameras with AEB mode can only show how the captured images look like at different exposure levels. The untrained eye can’t perceive much from over-exposed and under-exposed shots, so there’s really no way for a photographer to confirm how good the composite shot is going to look like. If you’d rather have the peace of mind knowing that you’re satisfied with the final shot, or if your client demands to see how the final shot will look like while you’re still doing the shoot, then an AEB feature might not be what you need.
3. Takes up more space
AEB does no on-site stacking of photos. Instead, it saves three to five photos each time you press the shutter. This means that your microSD card will also be filled up three to five times faster. If you’re going to be shooting in AEB, then it would be prudent to have a couple of extra microSD cards with you.
What is HDR?
HDR stands for High Dynamic Range, a feature more typically found in modern digital cameras, smartphones, and camera drones. It serves the same function as AEB, which is to even out the exposure levels in an image. It also works the same way. When HDR mode is activated, your camera takes several shots in rapid succession at different exposure levels.
The critical difference of HDR from AEB is that HDR uses a built-in algorithm to combine the images automatically. Different cameras have different algorithms, and the output quality of one camera may be vastly different from another.
Obviously, HDR is much more convenient than AEB. However, there are several good reasons for why AEB is still around, and for the fact that many professional photographers still use AEB more often than HDR.
PROS
1. Allows real-time preview and quick sharing
HDR produces a composite image almost instantly, which allows you to check the quality of your work while you’re still doing the shoot. This is very useful if you’re worried about having to do reshoots. Shooting in HDR mode is also the go-to tool for quickly sharing your work with your client or on social media.
2. Less work and time needed
If you’re contented with the output quality of HDR shots, then there’s virtually no post-processing necessary. With all the hard work handled by the camera itself, you won’t have to spend any additional time or effort in editing the photos.
3. Less storage space needed
When the camera creates the HDR image, the composite images are typically saved in JPG format, and the individual shots are erased automatically. In fact, you might not even be able to see the over-exposed and under-exposed shots. This saves a lot of storage space, so you won’t need to switch out microSD cards quite as often.
CONS
1. Output quality is typically lower
Stacking of the photos in HDR is done via the camera’s algorithm. Aside from setting the parameters of HDR mode, there’s not really much that you can do to influence the quality of the composite HDR image. More often, the output of HDR pales in comparison to what you can achieve by manually editing AEB images. Of course, this will largely depend on your skill as a photo editor. However, the difference in quality is enough for most photographers to decide that shooting in AEB is worth the extra time and effort.
2. Bracketed images are gone forever
Since the individual bracketed images are deleted every time a composite HDR image is created, there’s really no chance for you to go back to them later and repeat the image stacking process. You can’t go backwards on an HDR image. Should you realize that you’re not satisfied with the way that an HDR image turned out, then you have no chance but to shoot it anew.
Which camera drones have AEB and/or HDR?
AEB and HDR are typically used in photos of landscape and scenery because of the vastly different lighting conditions between the land and sky. If you’ve done any sort of aerial photography, then this dilemma may sound very familiar to you.
With this in mind, many modern camera drones have been outfitted with either an AEB or HDR feature. If you’re interested in exploring this technology for aerial photography, then check out our recommendations for drones with AEB or HDR,
Drones with AEB:
1. DJI Spark

One of the cheapest and most beginner-friendly drones from DJI, the Spark has a rudimentary AEB mode that only uses a one-stop exposure difference when taking several photos. The one-stop limitation makes this drone much less versatile in handling more extreme lighting conditions, but the Spark isn’t exactly the kind of drone that professional drone photographers go for. It’s a fun feature for playing around or showing off in social media.
2. Autel Robotics EVO
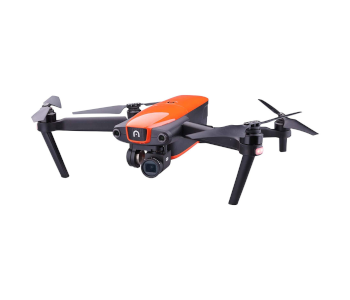
The flagship ultra-portable drone of Autel Robotics comes with an easy-to-access AEB mode that can be set to capture either three or five photos. The feature is simple, unsophisticated, and offers a little more versatility than the Spark. However, the EVO also costs around twice as much as a Spark.
3. Yuneec Typhoon H3

Yuneec has been a bit late to the party in terms of equipping their camera drones with AEB but has finally gotten around to it with the recently released Typhoon H3. A collaboration between Yuneec and Leica, the Typhoon H3 has one of the best cameras found in drones with its 1” CMOS sensor, lossless digital zoom, and Leica-optimized image modes.
Being a relatively new product, there’s no word yet on how well the AEB function of the Typhoon H3 has been implemented. The Wide Dynamic Range (WDR) feature should certainly help the camera capture more detail, even on the under-exposed and over-exposed shots.
Drones with HDR:
1. DJI Mavic Air
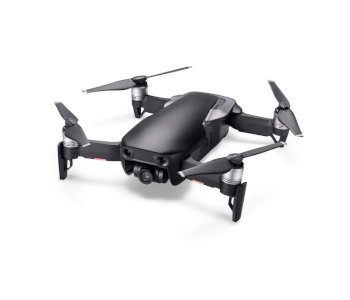
Up first is the most basic DJI drone to have an HDR feature, the Mavic Air. This lightweight and foldable drone is a very powerful tool for professional photography. Not only does it provide an option for automatic HDR composition, but you can also choose to capture a five-image AEB if you prefer post-processing your photos. As we’ll soon see, this dual AEB-HDR feature has become the norm for modern camera drones.
2. DJI Mavic 2 Pro
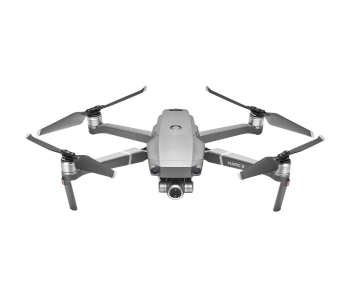
The Mavic 2 Pro isn’t just an excellent ultra-portable camera drone – it may be one of the best camera drones in the market today. The 1” CMOS sensor captures a ton of detail and gives the Mavic 2 Pro’s camera a Wide Dynamic Range. As you’d expect, this feature translates well to the quality of the drone’s HDR output. Better yet, you can also choose to capture three-image of five-image AEB for post-processing.
3. Parrot Anafi
The Parrot Anafi is one of only a few non-DJI drones to come with an HDR feature. It does not have an AEB mode, although it’s still possible to do manual bracketing using its metering tool to adjust the exposure. Unfortunately, the HDR output quality of the Anafi looks underwhelming. HDR photos tend to come with a lot of noise, and the colors look vivid to the point of being unrealistic.
Still, we’re glad to see Parrot thrown their hat in the proverbial ring and give DJI some worth competition. It’s not too late for the Anafi, either, as the issues on HDR output quality can be easily solved with a firmware update.
Final thoughts
The AEB and HDR features are some of the most powerful camera modes that professional photographers keep in their arsenal of tools. They are particularly critical in aerial photography because there’s a lot of detail that you want to show, which is seemingly impossible with just one exposure setting.
A word of warning: not every shot needs to be done on AEB or HDR. Contrast is good sometimes, especially when you’re playing around with shadows and silhouettes. Much like any other tool, knowing when to use AEB or HDR is the key to maximizing its potential. Try and check if your smartphone has this feature – maybe it’s time to give it a spin.