Anet A8 Upgrades

The Anet A8 is one of the cheapest 3D printers on the market. It comes in a kit and sells for less than $200 at most online stores, giving budget-conscious beginners the chance to learn about 3D printing without breaking the bank. While far from perfect, the A8 is a decent budget 3D printer that offers long-term value – but not without upgrades and mods.
Simply put, the Anet A8 in stock form is an unsafe and very limited 3D printer. If you want it to be a more stable and more capable machine, you must upgrade the core parts and augment it with mods. And we don’t mean just a few changes here and there; we’re talking about a top-to-bottom upgrade that will turn your A8 into a different machine.
Sounds like a lot of work, right? Well, the good news is you can print most of the mods on the A8 itself, driving down your expenses. Here are the best Anet A8 upgrades and mods, separated into different categories:
The Essentials
These are the most important upgrades for the A8, the ones that can mean the difference between a safe 3D printer and a 3D printer that can burn your house down. Go for these upgrades first before you consider any fancy upgrades such as an integrated camera and wireless connectivity.
Marlin Firmware
The A8’s default firmware is not safe, and one of the chief reasons is that it has the thermal runway protection disabled, which could result in a hardware failure and even cause the A8 to catch fire. It’s essential that you upgrade to a safer and more stable firmware as soon as possible. While Marlin is the most recommended firmware for the A8, Repetier is also a good option.
MOSFET
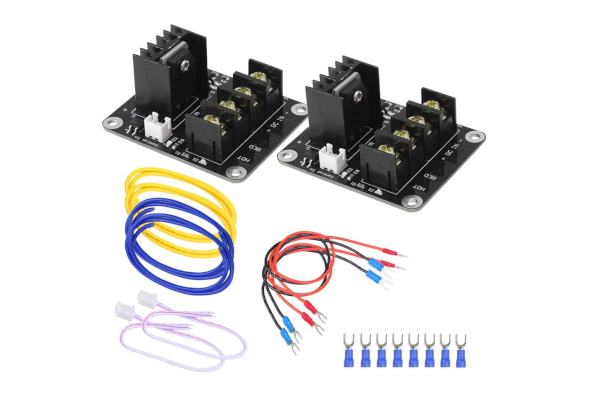
A MOSFET add-on is a mandatory upgrade for the A8. The stock A8 mainboard can’t handle the amount of power the default heated print bed draws, especially when printing with materials that require sustained heating for an extended period. If the mainboard becomes overloaded, the A8 could catch fire. That’s why an external MOSFET is an essential A8 upgrade. It acts as a safeguard and prevents the mainboard from being overwhelmed by the power draw of the heated print bed.
Although some owners install one, a second dedicated MOSFET for the extruder, which also has a heating component, is not necessary for safety purposes. Compared with the heated print bed, the A8 mainboard can easily handle the power draw of the extruder. Installing a MOSFET, which sells for less than $20, is easy enough, even for beginners, thanks to online resources.
Power Supply Unit (PSU)
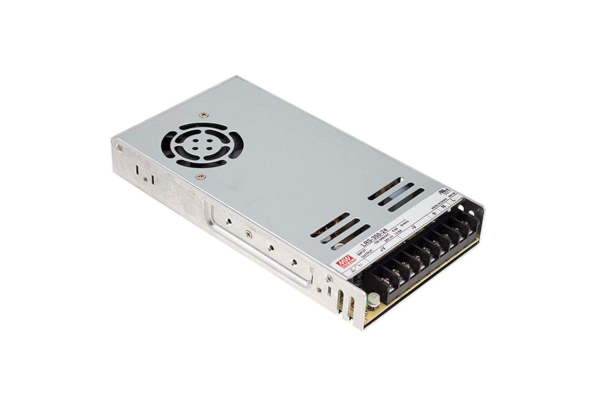
Most cheap DIY kits based on the popular Prusa i3 design are limited to PLA at the onset. Sadly, the A8 is in the same boat, coming in with an underpowered PSU not built for high-temperature prints. If you plan to print with high-temperature materials, it is recommended that you switch to a PSU more fit for the job – such as the Mean Well LRS-350-12 PSU, which sells for around $40. But whether or not you plan to print with high-temperature materials like ABS, Nylon, and PETG, replacing the stock PSU with a more capable one is a sound investment.
Performance/Quality Improvement Upgrades
In its stock form, the A8 is a limited 3D printer with serious performance and quality issues. The following set of upgrades will improve the stability, versatility, print quality, and overall performance of the A8. Some of these can be 3D-printed on the A8 while others are store-bought.
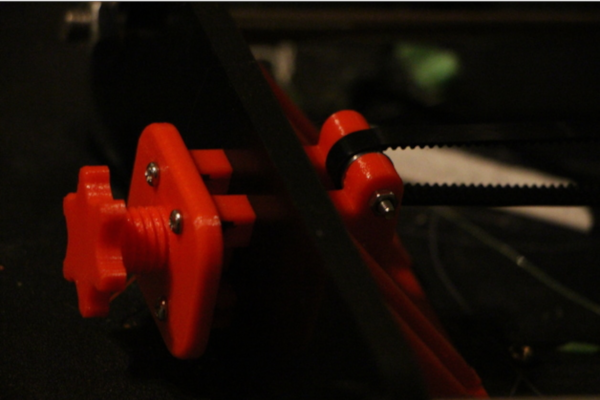
Belt Tensioners
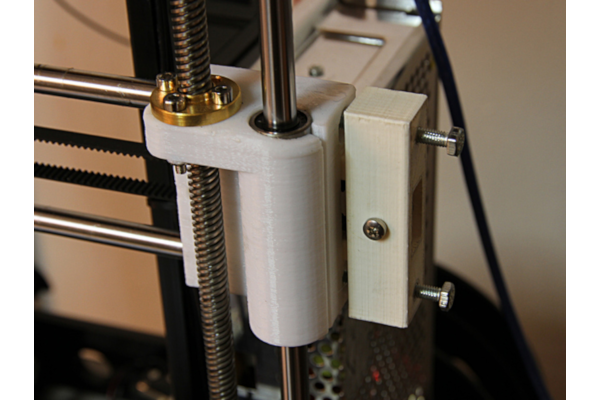
Thingiverse: https://www.thingiverse.com/thing:1683070
Thingiverse: https://www.thingiverse.com/thing:1959208
Belt tensioners or tensioning devices on the X-axis and the Y-axis keep the belts in optimum tightness, improving the print speed and print quality. With belt tensioners mounted on the machine, you can also easily adjust the tightness of the belts. But keep in mind that the addition of a belt tensioner on the Y-axis will put more strain on the stock frame, so install a brace first before you mount a tensioner. Moreover, we recommend that you replace the stock belts since they will stretch out at a faster rate due to the increased tension.
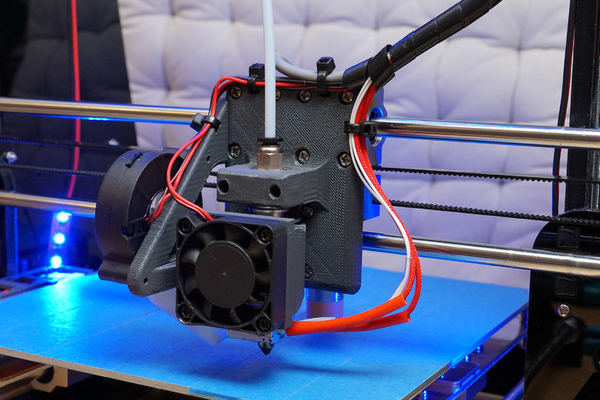
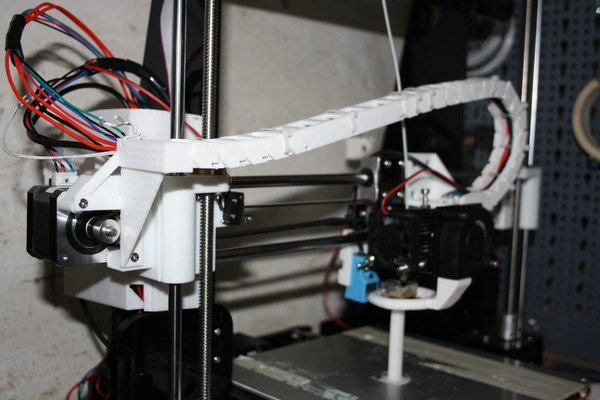
Bowden Feeder System
Thingiverse: https://www.thingiverse.com/thing:2099577
The A8 has a direct feeder system, which means the print head carries more weight, affecting the overall print speed. If you want a boost in print speed, you can switch to a Bowden setup. There are several Bowden mounts available on Thingiverse, with the modular Bowden mount designed by TNS being one of the most popular. However, a Bowden setup also comes with some caveats, so make sure to consider its pros and cons before you make the switch.
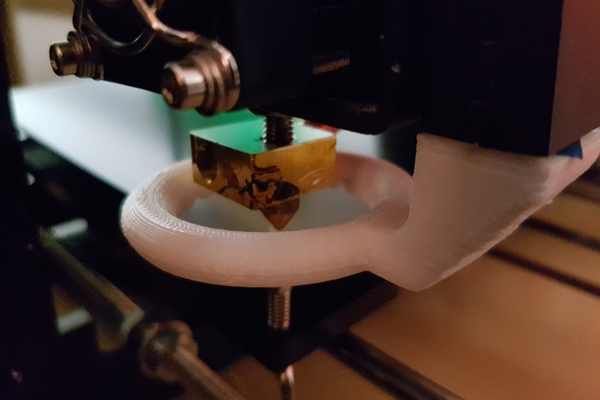
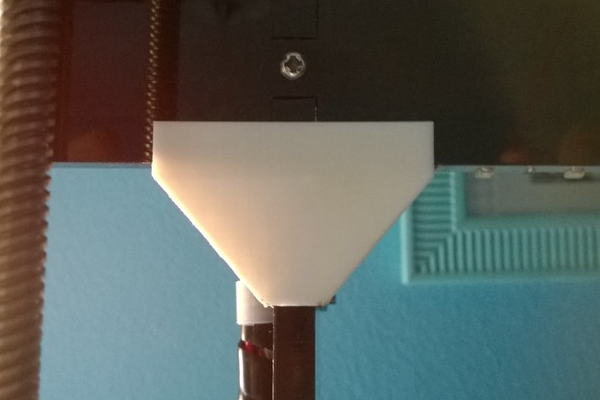
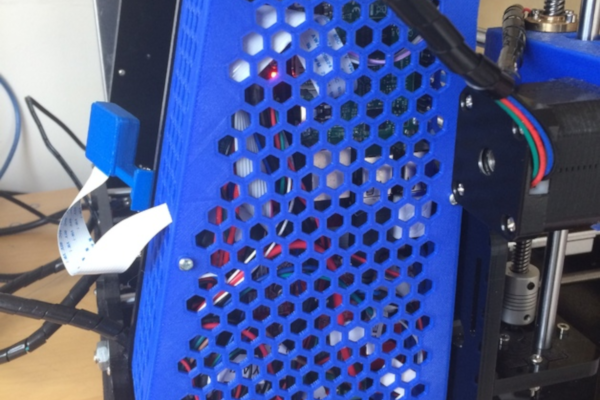
Center Nozzle Fan
Thingiverse: https://www.thingiverse.com/thing:1620630
The Center Nozzle Fan mod for the A8 looks like an inverted burner that forms a ring around the nozzle, with a series of holes on the inner rim. It acts as an extension of the extruder cooling fan, serving as a more focused, all-angles cooling system that helps improve the overall print quality. A half-circle version of the mod is also available on Thingiverse.
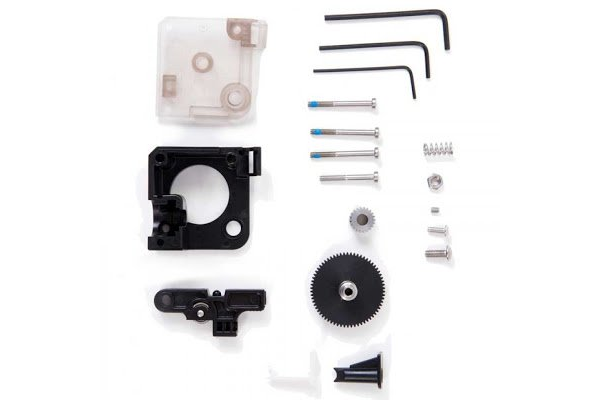
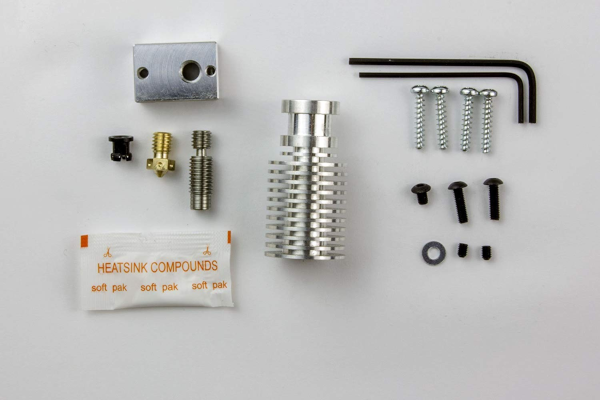
E3D Extruder and Hotend Upgrade
https://www.amazon.com/dp/B01F5Z3TRA
https://www.amazon.com/dp/B00NAK9JFO
With the stock extruder, the A8 can produce decent prints with PLA. Once more advanced materials enter the picture, its limitation becomes exposed. The default extruder is inadequately equipped to handle exotic and high-temperature filaments such as ABS, Nylon, PETG, and TPU.
The most recommended way to extend the A8’s material compatibility is to replace the stock extruder setup with an E3D Titan extruder coupled with an E3D v6 hotend. With both upgrades, the A8 can print with a much wider selection of materials and becomes less prone to filament clogging. The entire upgrade is going to cost more than $100, though, so make sure you got money to spare.
Fiberglass-reinforced Belt
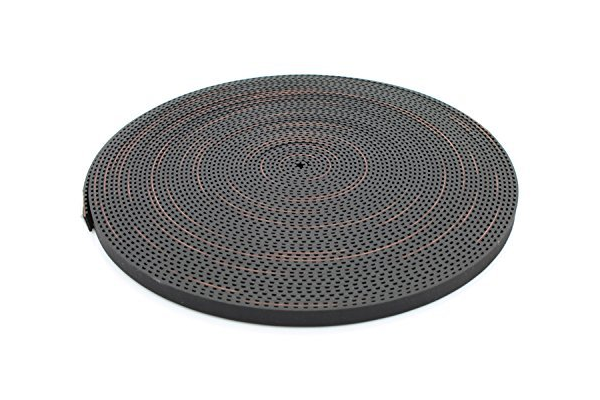
The stock belts on the A8 are poor in quality and won’t last for a long time, especially when a tensioner is mounted on both axes. They stretch out easily, with or without a tensioner, affecting the overall performance of the 3D printer. We recommend that you replace the stock belts with fiberglass-reinforced belts as soon as possible. Since a 5-meter fiberglass-reinforced belt is available for less than $10, this upgrade won’t cost you a significant amount of money, unlike with the extruder upgrade. With better belts, the A8 will run smoother and quieter.
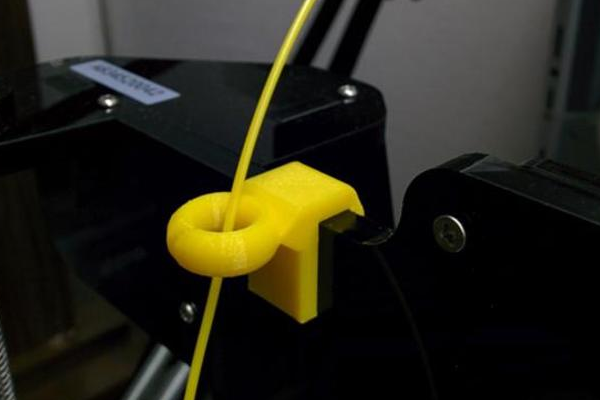
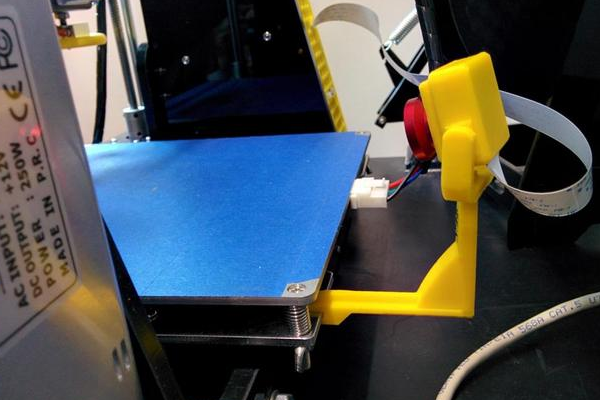
Filament Guide
Thingiverse: https://www.thingiverse.com/thing:1764285
Considering the poor cable management on the frame and the stripped-down profile of the machine, it’s not surprising the A8 doesn’t have a filament guide to keep the filament flow organized. A dedicated filament guide addresses that issue. With a filament guide mounted on the frame, the A8 will have a smoother and more organized filament flow. It’s a simple mod that can make a significant impact on the performance.
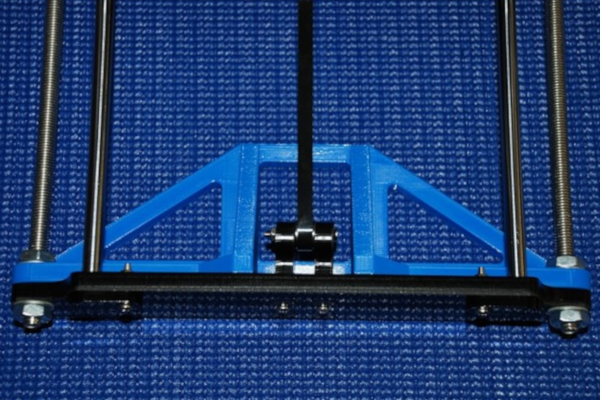
Frame Braces
Thingiverse: https://www.thingiverse.com/thing:1857991
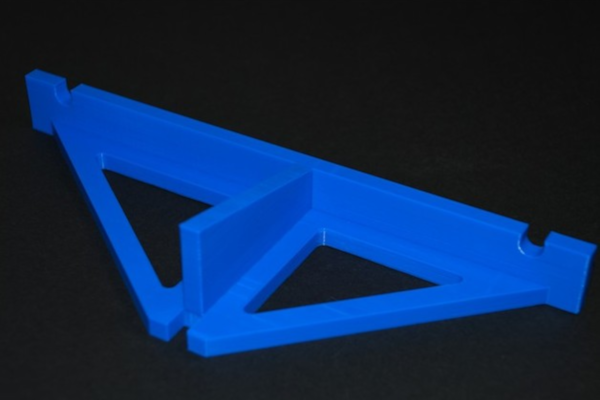
Thingiverse: https://www.thingiverse.com/thing:1852358
Thingiverse: https://www.thingiverse.com/thing:1672959
Similar to most other cheap Prusa-based 3D printers, the A8 has an unstable frame, which affects the overall print quality. To make the A8 a more robust and stable machine, you can build a pair of braces for the front and rear ends and a T-corner brace for the Z-axis, all of which are found on Thingiverse and can be easily mounted on the A8.
Linear Bearing Upgrade
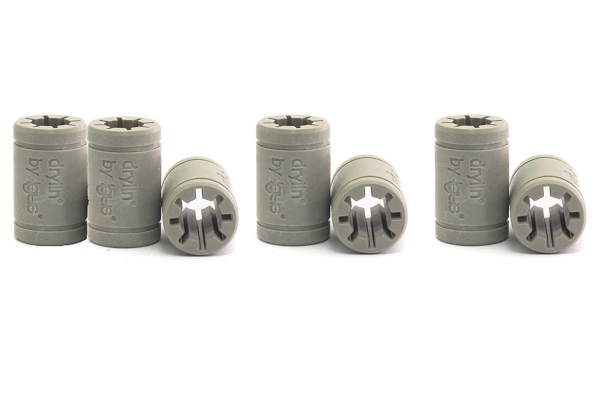
One of the most notable drawbacks of the A8 is that it has a high noise level. That’s pretty much an automatic caveat for a cheap 3D printer with an open structure. But the open frame is not the only reason for the A8’s high noise level; the stock bearings are also culprits. If you want your A8 to be a lot quieter, replace the stock metal bearings with the solid polymer bearings from Igus. The bearings are self-lubricating and allow for a significantly smoother performance. The best part is that you don’t need to spend a lot of money to get your hands on a pack of Igus bearings: a pack of seven costs less than $10.
Print Bed Upgrade
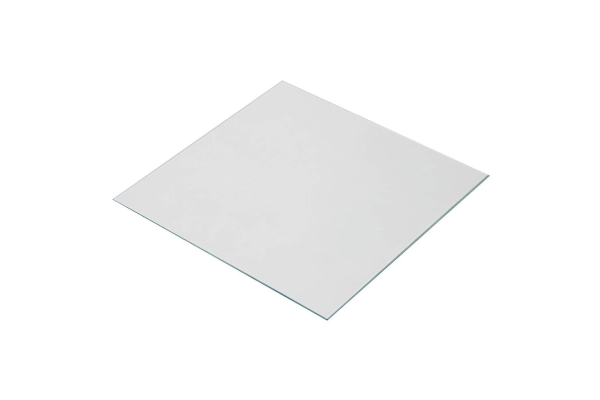
If you want an easy-to-clean build platform with a flatter surface, switch to a glass print bed. It’ll cost you around $10-30, depending on the brand. But like with the Bowden feeder system conversion, switching to a glass print bed also comes with a few negatives, the most notable is the slow heat distribution. Whether or not you switch to a different print bed, it’s also recommended that you add an extra pair of wires to the bed connector, for safety purposes.
Upgrades for User Convenience
These are the upgrades that add more convenience to the user experience, the ones that can make the A8 easier to manage and use. What upgrades you install depends on your budget and preference, but we highly recommend that you get at least the auto-level sensor and the power switch.
Auto-level Sensor
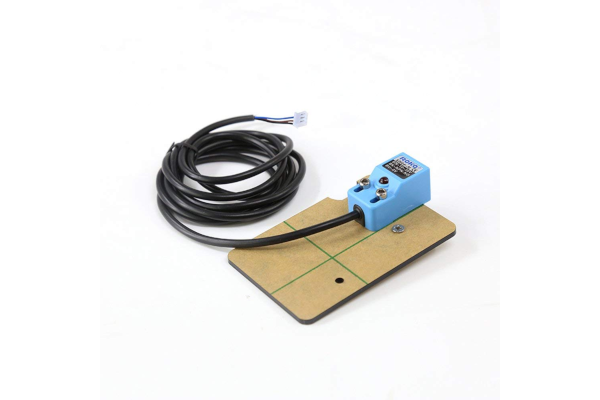
A manual bed leveling system can be a pain to deal with, especially for beginners. It can easily stretch the initial print bed calibration from 10 minutes to one hour. That’s why users feel relieved when a 3D printer comes with auto-leveling technology. The A8, sadly, has a manual system, which is unsurprising considering the price point. The good news is that you can simply install your own auto-level sensor, but make sure it works well with whatever type of print bed you got on your A8.
Bed Thumbwheel Upgrade

Thingiverse: https://www.thingiverse.com/thing:2350276
As previously mentioned, a manual bed leveling system can be a pain. If the bed thumbwheels are difficult to turn and uncomfortable to grip, the entire process becomes even more of a hassle. To make the manual bed calibration more bearable, replace the default thumbwheels with a new set of 3D-printed ones.
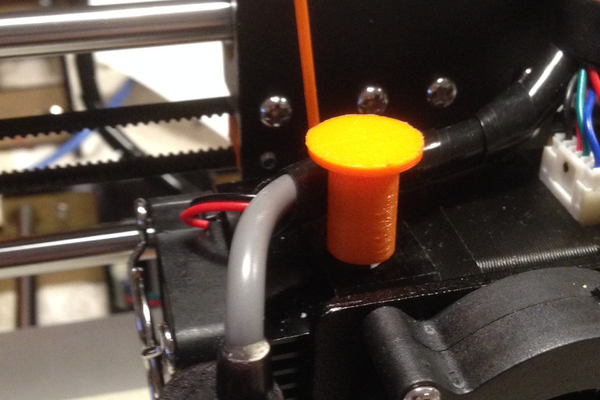
Extruder Button
Thingiverse: https://www.thingiverse.com/thing:1935151
Small mods can also significantly improve the user experience. Take the extruder button upgrade from dryas on Thingiverse, for example. It’s a modest upgrade the A8 can print in no time at all, even at 100 percent infill. It makes the filament changing process easier and, crucially, more comfortable for your fingers.
Power Switch
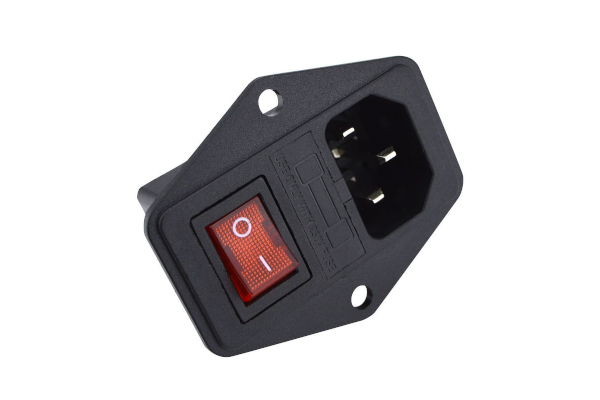
The A8 is so cheap that it doesn’t even have a damn power switch. The only way to turn it on and off is to plug and unplug it, which is rather crude. Outfitting the A8 with a power switch is easy enough, not to mention it won’t cost you more than $10. No need to get fancy. Just go for a simple power switch you can easily connect to the A8.
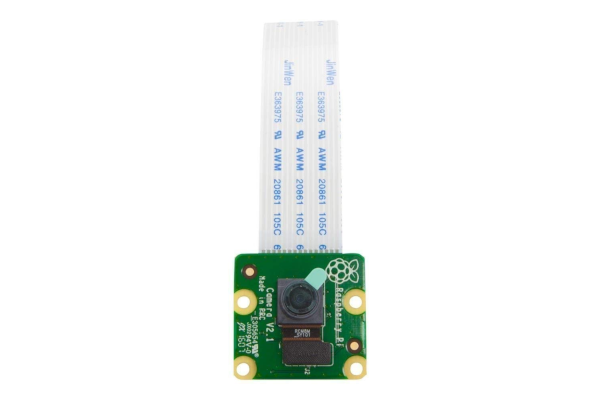
Raspberry Pi Camera Module v2 and Bed Mount
Thingiverse: https://www.thingiverse.com/thing:1867549
Like many other 3D printers today, the A8 is compatible with OctoPrint, which allows you to control and monitor your machine remotely. Considering the issues open-framed 3D printers come with, such as the noise level and the material odor, being able to manage the A8 from another room is a big plus. What makes the remote control setup even cooler is the addition of the Raspberry Pi Camera Module v2, which allows you to actually watch the print progress from afar. Of course, the camera module is uncovered and has no actual mount for the A8, so you need to build your own.
Aesthetic Upgrades
The A8 is not the prettiest 3D printer on the market. It has an open structure with poor cable management, which makes it look more like a failed science experiment than an actual working machine. But with these mods, you can make the A8 look more appealing and organized.
Cable Chains
Thingiverse: https://www.thingiverse.com/thing:1905344
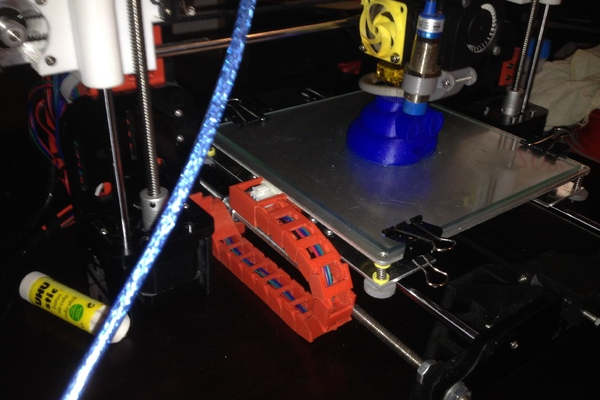
Thingiverse: https://www.thingiverse.com/thing:1874802
As mentioned, the A8 has poor cable management. But with a pair of cable chains for the X-axis and the Y-axis, you can keep the messy cables in check, translating to a more organized frame. It’s a lot better than simply wrapping the cables with an electrical tape or something.
Cooling Fan Cover
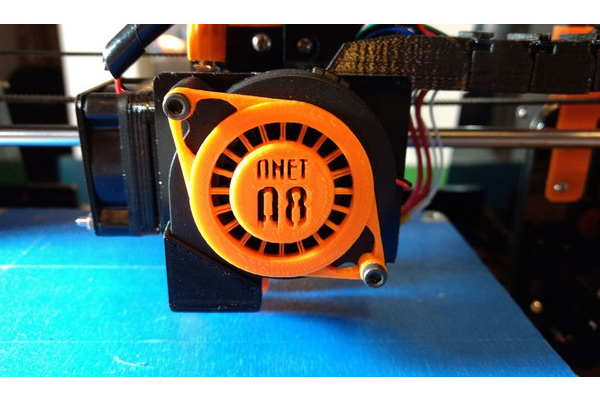
Thingiverse: https://www.thingiverse.com/thing:2357501
The Cooling Fan Cover is a pretty straightforward mod that doesn’t require a lot of explanation. It’s an easily printable mod that covers the cooling fan on the print head. It’s got an “ANET A8” branding at the center, which adds to its overall appeal.
Electronics Case
Thingiverse: https://www.thingiverse.com/thing:1767285/
The A8 has exposed electronics, which is not safe, but you can easily remedy that issue by creating an electronics case. One of the most popular electronics cases on Thingiverse is the one designed by c_wolsey, which also includes a mount for an OctoPrint-enabled Raspberry Pi camera setup. It’s a good alternative to the standalone camera mount mentioned in the previous section.
M8 Nut Cap
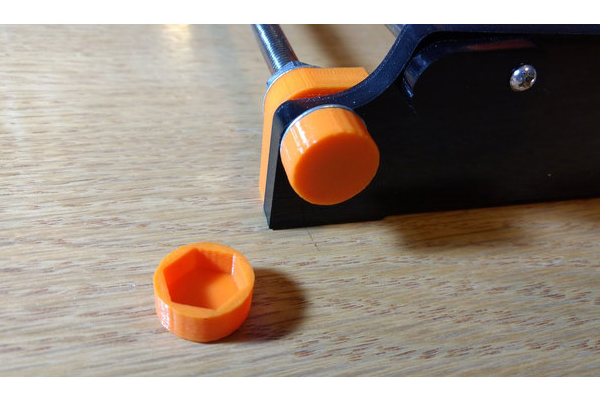
Thingiverse: https://www.thingiverse.com/thing:2357524
The M8 Nut Cap mod has only one purpose, which is to cover the exposed nuts and bolts on the A8. Feel free to pick a color that matches with all the 3D-printed mods on your A8. Unlike the Cooling Fan Cover mod, which is also from Puddlefist, the M8 Nut Cap does not have the “ANET A8” branding, for obvious reasons.
MOSFET Holder
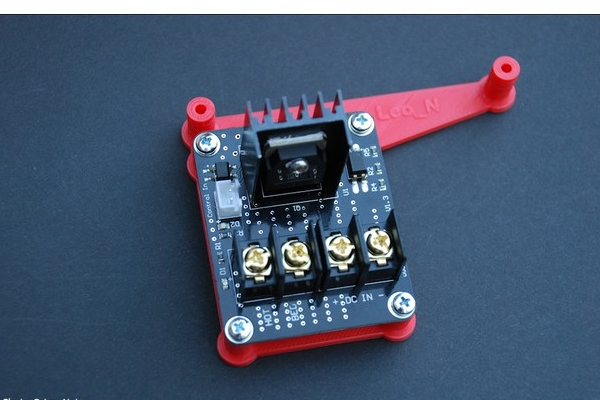
Thingiverse: https://www.thingiverse.com/thing:2018906
The MOSFET Holder by Leo_N on Thingiverse is exactly what it sounds like. It’s a small object you can use as a mount for an external MOSFET, which is one of the most important A8 add-ons. It has no trouble mounting onto the default frame and comes in two versions: one for a MOSFET placed in a horizontal position and one for a MOSFET in a vertical position.
Power Supply Cover
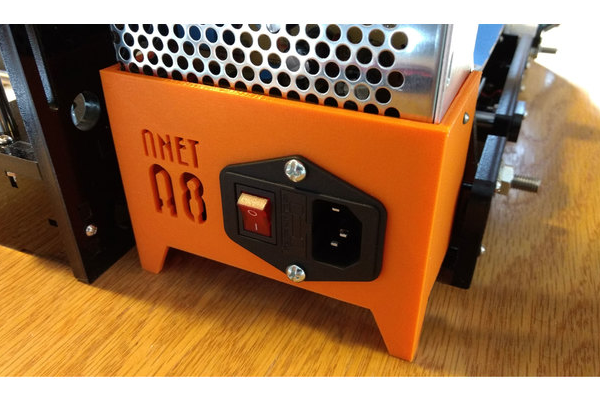
Thingiverse: https://www.thingiverse.com/thing:2320216
The Power Supply Cover is yet another mod designed by Puddlefist, the creator of the Cooling Fan Cover and the M8 Nut Cap mods mentioned above. Like the MOSFET Holder and the Electronics Case, this particular upgrade is self-explanatory. It serves as a holder for the PSU, with an opening for a power switch and the same “ANET A8” branding seen on the Cooling Fan Cover.
Advanced Upgrades
These are the kind of upgrades you might not want to try until you have a full understanding of the ins and outs of the A8 and 3D printers in general. Considering the costs and the time required for the installation, going for these upgrades is like building a brand-new machine, but the reward is more long-term value.
Aluminum Frame Upgrade
Thingiverse: https://www.thingiverse.com/thing:2263216
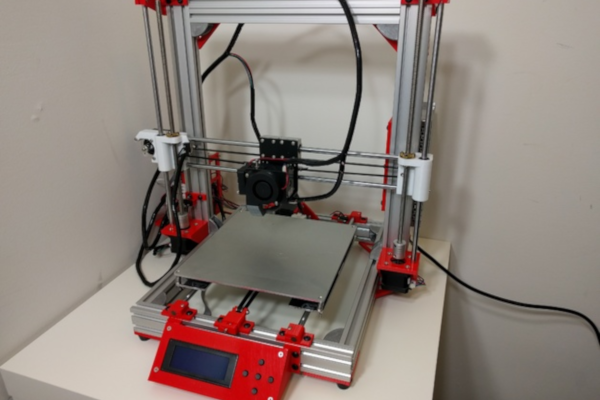
The A8 comes with an acrylic frame, which is a huge turn-off for a lot of people. To make the A8 more durable, more stable, and more equipped to handle high-temperature prints, you need to convert the stock acrylic frame into an aluminum frame. It’s a lot harder than it sounds, partly because the measurements of the metal parts must be on point; otherwise, the leftover stock parts may not fit. The good news is that converting the A8 into a metal-framed 3D printer won’t cost you a lot of money compared to the controller board upgrade.
Controller Board Upgrade
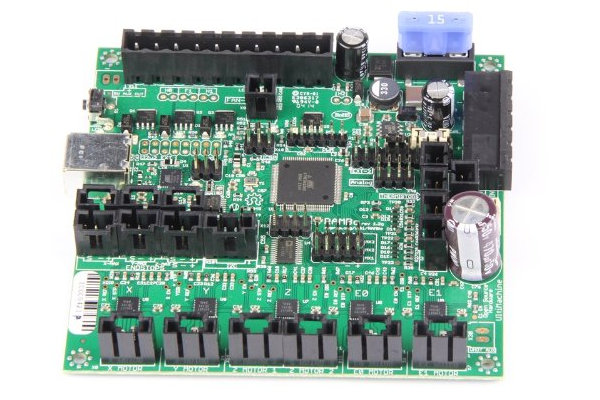
The A8’s stock controller board is not exactly built for the long haul. It’s good enough for a few months of regular printing, but ultimately, you’ll want to switch to a more capable controller board. There are several options on the market. One of the most recommended controller boards is the UltiMachine Rambo, which sells for over $150; in case you forgot, a brand-new A8 costs a similar amount of money.
You have all of these very abbreviated suggestions that are fairly good but it would be a lot nicer if you could get into a more descriptive mode, accompanied with pictures, like where the Mosfet is to be located on the frame and how they are mounted and similar notations on other upgrades. Just saying!!