Annealing PLA: What Is It and Why Do it?

Those who have worked in the manufacturing industry have probably heard of annealing but will still be surprised that it can also be used for 3D printing. After all, annealing is a process developed and mostly applied to metals. However, the fundamentals of annealing can also be used to enhance PLA, one of the most common 3D printing materials.
How exactly does annealing PLA work? Can the same technique be used for all PLA filaments, or even with other 3D printing materials? Check out this guide on how you can make your PLA prints better using just simple equipment.
What is PLA annealing and how does it work?
PLA is one of the most popular materials used in FDM-based printing because of several reasons. It’s fairly inexpensive, comes from sustainable sources, and is relatively easy to work with. It has become a favorite for 3D printing beginners and a staple part of the inventory of experts.
Despite being popular, most would agree that PLA filament is far from perfect as a 3D printing material. Because PLA prints at low temperatures, it also has poor heat stability. If you left a PLA print inside a car on a hot day, you would probably come back to it heavily deformed. PLA is also not known for having exceptional impact resistance and tensile strength.
Annealing is a way to partially address these deficiencies. Although annealing is more often discussed in the context of metalworking, the fundamentals of the technique are similar for both metal and plastics.
Annealing is a process in which the material is exposed to a moderate amount of heat for a limited period. This results in the grain of the material restructuring and forming a more “crystalline” form. This works particularly well for PLA as it a naturally semi-crystalline polymer.
Gentle heating and slow cooling are the hallmarks of the annealing process. This is an antithesis of the rapid heating and cooling that the material undergoes during 3D printing. Because PLA has so little time to cool down, its grains take on a more unstructured or “amorphous” form.
The formation of a crystalline structure helps PLA gain better mechanical properties. Annealed PLA is stronger, more rigid, and has better heat stability. All the while, it retains its advantage of being a more sustainable material for 3D printing and a lot easier to work with for beginners.
The annealing process for PLA
Annealing is a form of post-processing. This means that it requires no special 3D printing method or equipment – just print with PLA as normal. Once your PLA print has completely cooled down, it’s time to start the annealing process. You will need only three things:
- An electric oven
- A thermometer
- A stopwatch
The process starts by pre-heating the oven to a temperature between 65 to 70 °C. This is very close to the glass transition temperature of PLA, emphasizing the importance of using an oven with precise temperature control. Make sure that you get a stable temperature reading on your oven before moving on to the next step.
Place the finished PLA print inside the oven, along with a thermometer. Place the thermometer as close as possible to the print without directly touching it. It would be best to place these items on top of an aluminum tray with a silicone lining. Annealed PLA tends to stick to the surface it is standing on.
Allow the print to stay inside the oven for a prescribed annealing time. This can vary depending on the dimensions of the model. You can also expect some variation in annealing performance from one filament brand to another. You will likely have to do a bit of trial and error to perfect annealing time. A good starting point is 30 minutes of every half-inch of the thickest side of the object.
After the prescribed time, turn off the heat of the oven. Leave the oven unopened with the print inside it. This will ensure that the material cools down as slowly as possible, allowing for the growth of larger crystalline structures. This is a crucial step in gaining the greatest benefits from the annealing process.
Pros and cons of PLA annealing
PROS
Better mechanical strength
As in metalworking, going through annealing for PLA significantly increases its overall strength. Based on the results of some experiments, annealed PLA can bear more than 20% higher weight than standard PLA before failing. This is a huge advantage if you need to 3D print projects designed to carry loads – applications that weren’t quite right for PLA in its base form.
Better heat stability
The glass transition temperature of PLA is at around 65 °C. At this temperature, PLA becomes soft enough to deform and unable to carry any load. This has severely limited the possible applications of PLA, instead giving the advantage to more heat-resistant materials like ABS or Nylon.
With annealing, one can increase the heat deflection temperature of PLA up to more than 100 °C. This refers to the temperature at which a material starts to deflect when stressed by a specified weight. In terms of this specific parameter, annealed PLA almost equally rivals ABS.
Retains all the benefits of working with PLA
A huge point in favor of annealed PLA is that it gives you all those added benefits without making any changes to the 3D printing process. You can still print with PLA as usual, enjoying the ease of not having to worry too much about warping. You also won’t have to deal with the unpleasant fumes associated with ABS and the added energy of having to print at higher temperatures.
CONS
Takes more time
Annealing does not affect the 3D printing process – it’s an entirely separate process on its own. You’re likely to spend an extra hour or two for every PLA print if you subject it to annealing. This probably isn’t an issue if you’re just working on a single project at a time, but what if you have an order for a few dozen 3D printed parts? Annealing will take more time and work – both things you’ll have to plan for if you’re producing at a massive scale.
Will likely require some trial and error
Unfortunately, getting the best results out of annealing isn’t something you can nail down easily. You will have to consider factors such as the brand of filament used, the fill density of the print, and the dimensions of the object. You also need to play around with both annealing temperature and time. Generally, better properties are obtained when annealing at higher temperatures. However, there are also consequences to watch out for – as detailed in the next point.
Can cause distortion of details
Annealing can happen at any temperature between a material’s glass transition temperature and its melting temperature. For PLA, this is a wide range from 65 °C to around 180 °C. Theoretically speaking, you are bound to get a PLA print that’s stronger and more heat-stable if you anneal it at higher temperatures.
The downside to this approach is that PLA also tends to deform more heavily at higher temperatures. This is bad news if your model has a lot of details or if you have very specific size targets for your part. With this delicate balance in mind, we recommend annealing somewhere in the range of 65 to 70 °C.
Does annealing also work for other filament materials?
As we know at this point, annealing results in dramatic improvements for the properties of PLA. But does this also apply to other filaments? Can we get the same results by annealing Nylon, PETG, or ABS?
To answer that question, we’ll have to go back to the fundamentals of annealing. The reason that PLA benefits so much from annealing is that its polymer structure allows its chains to organize into a more crystalline structure. This is an advantage of dealing with compounds that are naturally semi-crystalline, such as PLA and Nylon.
At the other end of the spectrum are naturally amorphous polymers like ABS and PETG. Because of their structure, both these polymers simply cannot attain a more crystalline formation. However, they still benefit from annealing – but only marginally. By softening the materials and cooling them down slowly, annealing helps in redistributing thermal stress in an ABS or PETG print, slightly improving their mechanical properties.
This has been tested repeatedly in experiments, showing that PLA outperforms both PETG and ABS in terms of improvement after annealing. It is for this very same reason that annealing PLA has gained quite the popularity in the 3D printing community.
Which PLA filaments are compatible with annealing?
Theoretically, all PLA filaments should be compatible with annealing. However, there are particular filament brands that are marketed as being particularly “annealing-compatible.” These PLA variants are designed to be more resistant to warping, allowing them to be annealed at temperatures higher than usual. This also results in better properties after annealing.
If you want your annealed PLA to be as good as possible, then we recommend the following products:
FilaCube High Temperature PLA
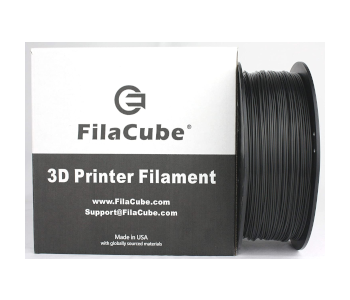
The High-Temperature PLA (HTPLA) filament from FilaCube delivers on a higher heat deflection temperature of up to 85 °C – but only after annealing. Fortunately, this filament was designed specifically for annealing and can handle temperatures of up to 130 °C without deforming.
Take note that FilaCube states that the part can still shrink in the X and Y-axes and grow in the Z-axes after annealing. The distortion is minor but is something you might want to plan for during the modeling phase. According to users of the filament, adjusting the size of the model to 104% in the x and y dimensions and 99% in the z dimension does the trick.
FilaCube offers the HTPLA in a limited selection of colors. It’s more expensive than standard PLA but isn’t prohibitively expensive for you to take for a spin.
3D PrintLife High Strength Annealable PLA
The Advanced PLA (APLA) filament of 3D PrintLife was manufactured using InGeo’s 3D860 material. When annealed at temperatures between 110 and 115 °C, APLA gains properties that can rival that of standard ABS.
The APLA filament is available in clear, silver, or blue color options. Aside from the standard 1-kilogram spools, 3D PrintLife also sells the filaments in small 100-gram coils. This is excellent for those who want to experiment with annealing PLA first without a large cost commitment. This is a good thing, too, because the APLA is significantly more expensive than standard PLA and even the HTPLA from FilaCube.
HATCHBOX PLA
Just to be clear, the PLA filament from HATCHBOX isn’t specifically designed for annealing. However, it benefits from a large user base, a good number of which have tried annealing the material. From the results so far, it seems like HATCHBOX PLA is a good candidate for annealing.
There are no official guidelines on how to anneal this particular PLA brand, so we advise playing it safe and setting it at temperatures between 70 to 80 °C. Reasonable distortion along all axes can also be expected, and you may have to adjust your models accordingly.
The nice thing about using a “standard” PLA filament like this one from HATCHBOX is that it does not cost a lot and you can always just back out off your annealing experiment anytime. This may be a good option if you’re not completely convinced that annealing can benefit you, or if it’s just something you want to casually explore.
Final thoughts
PLA might not be known for being a resilient 3D printing material, but annealing is a way for it to overcome its natural limitations. Fortunately, annealing is not a particularly difficult technique. With just some simple equipment, you can transform your PLA print into one that can rival the mechanical properties of ABS or PETG.
Take note, however, that annealing only alters the structure of PLA – not its chemical composition. This means that annealed PLA may lack resistance to the deleterious effects of other chemical compounds and the outdoor elements.