The New Anycubic Vyper 3D Printer – Beginner-Friendly at A Mid-Range Price

Just around a week ago, Anycubic launched their newest FDM 3D printer – the Anycubic Vyper. At a launch price of $359, the Vyper quickly established itself in the mid-range market. It’s far from being the cheapest 3D printer you can buy today but is certainly inexpensive enough to attract beginners and casual users.
Anycubic touts the Vyper as an easy-to-use- printer with a more powerful processing core. Is the Vyper better than the other 3D printers in the same price range?
Quick specs
Printing technology: FDM
Build volume: 245 mm x 245 mm x 260 mm
Maximum nozzle temperature: 260 C
Maximum bed temperature: 110 C
Connectivity: USB cable or trans-flash card (No Wi-Fi option)
Slicer: Cura
Input formats: STL, OBJ, AMF
Total footprint: 508 mm x 457 mm x 516 mm
Assembly and build quality
Like many of the other low-cost 3D printers, the Vyper ships in components that need to be put together. Assembly is fairly simple and should not take more than 15 minutes if you have had experience with 3D printers before. Some of the metal components are quite heavy so you might want to consider having another person help you.
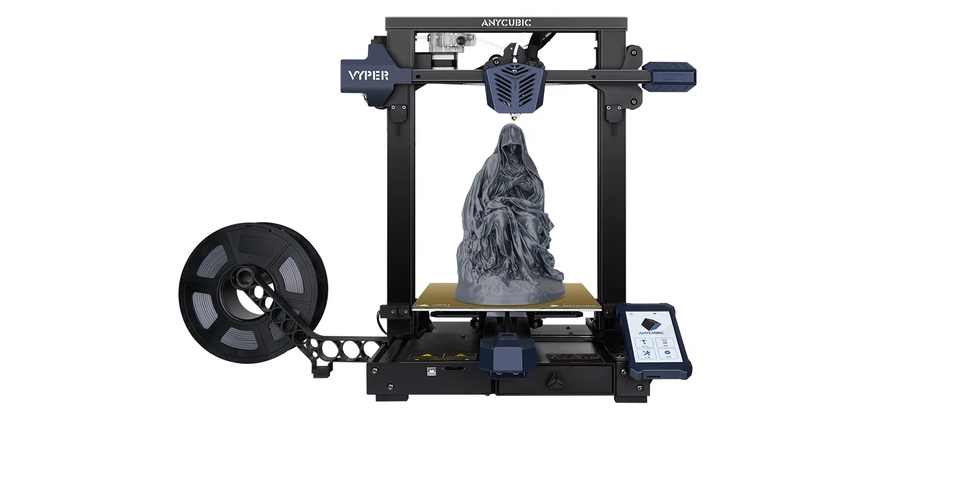
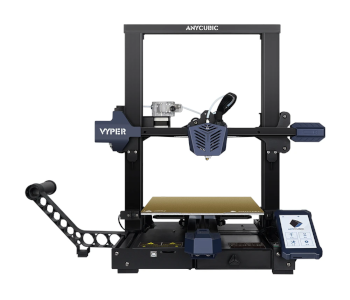
At a glance, the construction of the Vyper looks very similar to the Creality Ender 3, down to the location of the touchscreen. The Vyper looks a bit sleeker, though, with its blue, gray, and dark blue color scheme. The bare aluminum accent and gray PEI sheet rounds out the visual appeal of the Vyper. This is probably one of the best-looking FDM printers in this price range.
The Vyper has a relatively large build volume, although this also comes at the cost of a larger footprint. Unsurprisingly, the Vyper does not come with an enclosure but should be easily compatible with a DIY enclosure
Software
The printer comes with an SD card that has a copy of the Ultimaker Cura slicer, a pre-loaded profile, a set of PDF documents for instructions, and a test print of an owl model. The Cura slicer is, of course, reliably compatible with the printer.
The pre-loaded profile is a good starting point for beginners but can be modified as necessary. A persistent issue with the pre-loaded profile is that it almost certainly gives a wrong estimate for the printing time. An easy remedy to this is to go into the slicer settings and enabling both “acceleration control” and “jerk control.” This should give you an estimated printing time that is much closer to reality.
Connectivity
The lack of Wi-Fi connectivity really hurts the Vyper, especially for those who have gotten used to being able to print wirelessly. Instead, you will have to either transfer the models via SD card or hook up your laptop via USB cable. In any case, this is a huge loss in the convenience department.
The good news is that the touch-screen control interface is wonderfully quick and responsive. It’s also fairly large for better visibility.
Extruder
The Anycubic Vyper uses a BMG clone extruder with double-gear extrusion and a 3:1 gear ratio. This design should provide both good extrusion power and control and make filament tangles less likely.
Like most stock extruders, the hot end of the Vyper has a PTFE lining. This is fine if you’re printing with low-temperature filaments like PLA or TPU. However, heating the filament to temperatures above 240 C risks causing damage to the PTFE lining.
If you’re planning on printing frequently with ABS or PETG, you will have to anticipate similarly frequent replacements of the PTFE lining. You can consider upgrading to an all-metal hot end to reduce the need for maintenance.
Print bed
One of the best features of the Vyper is its automatic bed leveling function. This works like a charm. This can be done using the touchscreen interface. The whole process is very quick and needs no user intervention. The printer also saves the settings of the leveling process, so you won’t need to repeat it unless you transfer the printer to another surface.
The auto bed leveling process works by the nozzle moving around and probing the bed at 16 different points. The print bed itself is fixed in place – the tip of the nozzle acts as the sensor for z-offset adjustment. This is a much more robust system, but you’ll need to make sure that the nozzle is perfectly clean before running the leveling program to get accurate results.
The Vyper also has dual lead screws and dual optical stops in the Z-axis to make Z-endstop errors even if the X gantry is not perfectly parallel to the build plate. This is a really nice addition as it counteracts any possible user error that can cause Z alignment problems.
The Vyper comes with a magnetic detachable build platform with a special textured surface. This is designed to alleviate the difficulty of removing finished prints from the print bed. On the top side of the removable build platform is a texture PEI surface that massively helps with bed adhesion. This is a great add-on although you will end up having to replace it soon enough as the PEI surface gets damaged.
Cooling
The Vyper comes with dual cooling fans. This should allow faster printing speeds, especially if you’re printing with filaments like PLA and TPU. According to Anycubic, the design should accommodate printing speeds of up to 100 mm/s.
Keep in mind that having two cooling fans also means that they are doubly loud. If you have these two cooling fans running at maximum, they will likely be the components that produce the loudest noise in this printer.
Printing performance
The Vyper is equipped with a 32-bit motherboard with a high-performance Cortex M3 architecture control chip and TMC2209 silent driver. This combination offers faster computing speed, precise voltage control, and overall more silent printing.
Test prints using the Vyper have yielded good results across different filaments – PLA, ABS, and PETG. The print bed heats quickly and evenly, and the magnetic PEI sheet makes print removal very easy.
As far as noise goes, the Vyper cannot exactly be described as silent. The stepper motors still make a fair bit of noise, although the dual cooling fans are certainly much louder when they are turned on. Compared to other FDM printers, the Vyper is still significantly quieter, so there is still some truth to their claim.
Price
The Anycubic Vyper has a launch price of $359. Anycubic also offers bundles of the Vyper that come with a spool of PLA ranging from 1 kilogram to 3 kilograms. The most expensive bundle clocks in at $431.
Is the Anycubic Vyper worth it?
It’s hard to find a fault with the Vyper, especially when we consider the other competitor printers in the same price range. The Vyper has a better extruder, build quality, and cooling fans. The auto bed leveling function is a huge benefit, as anyone who has spent too much time manually leveling a print bed can attest to.
At less than $400, the Anycubic Vyper certainly provides enough value for money, especially for beginners and more casual users. The Vyper is deliberately designed to ease the entry of users into 3D printing with its easy assembly and features that mitigate user error.
If there’s any point of criticism on the Vyper, it’s the fact that it does not have Wi-Fi capabilities. This is a sorely lacking feature as there are some cheaper 3D printers that can print via Wi-Fi. Some reviewers have mentioned that there is a Wi-Fi adapter in the motherboard, so there’s still a chance that Wi-Fi support can be added via a firmware upgrade.
At its launch price, the Anycubic Vyper is a solid purchase. Not only does it have a large build volume, but it is made to reduce the amount of tweaking that you will need to get good prints. It’s far from being the most advanced FDM printer but should last a long while before you feel the need to upgrade to another model.
My points of criticism after 2 weeks with the Vyper. Lack of info and functionality on the display. There is no status on where the axis are anywhere in the menu. no flow control, no pid tuning or esteps, temperatures are only shown on some screens. M600 filament change does not work. After filament runout, there is no resume. The biggest worst problem, the stepper drivers may be TMC2209s, but they are not installed in uart or spi mode, so that precise current control they advertize is non existant. In the firmware they have them installed as A4988 drivers, which are NOT silent, that is why you can still hear the steppers. They have not released the source code for the newest firmware, and the old source code is broken and unable to be compiled. Every strain gauge on every printer sold is going bad, if it wasn’t bad out of the box. It literally takes a small bump, or a small catch by the nozzle on a print to bend and mess up the strain gauge. Some pretty big issues for this printer, some things may get fixed, but I highly doubt they will send out replacement boards to everyone, when they cut corners on the first one to save 3 cents per board.