Autodesk Inventor – Loft Tutorial
In this tutorial we’re going to use the ‘Loft’ tool to make an object that reduces in size from one end to the other (essentially a cone). Lofting can be really useful in many 3D models, from making handles to plane wings and many more items. We use the work plane tool in this tutorial, so if you haven’t checked out our “Work Planes Tutorial” I would suggest you do.
Step 1: Make a Sketch
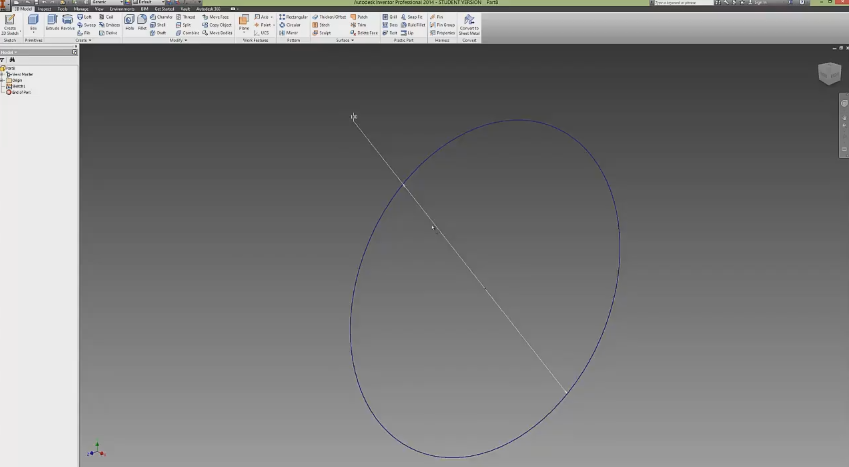
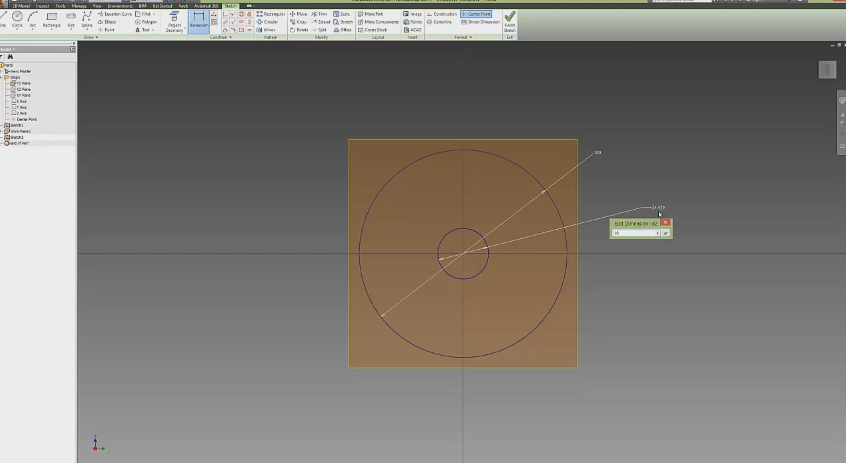
Create a new sketch and draw a circle that is 100mm in diameter. Finish the sketch.
Step 2: Turning on the Origin Plane
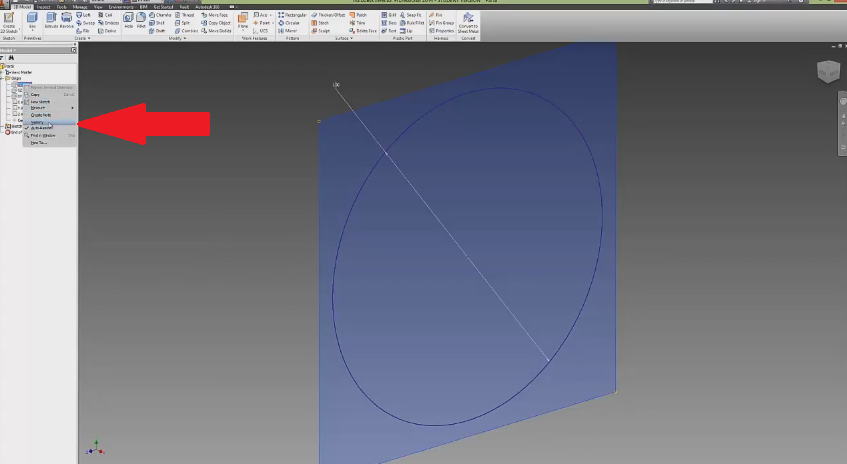
After you have drawn the circle and finished the sketch, the next step is to turn on the YZ plane under the Origin plane in the left-hand browser. To make the YZ plane visible, right click on YZ and then turn on visibility.
Step 3: Work Planes
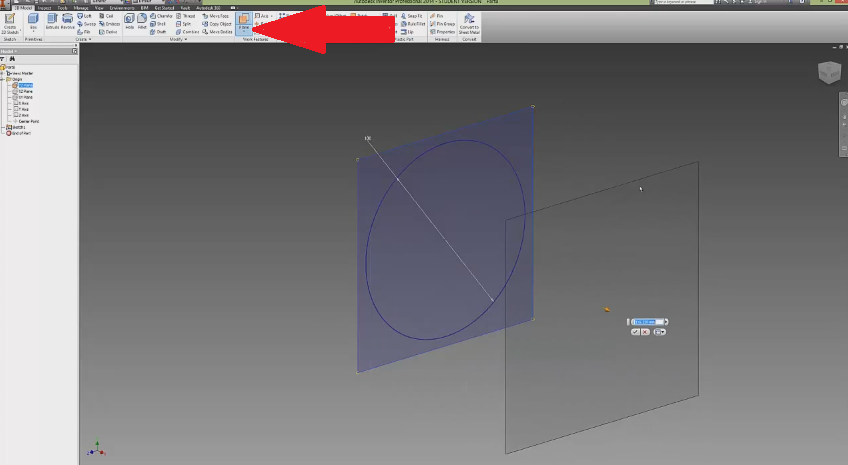
Now that we have the YZ Origin plane turned on, it is time to create a Work plane parallel to the YZ Origin plane. Select the Work plane tool and then click on the YZ Origin plane to create a second work plane. Either drag the Work plane 100mm away from the Origin plane or enter 100 mm.
Step 4: Second Sketch
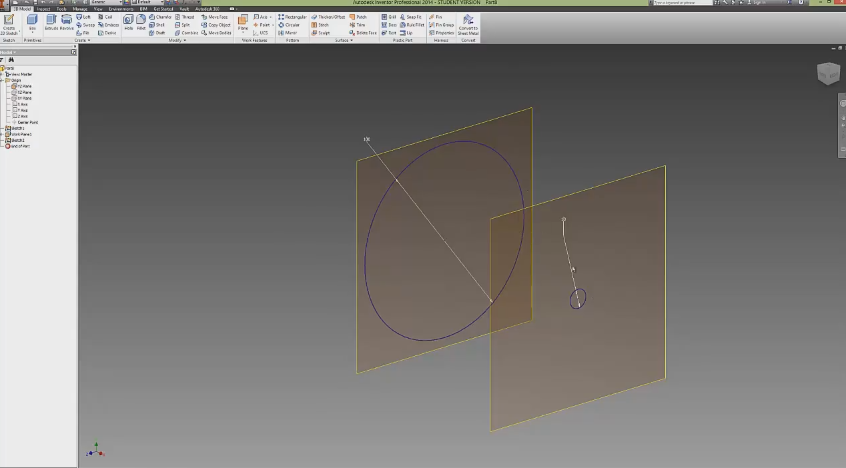
Now that we’ve created the work plane, we can draw a second sketch. Draw a circle 10mm in diameter at the centre of the work plane. Finish the sketch.
You should have something resembling the image below. Two planes with two different sized circles drawn on them.
Step 5: Lofting
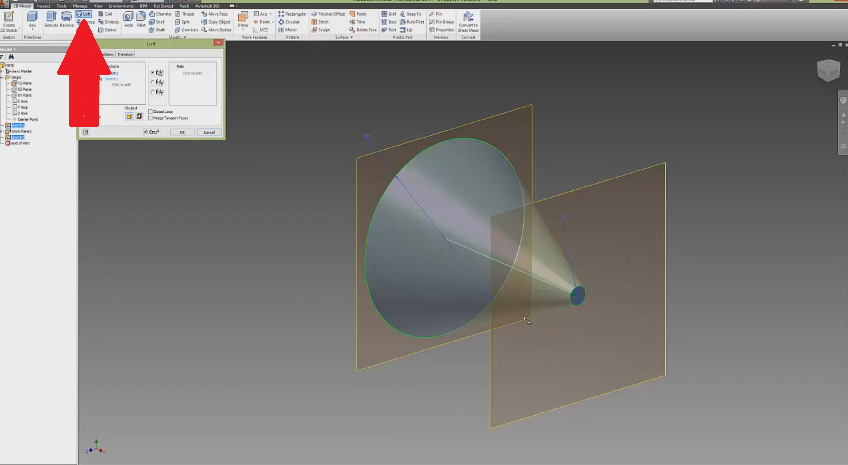
Lofting is really simple and the only slightly hard part is making the sketches above. To use the Loft tool, click on ‘Loft’ which is found under ‘Create’. Once Loft has been selected, click on both circles/sketches and Autodesk Inventor will automatically create the Loft.
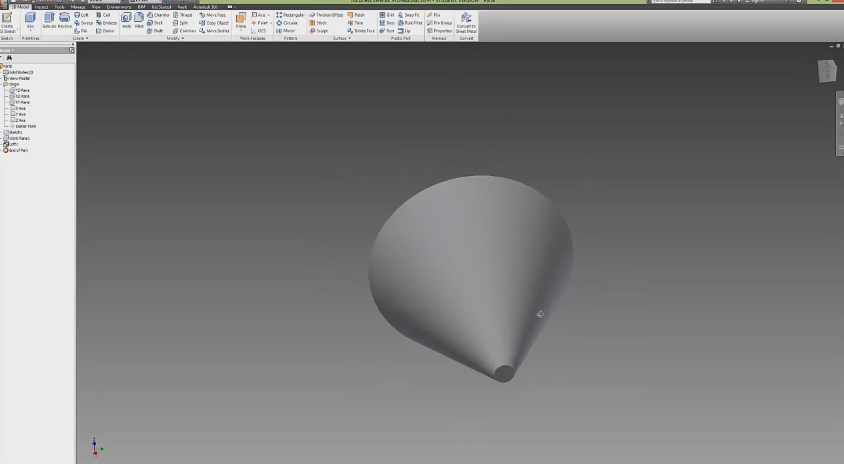
Once you’ve created the Loft, turn off both the planes and you should be left with something like the image below.
Conclusion
The Loft tool is simple and it can be really useful if you want to make handles, wing profiles, vases or all manner of models. This is obviously just a simple explanation of the Loft tool and there are many more advanced features that are slightly more complicated to use.
Check out our How To section for more tutorials.

