Autodesk Inventor Tutorial – Sweep Tool

The Sweep Tool allows you to extrude along a path or a curve and is found under Create in the Model Tab. In this tutorial we show you how to create a simple 3D model using the Sweep tool. Note, some of the processes we use in this tutorial have already been covered in previous tutorials, which can be found in the How To section of the site.
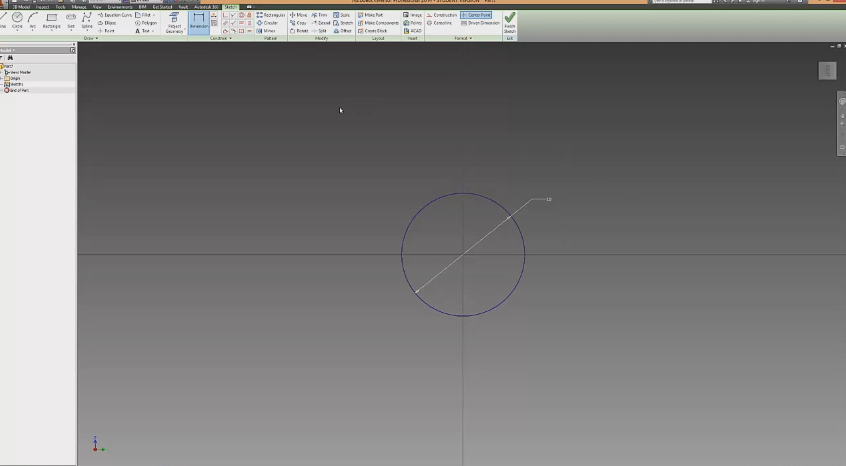
Step 1: Make a New Sketch
Create a new sketch and draw a circle that is 10mm in diameter. Finish the sketch.
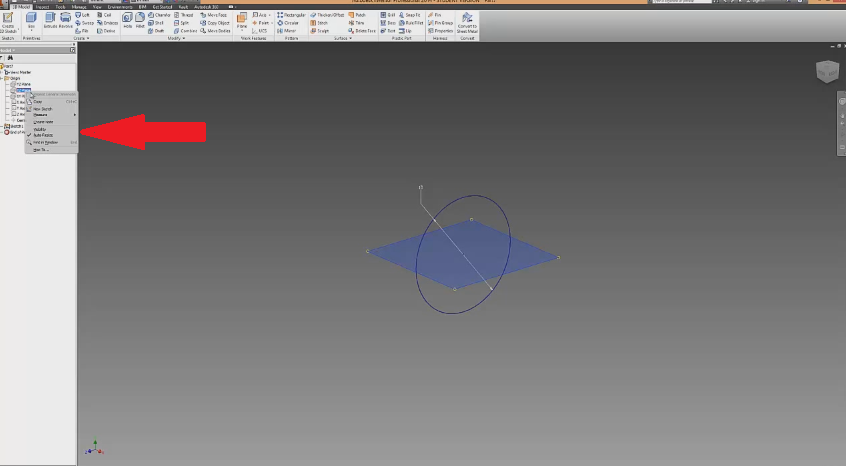
Step 2: Turn on a Origin Plane
Once you’ve created the sketch above, the next step is to turn on one of the Origin Planes that will run perpendicular to the sketch you just created. For this tutorial we used the XZ plane. To turn on the XZ plane, open up “Origin” in the left hand Browser, right click on XZ and turn visibility on.
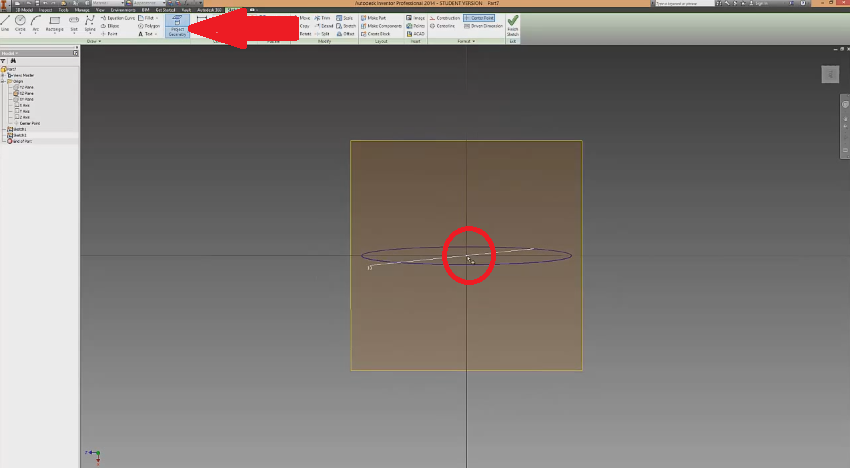
Step 3: Project Geometry
So far you should have a sketch of a 10mm circle and the XZ plane turned on. The next step is to Project Geometry the centre point of the plane/sketch. This will allow us to make a new sketch on the XZ plane that lines up with the sketch of the circle.
Step 4: Make a New Sketch
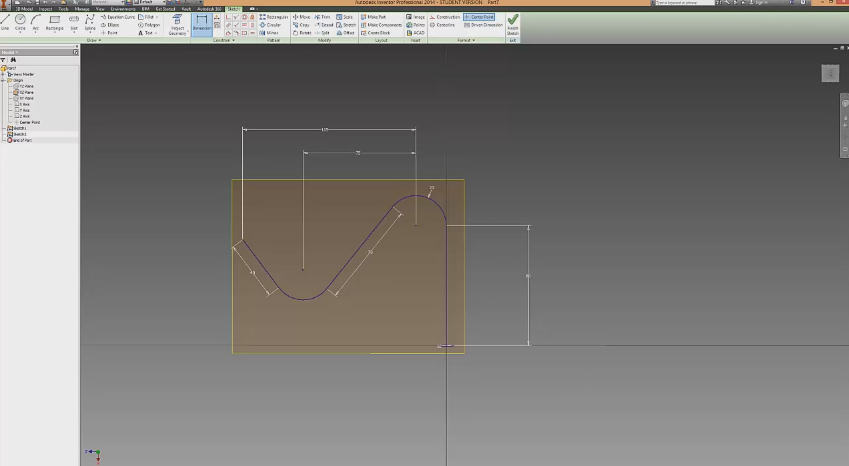
Once you have completed Step 3, create a new sketch on the XZ plane. For this sketch we drew a couple of arcs and some lines. These were then constrained. For this tutorial the size, direction and layout of your sketch doesn’t really matter as long as you have no lines intersecting or coming too close together. If you make something like the image below you should be fine.
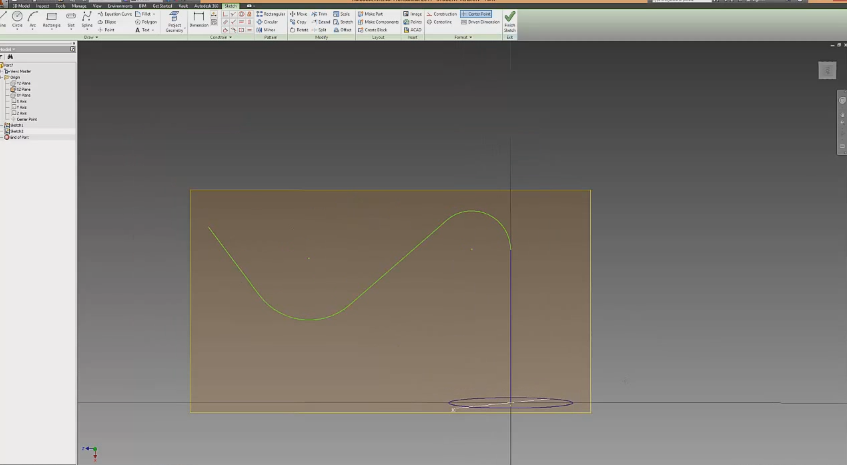
Sketch is constrained and finished.
Step 5: Sweeping
Now that we have our two sketches 90 degrees to each other and fully constrained, it is time to use the Sweep Tool. As stated earlier in the tutorial the Sweep Tool is found under Create in 3D model. When you click on Sweep you should notice that the circle we created in sketch one is highlighted. If it is not, click on the circle. To complete the sweep, select the second sketch (the one with lines and arcs in it) and click ok.
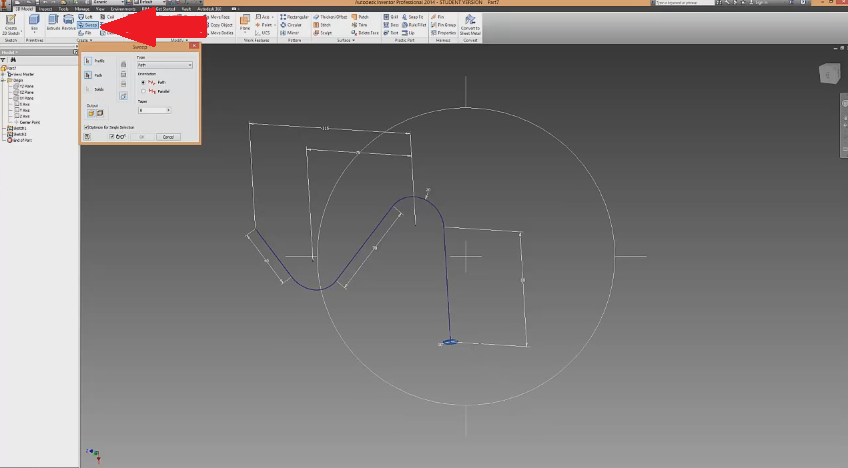
Below is a preview of what the sweep will look like. Different settings like the type or orientation of the sweep can be changed; however we’re just going to leave the type as ‘Path’ and the orientation as ‘Path’.
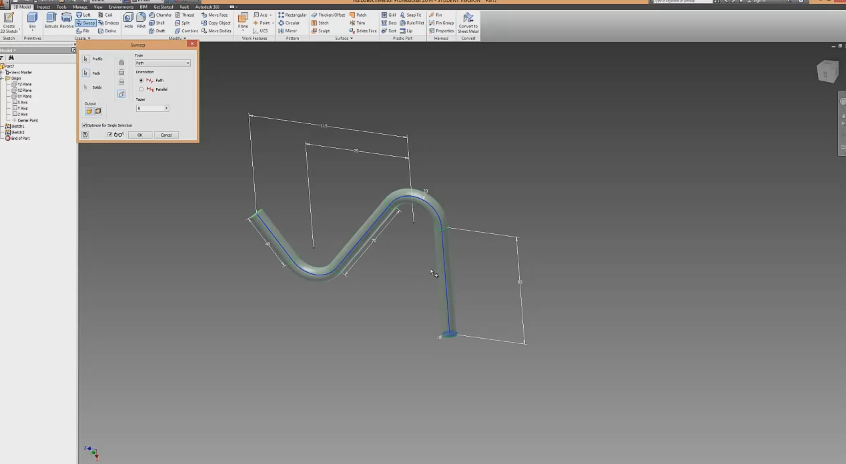
The final 3D model should look something like the image below, depending on how you drew your sketches. Sweep is a really useful tool for those wanting to extrude a non-linear shape, just remember that the lines of the sketch cannot intersect. Multiple different planes can be used together to make a 3D model that sprawls out in a load of different directions.

Take a look at our How To section for more useful tutorials.