What is Bed Tramming?

As with any niche hobby, 3D printing is replete with technical jargon. Some of these are quite common, while others are barely used. In this article, we will discuss one of the less popular terms used in 3D printing – bed tramming.
Despite the term being relatively unfamiliar, this is actually a practice that most users of 3D printers have at least heard of at some point. What exactly is bed tramming? How is it related to bed leveling and how is it any different?
What is tramming?
In a nutshell, tramming a bed refers to the practice of setting it at a fixed distance away from the nozzle. This is typically done by placing a thin material – usually a piece of carboard – between the nozzle and the print bed at several points. The bed level is then adjusted by turning one or several adjustment screws.
The term ‘tramming’ was originally used in CNC machines or mills to refer to the practice of adjusting a mill head or any other tool to be square with the table. This is basically the same practice being done with print beds. The term making its way to the world of 3D printing is expected considering how closely 3D printing and CNC machining are associated.
Bed tramming can be thought of as an adjustment of the plane of the print bed. This assumes that a print bed constitutes a perfect plane with minimal spatial deviations or warped areas. This may not always be the case. If the fundamental assumption of a ‘flat’ print bed is far from the truth, then tramming may not be very beneficial.
The process of tramming is repeated often in any piece of advice about bed leveling. Doing it regularly helps massively with bed adhesion and with many quality-related issues.
What is the difference between bed tramming and bed leveling?
Given the definition of tramming, does it not make sense to just call it bed leveling? It does, actually, and the terms bed tramming and bed leveling are considered interchangeable by many people in the 3D printing community.
However, there is a case to be made for using the term ‘tramming’ as the proper nomenclature for manually adjusting the level of a print bed. This distinguishes it from ‘bed leveling’ as a mostly automatic process done using sensors and software.
Bed leveling – either via Automatic Bed Leveling (ABL) or Unified Bed Leveling (UBL) – are different in that they do not actually adjust the level of the bed. Instead, it is a process that automatically adjusts the level of the print head to account for detected deviations on the print bed level. Different 3D printers may execute this in a variety of ways, but the concept remains the same.
In any case, the term ‘bed leveling’ is a bit of a misnomer that has led some beginners to think that it involves the use of a spirit level. This is very far from the truth. When done right, you will not need a spirit level at all to properly orien your print bed. Avoiding this misconception is the beast argument for using the correct term – tramming.
How is bed tramming done?
To tram a bed, the only tool you will need (aside from your 3D printer) is a thin piece of paper. A Post-it also works quite well and is the perfect size for moving around the print bed.
The first step is to bring the nozzle temperature and print bed temperature close to the usual settings that you use. This ensures that you are tramming the print bed with the effects of thermal expansion duly considered. Most people would say that the difference is minimal, but it does not hurt to do it this way.
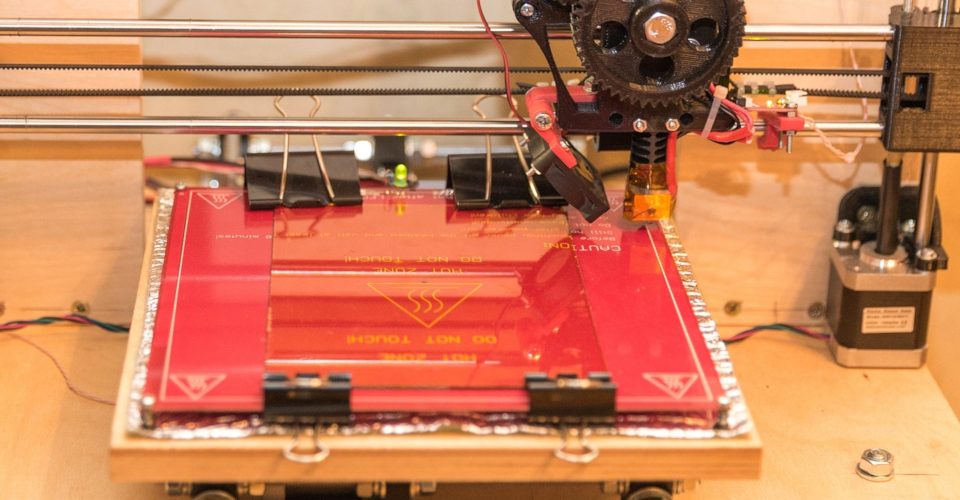
Depending on the model of your 3D printer, it may already have a built-in mode for bed leveling or bed tramming. This will simply move the print head around the four corners of the print bed. If your printer does not have this feature, you can just move the print head manually. Just make sure that the stepper motors have been deactivated so that the print head can be freely moved around.
You will then want to set the nozzle to the home position or at the (0,0,0) position. This marks the starting z-position for any project.
Place the print head over one corner of the print bed and put the sheet of paper between the nozzle and the print bed. You will then need to adjust the leveling screw of the print bed until the nozzle just barely touches the piece of paper. You want the paper to be snug between the print bed and the nozzle but not too tight that it cannot be moved around.
Do this process for all four corners of the print bed and at the center. You will then want to redo the entire process to make fine adjustments. It is expected that making an adjustment in one section also has minor effects on another.
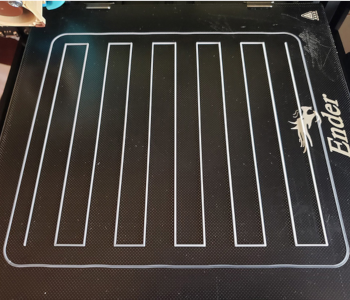
The quality of bed tramming can then be evaluated using a simple bed level test. There are several options that you can download that are quick to print and do not consume a lot of filament.
Does bed tramming always work?
As mentioned, the practice of bed tramming assumes that the print bed approximates a perfect plane. In the case of heavily warped print beds, this assumption will no longer apply. There is simply no way to account for warped sections, bulges, or ripples on a print bed with manual tramming.
In the case of a heavily uneven print bed surface, a mesh correction technique would be the best way to improve bed adhesion. This is best done using a pre-built software feature, as it involves making small corrections to the Z-setting of the print head. It will also require a bed level sensor, the BLTouch being the most commonly used.
When should you tram your print bed?
Tramming is something that has to be done regularly, especially if you use your 3D printer heavily. Doing it at least once a week under normal conditions is typically good practice. If you change your nozzle or print bed surface, then tramming the bed should be required before using the 3D printer again.
Finally, doing a round of tramming is one of the first possible solutions to explore if you are running into bed adhesion or warping problems. It is quick, easy, and will always be beneficial to the quality of your print. Do not forget that there are also other solutions to warping such as the application of an adhesive or printing with a raft.
Final thoughts
Tramming is a classic term used in old-fashioned CNC machining, but it is not commonly encountered in 3D printing anymore. However, it actually is the proper nomenclature to refer to the bed leveling process. It is also good practice to use tramming to refer to the manual bed adjustment process to differentiate it from the automatic, sensor-driven techniques.
Bed tramming has been considered one of the fundamental practices that everyone in 3D printing should know. It has become less common in recent years with the use of built-in bed leveling technologies. However, it is a good skill to learn, if only as an added tool for addressing 3D printing issues.