The 12 Best Beginner-Friendly Upgrades for Your 3D Printer

Those who own 3D printers are familiar with the feeling of always wanting to get an upgrade. From hot ends to control boards, there are simply so many ways for a 3D printer to be modified or improved by replacing a piece of hardware somewhere. It also helps that this is a very common practice in 3D printing communities.
However, making changes to a 3D printer can be intimidating for a beginner. In this article, we will be looking at a few of the easiest and most beginner-friendly 3D printer upgrades that do not require a lot of experience to pull off.
1. Magnetic PEI sheet
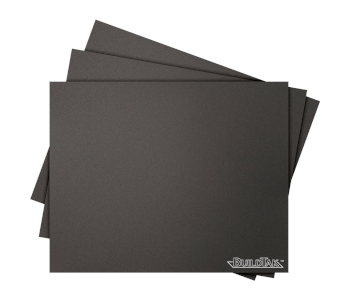
A PEI sheet is the easiest and best way to enhance the stock build plate of your 3D printer. You only need to get the right size of the sheet for your printer and then attach it magnetically. With something so simple, you instantly have a print surface that provides better bed adhesion and allows for easier print removal.
There are lots of options for PEI sheets out there but the most popular would be the BuildTak line. Popular 3D printing brands like Creality and Gizmo Dorks also sell their brand of first-party PEI sheets.
These are quite expensive, so make sure to handle the PEI sheets with care. They are quite prone to scratches, especially when the nozzle is set too close to the print bed. Don’t forget to do a bed level calibration after installing a magnetic PEI sheet.
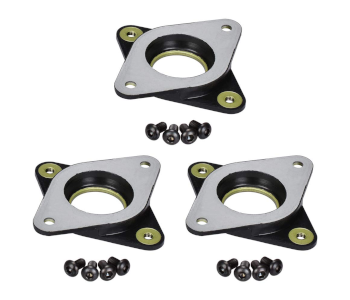
2. Motor dampers
You may have already noticed that 3D printers can be quite noisy. Hopefully, you have space for your 3D printer outside of your living room or bedroom. Regardless of where you have placed it, a reduction in the noise level of your 3D printer is probably welcome.
A simple but effective way to do this is to install rubber dampers on the 3D printer’s stepper motors. These dampers absorb the vibration of the motors and keep them from propagating to the rest of the 3D printer frame. Aside from reducing noise, dampening the vibration might even result in some improvement in the quality of your finished prints.
3. Replacement nozzle
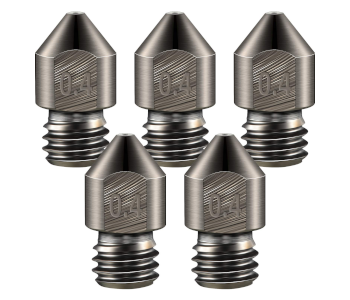
The nozzle is one of the parts of your 3D printer that you will need to replace eventually. However, you do not need to stick to the same stock brass nozzle that came with your 3D printer. Depending on your needs, you can upgrade to a hardened steel nozzle or even to a ruby-tipped nozzle.
These alternative nozzles have the advantage of being more wear-resistant than brass. This is important if you’re printing with an abrasive filament material like polycarbonate, wood, or ceramic. These materials can wear down a brass nozzle quite quickly, likely resulting in some extrusion issues.
4. Filament dryer
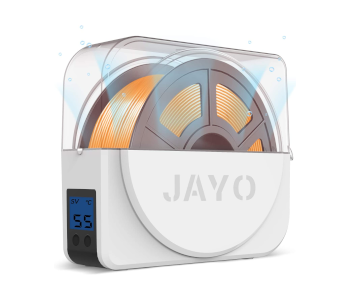
Humidity is the mortal enemy of 3D printing filaments. All filament materials are naturally hygroscopic, which means they readily absorb moisture from the air. When the moisture level of a filament gets too high, it can cause a host of performance and quality issues.
An easy way to remove excess moisture from a filament would be to use a custom filament drier. This is a closed container that uses temperature and air convection to actively remove moisture from the filament. It can also be used as a filament spool holder during 3D printing, keeping the filament dry even through a job that can take several hours.
5. Webcam
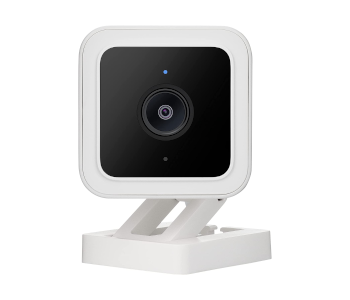
Walking away from a 3D printer while it is running is a luxury that comes easier with experience, but you can reduce the uncertainty of this act with a simple webcam. Any standard Wi-Fi or streaming camera can work for this purpose. There are lots of options here such as the Wyze video camera or this generic Mintion streaming camera.
Just make sure that the camera is connected to your local network, point to the build plate, have good lighting, and pair the camera with your mobile app. This should then allow you to monitor the 3D printer remotely. Having a camera is also great for making one of those fancy time-lapse videos that you find a lot online.
6. Belt tensioner
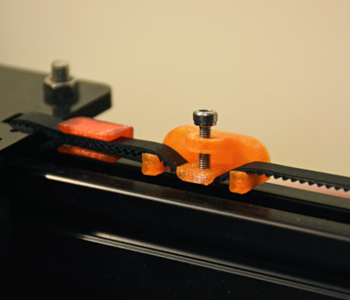
The rotation of the stepper motors is translated to the linear motion of the print head through belts. Over time, these belts can get stretched out and lose tension. When this happens, the movement of the print head can get erratic and cause quality issues in your 3D printing projects.
Fortunately, it’s very easy to maintain tension in these belts. Just snap on a belt tensioner or tightener and adjust until the belt is at the proper tension again. The best thing about belt tensioners is that you can just 3D print your own. There are literally hundreds of them out there but we prefer to keep things simple with a basic belt tensioner.
7. Fan duct

Cooling fans are instrumental in 3D printers, especially when you’re working with filament material that benefits from rapid cooling. Materials like PLA or TPU retain better quality and detail accuracy when they are cooled as quickly as possible.
Most 3D printers come with stock fans for part cooling. However, there is a way to modify these fans so that they can provide better and more focused cooling. Most 3D printing communities would agree that this Petsfang design for a fan duct is the best one. It is a modular accessory that you can 3D print and mount on almost any of the most popular 3D printers today. You can also attach a cooling fan to it if yours does not come with one.
8. BLTouch sensor
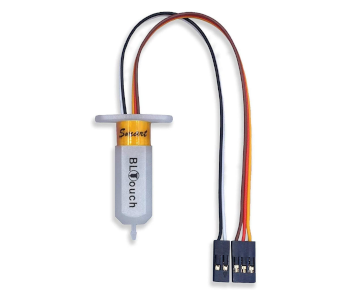
Bed level calibration is a part of maintenance that you are going to have to do a lot of when 3D printing. If your printer does not come with an automatic bed leveling feature, then this is something you will have to do manually. The tried-and-tested cardboard method is actually quite effective, but having to do it so many times can get frustrating.
Adding a BLTouch sensor to your 3D printer will give it an auto bed leveling feature. This is particularly useful if your print bed has gotten warped after heavy use. Installing this might take a bit of technical know-how, but it’s nothing that you cannot handle with just some instruction. Make sure to get a sensor with a cable that is at least 1.5 meters long.
9. Enclosure
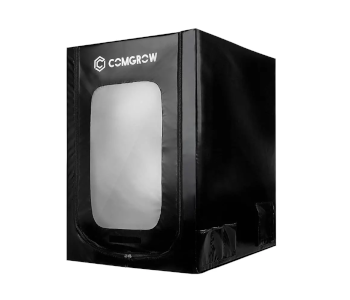
Most inexpensive 3D printers do not come with enclosures. This is fine for the most part because you can easily place an enclosure around your 3D printer anyway.
Enclosures are useful for several reasons. If you’re having trouble with warping, an enclosure provides better temperature control and may reduce or prevent warping by helping to maintain an elevated internal temperature. Enclosures are also great for containing the unpleasant fumes that are released during 3D printing.
You can either buy a ready-made 3D printer enclosure or build one yourself. There are lots of tutorials out there for building enclosures from simple materials or even from some cheap IKEA furniture. Make sure to avoid using easily flammable materials.
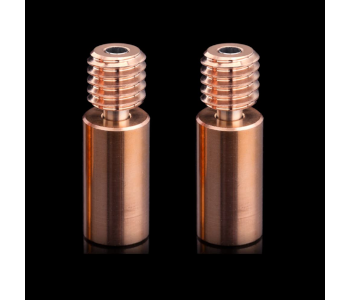
10. Heat break

The heat break is a part of the 3D printer’s hot end that sits between the hot zone and the cold zone. Its function is to prevent “heat creep” or the transfer of heat from the hot zone to the cold zone, as this may cause extrusion issues.
Most 3D printers come with a heat break made of stainless steel with an internal PTFE tubing. This works well for the most part unless you start working with filaments that require very high temperatures. PTFE tends to break down at temperatures above 240 C, so you might start having extrusion problems because of the heat break.
To upgrade the heat break, you have two options – a titanium heat break and a bimetallic heat break. Both of these have no PTFE components, making them suitable for high-temperature printing. Bimetallic heat breaks are more expensive and fragile, but do a better job of preventing heat creep.
11. Hot end
Conversely, you can replace your entire hot end if you are still encountering heat creep or other heat-related problems. An entire hot end assembly includes the nozzle, heating block, heat break, and heat sink.
To make sure that heat creep will no longer be a problem, we recommend getting an all-metal hot end. In theory, a ready-made hot end assembly should perform better than building a hot end made from several different third-party parts. This also eliminates the need to constantly have to replace the worn-down PTFE tubing in your 3D printer.
12. Extruder
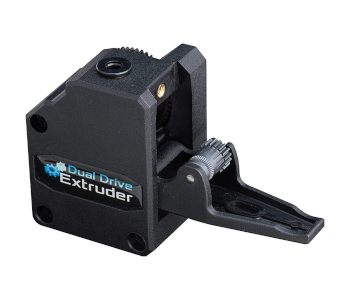
Replacing the extruder of your 3D printer is going to take a good deal of work but there are several good reasons to do this upgrade. Did your 3D printer come with a Bowden extruder that you would like to replace with a Direct Drive extruder? Do you want an extruder that has two rotating gears instead of just one?
The good news is that there are lots of extruder replacement parts out there. Dual-gear extruders are extremely popular and typically deliver more consistent and reliable extrusion. These have better torque and grip and are better suited if you’re working with flexible filaments.
You can also get Bowden extruder replacements, just in case you prefer this extruder type.
There is a wide range of 3D printer extruders out there that vary in appearance, size, torque, filament restrictions, and price. It’s a good idea to shop around and make sure that you’re buying one that suits your needs.
When should you upgrade your 3D printer?
We have been focusing so much on how you can upgrade your 3D printer that we have not stopped to ask whether it’s a good idea to upgrade it. After all, doing any upgrade will cost some amount of money and will take a bit of work.
The rule of thumb is to not upgrade your 3D printer unless you’re absolutely sure that you need to. If you’re having trouble with extrusion or warping, it’s best to go into your slicer settings first to try to address the problem.
It would also be a good idea to be as familiar as possible with your 3D printer before committing to an upgrade. Learn how it works with the stock parts and the types of filaments that it can print with. If you bought a fairly popular 3D printer, you should be able to find a support resource online.
If you can’t solve an issue on your own, your next best recourse would be to ask for advice from more experienced users. There are lots of active 3D printing groups online full of people who will be more than happy to help. These people can also help you decide whether an upgrade to your 3D printer is in order.
Finally, don’t go all out on upgrading your 3D printer all at once. Do one upgrade and see how it goes before moving on to another.
Final thoughts
Installing upgrades, particularly related to hardware, is a very common practice in 3D printing. It might even be fair to say that upgrading a 3D printer is inevitable, especially if this is a hobby that you plan to take seriously.
The upgrades we have listed here just some of the most basic that you can do for your 3D printer. If you’re still a beginner, we recommend doing the first few ones as those are a lot easier.