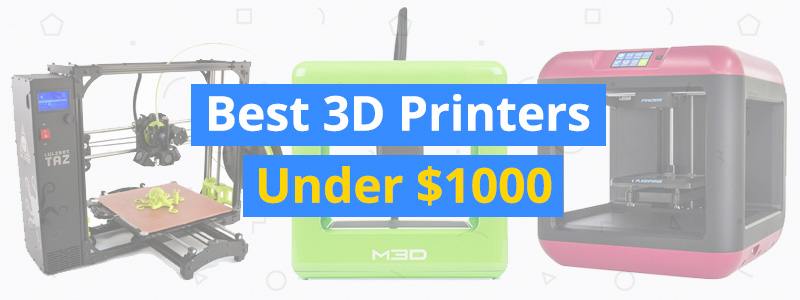
Best 3D Printers Under $1000
Welcome to our guide to the best 3D printers under $1,000. Here, we talk about the only 3D printers you should consider if you have a grand to spend. Not all the highly rated products you see out there are really worth it, so we’re here to make sure you get your money’s worth.
| Budget |
|---|
 |
| Dremel Digilab 3D20 |
| 4.2/5.0 |
| 19 lb |
| USB, SD card |
| Easy to use 3D printer that’s limited to PLA filament. |
| Check Amazon |
| Best Value |
|---|
 |
| BIBO2 |
| 4.7/5.0 |
| 28.7 lb |
| Wi-Fi, USB, SD card |
| Dual extruder 3D printer with built-in laser engraver. |
| Check Amazon |
| Top Pick |
|---|
 |
| Original Prusa i3 MK3 |
| 4.9/5.0 |
| 14 lb |
| USB, SD card |
| Can resume printing after a power failure and extremely quite. |
| Check Amazon |
For this guide, we set the price floor to $500 because we don’t want you to deal with all those cheap 3D printers under $500. We also excluded DIY 3D printers like the Creality CR-10S. If you’re willing to spend $1,000 on a 3D printer, then you deserve a machine that’s already assembled right out of the box. The Original Prusa i3 MKS, our top pick, is available in a pre-assembled package, which makes it eligible.
Best 3D Printers Under $1,000 Comparison Table
| Make and Model | Weight | Connectivity | Price |
|---|---|---|---|
| Original Prusa i3 MK3 | 14 lb | USB, SD card | Check Price |
| Dremel Digilab 3D20 | 19 lb | USB, SD card | Check Price |
| BIBO2 | 28.7 lb | Wi-Fi, USB, SD card | Check Price |
| Stanley Model 1 | 33.1 lb | Wi-Fi, USB | Check Price |
| FlashForge Creator Pro | 37.5 lb | USB, SD card | Check Price |
1. Original Prusa i3 MK3
Editor’s Rating: 4.9/5
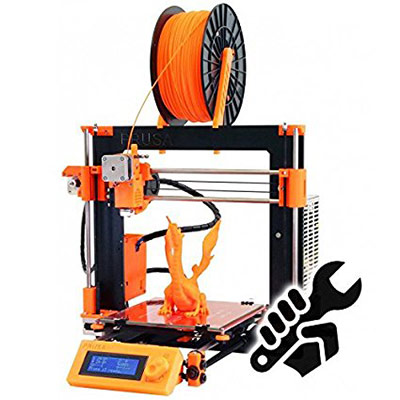
If you want the best 3D printer under $1,000, you don’t have to look very far. Just head straight for the latest version of the Original Prusa i3, the 3D printer that gave birth to dozens of copycats.
The successor to the MK2S, the MK3 is Josef Prusa’s latest masterpiece. It’s a top-of-the-line 3D printer that sets the standard for all other 3D printers in this price range. No doubt in a year or two, the market will be full of clones, each hoping to get a slice of the MK3 cake.
Right out of the box, the MK3 lets you know that it’s different from the competition. Included in the package is a comprehensive instruction manual that walks you through the basics in a clear and professional way. Many 3D printers come with poor documentation, often forcing users to turn to the internet for help. Heck, some 3D printers don’t even come with an instruction manual, which can be frustrating.
Since it’s already assembled, the MK3 allows you to get right into 3D printing in less than one hour. (For comparison, the MK3 kit takes about 6 hours to assemble, which is relatively fast for a DIY kit.) It’s already calibrated and loaded with preset print configurations, so you don’t need to spend hours tinkering with the settings to get started on your first print. Even with the default settings, the MK3’s performance is good, teasing you that you’re in for a real treat once you have your printer fully optimized.
The MK3 boasts a couple of features that all 3D printers should have. The first is the smart sensor that lets you know if the printer is out of filament. As soon as the loaded filament runs out, the printer automatically pauses and waits for you to load a new spool of filament. Moreover, the MK3 can detect if the nozzle is clogged with filament and offers you the chance to clean it before resuming the print.
The second and more important feature is the MK3’s ability to resume printing from a power outage. During a power failure, the MK3 remembers the print progress, allowing it to resume from where it left off as if the loss of power never happened. Starting over from scratch is not cool, so the MK3’s resume capability is a godsend for those who normally take on projects that take over 12 hours to complete.
Boasting a large build volume, the MK3 checks all the boxes concerning performance. It’s reliable, works significantly faster than the MK2S, and is surprisingly quiet for a non-enclosed 3D printer. In fact, the MK3 is probably one of the quietest 3D printers on the market. It’s not exactly dead-silent, but the printing sounds it produces are barely noticeable even at close range.
The MK3’s print quality is top-notch. It’s smooth, consistent, and incredibly detailed once you have the print settings properly set up. The MK3 is also compatible with all sorts of filament types, ranging from ABS and PLA, the two most common types, to HIPS and Nylon. If you want to experiment with different types of filaments, make sure that you’re fully aware of each material’s behavior and required print settings.
In conclusion, the MK3 is the kind of 3D printer that makes you look wise for buying it. It’s a fantastic machine that seemingly does everything right. It’s easy to use, comes with a number of useful features – including automatic bed leveling – and is backed by an excellent customer service.
| Tech Specs |
|---|
| Resolution: 50 microns |
| Volume: 9.8 x 8.3 x 8.3 in |
| Filament: 1.75 mm |
| Type: ABS, PLA, HIPS, and others |
| Weight: 14 lb |
| Connect: USB, SD card |
| The Pros |
|---|
| Easy to set up |
| Easy to use |
| User-friendly built-in interface |
| Outstanding print quality |
| Includes smart filament sensor |
| Can resume printing after a power failure |
| Large build volume |
| Extremely low noise level |
| Excellent customer support |
| Clear and detailed instruction manual |
| The Cons |
|---|
| Non-enclosed |
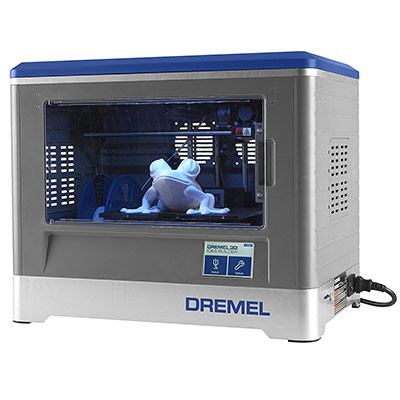
2. Dremel Digilab 3D20
Editor’s Rating: 4.2/5
At first glance, the Dremel Digilab 3D20 appears to be a rebranded FlashForge Dreamer which, as of this writing, retails for nearly double the price. But if you look closely at the technical specifications, you’ll notice the 3D20 is a different machine in more ways than one.
Essentially, the 3D20 is a more limited Dreamer, with a single extruder setup and a non-heated build platform that limits you to PLA filaments, hence the significantly lower price tag. It’s a fully enclosed 3D printer that arrives already assembled, making it a perfect starter 3D printer for beginners. The overall construction is sturdy and feels like it’s built for the long haul.
Setting up the 3D20 shouldn’t be too much of a problem, even for non-techies. The included instructions are clear and easy to understand. Perhaps the only thing that may cause you to sweat is the manual bed leveling process, which can be tricky. In case you need help during the initial setup, Dremel provides excellent customer service, though the lines can be really busy at times.
Once locked and loaded, the 3D20 is extremely easy to use, one reason why it’s a recommended starter 3D printer for newbies. The built-in touchscreen interface, which allows for offline printing via SD card, is responsive and user-friendly. The included slicing software is good for beginners as well, but veterans may want to replace it with a more capable slicer for better results.
The 3D20’s print quality is good for a $500 3D printer. If you have the perseverance to tinker with the print settings and go through dozens of trial-and-error, the 3D20 can become a powerful 3D printer capable of producing outstanding results. The lack of a heated built plate, however, means you don’t get to play with all sorts of filaments. It’s a shame considering the 3D20’s enclosed design is perfect for printing ABS.
Dremel tells you that the 3D20 is optimized for Dremel filaments. The key word here is “optimized.” See, the 3D20 is actually compatible with third-party filaments. But you void the warranty the moment you pop in a non-Dremel filament. Furthermore, using a third-party filament requires you to build your own spool holder because the 3D20’s spool holder, as you might have guessed, is built specifically for Dremel spools.
But is it worth it to eschew Dremel filaments and void the warranty? In our opinion, yes. For one, Dremel filaments are slightly more expensive than other more popular brands. Users have also reported getting better results with third-party filaments such as Hatchbox. But of course, the decision is yours to make. If you value the warranty more, then stick to Dremel filaments.
From a certain angle, the 3D20 is actually a better buy than the Dreamer. Dual extruder 3D printers aren’t for everybody, and lots of users have reported issues with the latter’s dual extruder setup. The Dreamer’s wireless connectivity is also not very reliable. So if you don’t want to play around with dual extruders and only plan to use PLA, the 3D20 should be good enough for you.
Going for a 3D printer that retails for way below $1,000 means you have to put up with limitations. If you want the best budget option that still produces excellent results despite being limited in the specs department, look no further than Dremel’s 3D20.
| Tech Specs |
|---|
| Resolution: 100 microns |
| Volume: 9 x 5.9 x 5.5 in |
| Filament: 1.75 mm |
| Type: PLA |
| Weight: 19 lb |
| Connect: USB, SD card |
| The Pros |
|---|
| Fully assembled |
| Enclosed |
| Sturdy construction |
| Easy to use |
| User-friendly default software |
| Good print quality |
| Responsive touchscreen interface |
| Good customer support |
| Trusted brand |
| The Cons |
|---|
| Limited to PLA filaments |
| Needs separate spool holder for third-party filaments |
| Using third-party filament voids warranty |
| Manual bed leveling can be really tricky |
| Poor bed adhesion |
3. BIBO2
Editor’s Rating: 4.7/5
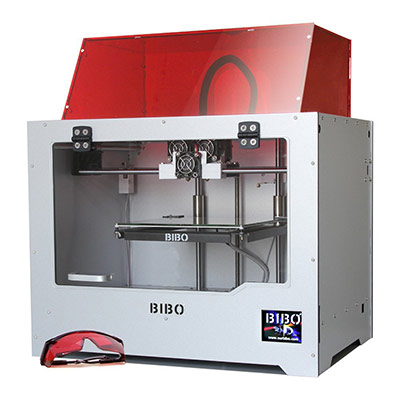
The BIBO2 is a 3D printer so loaded with features that it almost sounds too good to be true. The listed tech specs and features don’t even seem possible for a 3D printer available for less than $1,000. But the BIBO2 is not a scam – it’s the real deal.
Note that the BIBO2 is available in different configurations. The one listed here is the touchscreen-equipped BIBO2 with a built-in laser engraver. The product ships from China, so make sure all parts are in good condition as soon as you unpack it. If some parts have been damaged or are missing, notify the manufacturer immediately.
The BIBO2 arrives nearly assembled, with only a few parts that need to be installed. The initial setup can take 1-2 hours, depending on your familiarity with electronics. The manual is poorly written, so just head straight for the instructional videos included in the SD card.
Fully enclosed with a removable top and door, the BIBO2 is packed with useful features that both beginners and veterans will appreciate. It includes a filament run-out sensor, a feature many manufacturers don’t even bother with. The BIBO2 pauses the print as soon as it detects it’s out of filament, allowing you to load a new spool of filament.
Imagine experiencing a power failure halfway through a 20-hour project and not being able to resume from where you left off. Sounds painful, right? The BIBO2 guarantees that you will never have to experience such a scenario. It has the ability to recover from a power loss, so don’t be afraid to print large-volume 3D models that take over 24 hours to complete.
The BIBO2 is one of the best dual extruder 3D printers that you can get for less than $1,000. The dual extruder setup opens you up to new printing possibilities, like being able to print in two colors and print two identical 3D models at the same time in one session. The latter is especially convenient if you plan to use your 3D printer for business or commercial purposes.
The BIBO2’s print quality is accurate and detailed, though you will have to tinker with the settings in order to get the best possible results. When configured correctly, the BIBO2 can outshine many 3D printers that go for twice the price. It’s a reliable workhorse, too, capable of printing for extended periods with minimal performance issues.
The laser engraver is the cherry on top. It’s one of the features that really caught our attention. It’s unbelievable that a 3D printer retailing for less than $1,000 is equipped with such a feature. The laser engraver can be awkward to use because of the way it’s positioned, though – but it works, which is the most important thing.
Lastly, we’d like to point out that BIBO has one of the best customer services in the business. The customer support is easy to reach and usually replies in less than 24 hours. BIBO is one of those manufacturers that really care about their products and their customers’ satisfaction, providing timely support in a professional and friendly way.
Sure, the BIBO2 has a few areas that need improvement – like the sometimes unreliable wireless connection and the rather flimsy removable build plate. But considering all the good things it brings to the table, it can be forgiven for having a few negatives. If you want a 3D printer that delivers an incredible balance between affordability and value, the BIBO2 is the only product you should seriously consider.
| Tech Specs |
|---|
| Resolution: 50 microns |
| Volume: 8.4 x 7.3 x 6.3 in |
| Filament: 1.75 mm |
| Type: ABS, PLA, PVA, and others |
| Weight: 28.7 lb |
| Connect: Wi-Fi, USB, SD card |
| The Pros |
|---|
| Arrives nearly assembled |
| Dual extruder setup |
| Includes laser engraver |
| Responsive onboard touchscreen interface |
| Filament run-out detector |
| Can resume print after a power failure |
| Fully enclosed with removable covers |
| Heated build plate |
| Decent build volume |
| Excellent customer support |
| The Cons |
|---|
| Poor written instructions |
| No auto bed leveling |
| Unreliable wireless connection |
| Build platform feels rather flimsy |
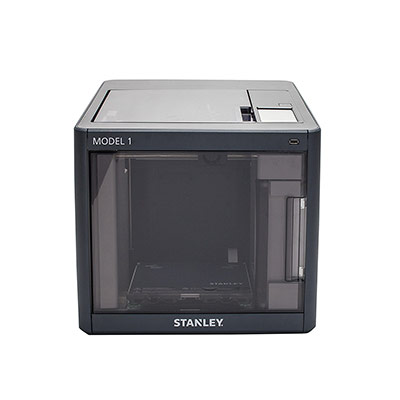
4. Stanley Model 1
Editor’s Rating: 4.3/5
If you think the Stanley Model 1 looks familiar, that’s because it’s a rebranded Sindoh 3DWOX DP200, one of the best 3D printers under $1,500. The key difference between the two is the price: as of this writing, the Model 1 retails for $900 while the DP200 goes for nearly $1,200.
The Model 1 has a very sleek and clean design, with all the wires and moving parts safely tucked away inside the enclosure. The internal spool holder is accessible through an opening to the side, allowing for quick removal and replacement of filament spools. Like the front door, the top cover can be flipped open for better ventilation.
The initial setup is painless. The Model 1 requires about 30 minutes of initial tinkering before it can start printing for real – and that includes the software installation. The auto-loading filament system makes loading the filament spool quick and easy – just insert the spool and the machine takes care of the rest.
The assisted bed leveling is also extremely helpful, especially for beginners. When prompted, the assisted bed leveling system analyzes the position of the build platform and sends you instructions (via the onboard touchscreen interface) on how to adjust it. Unless you have serious issues with following instructions, the bed leveling process should only take a few minutes.
Heated and removable, the build plate has excellent adhesion right out of the box. Everything just sticks on it without issue. But sometimes it’s too sticky for your own good, with particularly large-volume 3D models taking a while to pop off even with scrapers.
In terms of print quality, the Model 1 isn’t too shabby. It’s accurate and detailed enough to impress even those who have extensive experience with 3D printers. Of course, you need to have the right settings for optimum performance, which is also true for all other 3D printers. The bad news is that the Model 1 is meant for PLA and ABS only, so you don’t really get to play around with more exotic filaments.
Even worse, the Model 1 requires you to use only Stanley and Sindoh filaments, which can be a real deal-breaker. Using third-party filament will not only void the warranty, it could also damage the machine since it’s geared specifically for proprietary filaments. If you want an open filament system, you’re better off checking out other products on the market.
The Model 1 was built with convenience in mind. The auto-loading filament system, the assisted bed leveling system, and the nearly plug-and-play setup are proof enough of that. But what makes it scream “convenience” is the built-in camera, which allows you to monitor your progress from afar thanks to the wireless connectivity option.
Like the DP200, the Model 1 is not meant for tinkerers. It’s not open to a lot of modifications on the hardware side. It’s more of an entry-level 3D printer meant for beginners and non-techies, hence the user-friendly and convenient features. If you just want to print stuff and don’t want to deal with too many technicalities, the Model 1 is for you.
| Tech Specs |
|---|
| Resolution: 50 microns |
| Volume: 7.9 x 7.9 x 7.3 in |
| Filament: 1.75 mm |
| Type: ABS, PLA |
| Weight: 33.1 lb |
| Connect: Wi-Fi, USB |
| The Pros |
|---|
| Idiot-proof initial setup |
| Easy to use |
| Fully enclosed |
| Large build volume |
| Assisted bed leveling system |
| User-friendly touchscreen interface |
| Auto-loading filament system |
| Onboard camera for remote monitoring |
| Good print quality |
| The Cons |
|---|
| Bed adhesion can be too sticky sometimes |
| Not ideal for tinkerers |
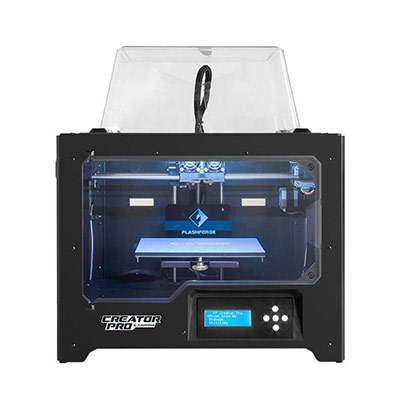
5. FlashForge Creator Pro
Editor’s Rating: 4.5/5
The FlashForge Creator Pro could have easily been our best value pick, but we gave the nod to the BIBO2 simply because it’s loaded with lots of features right off the bat. The BIBO2 is also slightly cheaper and is more suitable for beginners; the Creator Pro is more of a tinkerer’s machine.
Enclosed in a sturdy metal frame, the Creator Pro arrives almost assembled, with only a few parts that need to be installed, most notably the extruder. The instruction manual is pretty straightforward, though you may need to apply a bit of guesswork since some steps can be vague and confusing. In all, the initial setup – including the software setup and the calibration – shouldn’t take more than two hours.
FlashForge has a reliable customer support, so if you ever need help during the initial setup or think you might have received a defective unit, don’t hesitate to contact the manufacturer. The customer support staff are extremely helpful and would be glad to assist you anytime.
The Creator Pro is fairly easy to use. It includes a user-friendly LCD interface and comes with a good but limited default slicing software. If you can afford it, we highly recommend you get Simplify3D right from the get-go to make everything more streamlined, although you can also check out other free printing software.
The Creator Pro includes everything you need to get started right away, including two spools of filament. But while you can get started right away, it takes a bit of time before you can actually produce a decent print quality. The Creator Pro needs a fair amount of tinkering – even a few modifications – before you can be proud of your machine’s output. The good news is that the Creator Pro has an active community where you can get tips and optimization instructions.
Unlike the Stanley Model 1, the Creator Pro is compatible with third-party filaments and is not limited to just PLA and ABS. However, you do need to build your own external spool holder because the Creator Pro’s internal spool holder is designed for FlashForge spools. It’s not that hard to build one considering you can easily get a design for it.
As mentioned, the Creator Pro is more of a tinkerer’s machine. It needs a bit of work before it can truly shine. If you place more value on a 3D printer’s long-term potential with mods, the Creator Pro is for you. It’s also more robust and is better suited for marathon printing. But if you want something that’s already packed with features, stick to the BIBO2.
| Tech Specs |
|---|
| Resolution: 100 microns |
| Volume: 8.9 x 5.8 x 5.9 in |
| Filament: 1.75 mm |
| Type: ABS, PLA, Flexible, and others |
| Weight: 37.5 lb |
| Connect: USB, SD card |
| The Pros |
|---|
| Tightly secured packaging |
| Fully enclosed for protection and temperature consistency |
| Dual extruder |
| Sturdy and stable metal construction |
| Easy to set up and use |
| Good print quality |
| Can print using third-party filaments |
| Good customer service |
| The Cons |
|---|
| Default print bed isn’t so great |
| External spool holders required for non-FlashForge spools |
| Instruction manual could have been more detailed |
| Limited default printing software |
Contents

