How to Calibrate Your 3D Printer Extruder

Just like any machine, your 3D printer requires regular maintenance so that it’s always in tip-top shape. Considering all the intricate moving parts of a 3D printer, it’s easy to imagine how a misaligned build platform or a dirty nozzle can mess up your print. This wastes not just your precious filament, but also the hours of printing that you’ll have to start all over again.
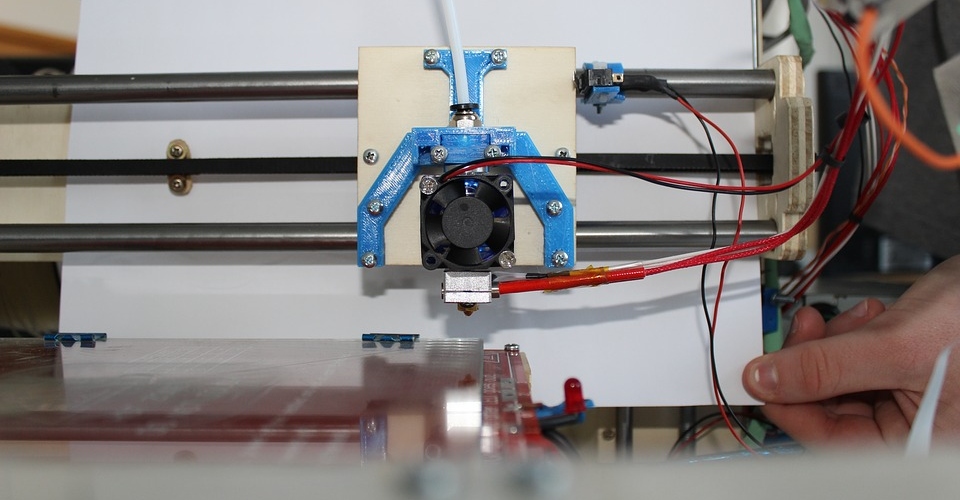
One of the things that we recommend the users of 3D printers to regularly do is to calibrate their extruders. This is an often overlooked aspect of 3D printer maintenance, but it can really help you get your projects to look just the way you want them.
When do you need to calibrate your extruder?

The main point of calibrating your extruder is to make sure that it is extruding exactly the amount of filament that you need it to. Why calibrate your extruder in the first place? To make this point clear, it would be better to talk about what will happen if you DON’T calibrate your 3D printer’s extruder.
Fortunately, it’s easy enough to spot an extruder that needs calibration. Either of two things can happen: your extruder can over-extrude, or it may under-extrude.
If your extruder is over-extruding or laying down too much filament, your print will typically come out with blobs or droopy features where the excess filament lacks support or is simply too heavy. If your model has a lot of gaps, then there’s a good chance that you will run into stringing problems. Left unchecked, over-extrusion will eventually result in a clogged nozzle.
On the other hand, under-extrusion is typically characterized by gaps and holes in your print where there shouldn’t be any. You may also end up with layers that are too thin, resulting in adhesion problems and warping in some sections. In any case, you’re going to end up with a print that lacks mechanical integrity.
A step-by-step guide to calibrating your 3D printer extruder
Calibrating your printer is a simple process that shouldn’t take your more than an hour. Take note that some of these steps will require you to make adjustments on your printer’s slicer software, the specifics of which will depend on which slicer software you have. Still, the basic idea should remain the same.
1. Gather your materials
- Your 3D printer
- Slicer software you normally use
- A micrometer (preferred) or caliper
- A ruler
- A permanent marker
- A spool of any non-flexible filament
2. Turn on your printer, connect it to the computer (via USB or Wi-Fi), and start the slicer software
3. Pre-heat your printer to the temperature appropriate to the filament
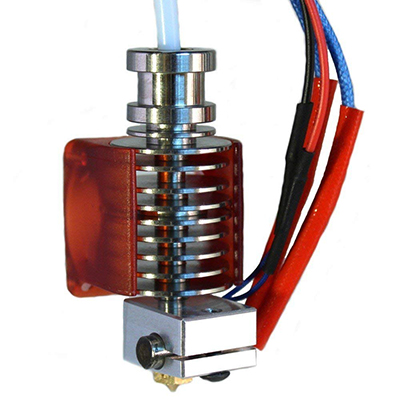
4. Feed the filament into your extruder like normal (Important: Make sure that there are is no leftover filament in your nozzle)
5. From the point where your filament enters the extruder, measure exactly 120 millimeters of your filament using a micrometer or caliper. Mark this point clearly with a permanent marker.
6. Using the slicer software, send a command to your printer to extrude exactly 100 millimeters of filament.
Some slicer software may allow you to do this directly, but you may need to use a program that lets you send gcode commands to your printer (such as Simplify3D or Octoprint web interface). In the latter case, the relevant gcode command is G1 E100.
7. Extrusion of 100 millimeters of filament should take about a minute or two to avoid developing any tension on the filament or pressure on the nozzle.
8. After 100 millimeters of filament has been extruded, go back to the filament that is still yet to enter your extruder and look for the mark you made.
Using your micrometer or caliper, take another measurement between your mark and the point at which the filament enters the extruder. If the measurement is exactly 20 millimeters, then you’re in luck! Your extruder isn’t out of calibration yet. We still recommend running the test several times, though, just to be sure. If everything’s good, then there’s no need to do any of the following steps.
If the measurement isn’t exactly 20 millimeters, then write down the actual length that the extruder consumed. You’ll have to do this test several times for verification.
9. Repeat steps 5 to 9 two more times, each time writing down the actual length of filament that was extruded. These should be similar values. If there are slight variations, then you can simply take the average of the three readings.
10. At this point, there’s a value that you need to extract from your slicer software – the number of extruder steps it estimates to extrude one millimeter of filament.
This can be done quickly by issuing a gcode command M503. This should return a string of characters, but the line you’re interested in should start with echo: M92. At the end of this line, you should find the E-value, which pertains to the number of extruder steps per millimeter.
For sake of discussion, let’s set a number for this E-value – 150.5. This value is just to be used for this example, and the actual E-value of your slicer may be different.
11. We’ll have to do a bit of math to “correct” how much filament your extruder releases. First, we need to get the number of steps that the extruder took to extrude what it perceives to be 100 millimeters. To get this value: we simply calculate:
(E-value)x(100 millimeters) = (150.5)(100) = 15,050 steps
Now, we have to set a new E-value by considering the actual length of filament that was extruded. Let’ say, for this example, that your printer was over-extruding. Instead of printing exactly 100 millimeters, it ended up printing 125 millimeters. Using your actual measurement and the number of steps that your extruder makes, you can compute for the new E-value:
15,050 steps / 125 millimeters = 120.4
12. Using the correct E-value you have calculated (which is 120.4), it’s time to correct the parameters of your extruder. To set the new value, simply send the gcode command M92 E###.##, where the hashes should be replaced by your new E-value. In our case, the proper command will be M92 E120.4. You will then save the new value by sending the command M500.
13. Restart your printer. Check if the changes have been made by sending the M503 command again and looking for the new E-value. The E-value should now match the number that you have set from the previous step.
14. To verify the accuracy of your adjustment, simply repeat steps 5 to 8. If there is still a discrepancy, keep repeating the steps to correct the E-value until the difference is hardly perceptible.
However, if you can measure a perfect 100 millimeters of extruded filament, then kudos to you! Do another two trials just to be sure before you start printing your next project.
Is the calibration process different between Bowden and Direct Extruders?
Not really. The same basic principle applies to both types of extruders, but you’ll need to be extra careful when using a Bowden extruder to ensure that you are doing the calibration process properly.
The extra layer of complexity comes from the fact that the extruder in a Bowden setup is separate from the nozzle. From the extruder, the filament has to go through a long Bowden tube before it reaches the nozzle, which provides a bit of room for the filament to deform.
To avoid the problem, you need to feed the filament through the extruder all the way to the outlet of the Bowden tube. Allow the filament to go slightly past the end of the tube and cut off the excess, making sure that the end of the filament is flush with the end of the Bowden tube. This ensures that the filament does not compress within the extruder assembly, leading to inaccuracy in your measurement of the extruded filament.
With the filament tapered right at the end of the Bowden tube, the tube can then be connected to the hot end, and the test can proceed. Take note that you’ll need to repeat this step for each of the succeeding trials – you’ll need to disconnect the Bowden tube, extrude a bit of filament, cut off the excess filament, and reconnect the Bowden tube.
This does not need to be done if your printer uses a Direct Extruder. Since the extruder and hot end are right next to each other in this setup, there is practically no room for the filament to deform. This makes the calibration a little easier. Of course, Bowden extruders also have their advantages.
Final thoughts
Calibrating your 3D printer’s extruder likely isn’t something that you’ll need to do very frequently, but you’ll need to do it eventually as the condition of your extruder gears starts to change. Since it’s not a purely mechanical process, it can be quite easy to forget the steps that you need to take to set a new E-value for your extruder. Don’t sweat it, though – you can always come back to this guide.