How to Charge the DJI Mavic Pro Controller

Charging a controller sounds like a simple matter, and it very well should be. For most devices, charging is a pretty intuitive process that does not take a lot of thought to figure out. This doesn’t seem to be the case for the dedicated controller that comes with the DJI Mavic Pro. Based on how many new Mavic Pro owners end up asking this question, it appears that DJI has not done a good job on making this a foolproof process.
In this article, we take a look at why this matter seems to be more complicated than it should be. We have also included a detailed guide on how to charge the Mavic Pro controller so that the matter can be cleared, once and for all.
Why the confusion?
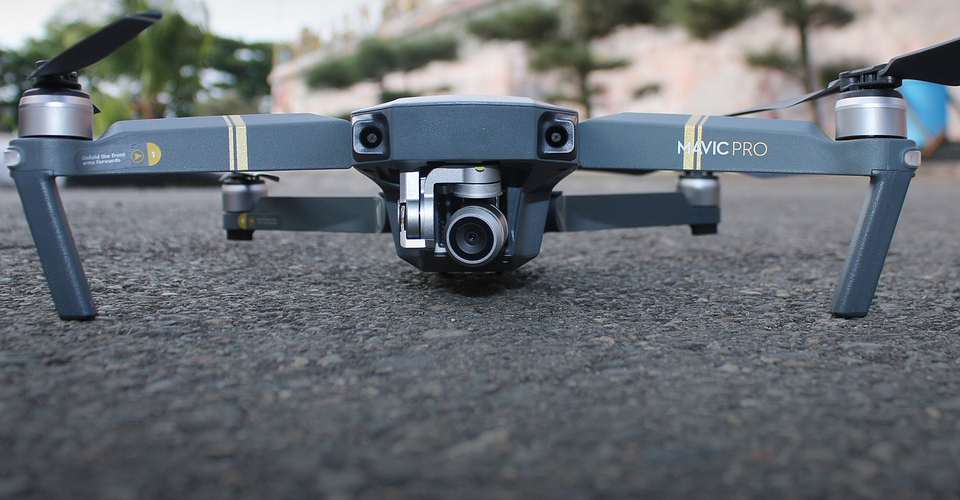
There’s actually a pretty good reason why people initially get confused about how the Mavic Pro controllers are charged. This is because, at first glance, the most apparent USB port of the controller is the USB-A port at the bottom of the controller. However, this port is only meant for the controller to communicate with a smartphone which the has the DJI GO app running.
Due to the prominence of the USB-A port, some people have been under the impression that the remote controller can only be charged using the power of the smartphone’s battery. This is simply not the case – but it would have been hilariously impractical.
How to charge the Mavic Pro controller properly
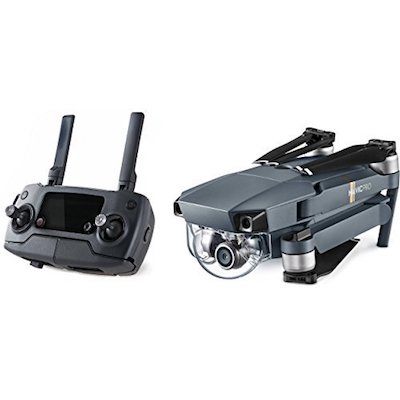
Many people figure this out eventually, but we’ll spell it out here for those who have come here for help. Charging the Mavic Pro controller is done via a micro-USB port located on the left side of the controller. This has a plastic cover that makes it a bit inconspicuous, but also gives it some protection against dust and other small particles.
The Mavic Pro comes with a micro-USB cable which can connect the remote controller to the charging block. With the charging block, you can charge the remote controller simultaneously with the drone battery. Each port of the charging block is designed to accept only 2 amperes, which is incidentally the maximum current that the remote controller will accept.
If you don’t have the admittedly cumbersome charging block with you, you can go ahead and use any regular charger with a USB-A port or a portable power bank. The battery of the controller does not require a high current flow, so you should be able to charge the controller from 0 to 100% in about two hours.
Charging tips
Now that you’ve figured out how to charge your Mavic Pro controller, here are some additional tips to make sure that you get the most out of your controller’s batteries.
1. Keep the controller plugged in when doing firmware updates
Like the drone, the remote controller also has to receive firmware updates from time to time as DJI makes minor refinements and improvements to the software. Between maintaining an internet connection, downloading the firmware, and installing it to the system, this can be a very power-intensive process. Once your remote controller has started the process of downloading new firmware, it will be better to plug it in. This ensures that the controller does not shut down mid-installation, which will likely make it unusable before you can re-install the upgrade firmware.
2. The batteries will self-discharge during storage
In a way, the batteries of the remote controller are also “intelligent” in that they will start to self-discharge if they have been stored for a long time while holding an amount of charge higher than the recommended threshold. This is a deliberate feature that helps preserve the integrity of the battery. There is a little bit of tolerance before the battery starts to self-discharge – we have observed the charge of the controller go down starting the 3rd or 4th day.
3. Get the Fstop Labs Mavic Pro rapid battery charger
If you only have one or two spare batteries for the Mavic Pro, you will probably stop flying even before the controller has consumed half of its charge. Charging the remote controller starts to become a problem when you buy even more batteries for your drone. If you find yourself needing to charge your remote controller to keep up with your drone, then the Mavic Pro Rapid Battery Charger from Fstop Labs might be worth your consideration. This charging hub allows you to charge up to three drone batteries and two more USB devices – including the remote controller and your smartphone.
4. Don’t overcharge!
The Mavic Pro remote controller only needs around two hours to be fully charged from a completely drained state. This is pretty short, so it’s easy to overlook when you need to pull the plug. This puts the battery in a state of trickle charging, which is never good if you want your battery to last for a long time. To make sure that you don’t cause long-term damage to your controller’s battery, we recommend that you only charge it until it’s almost full – between 90 to 95% should last long enough for your planned flight.
Final thoughts
The results of the counter-intuitive design of the Mavic Pro remote control was probably a learning moment for the engineers and designers of DJI. Thankfully, the succeeding releases seem to show that they have learned their lesson from this incident. After all, coming up with a foolproof design should always be the goal of any product developer.
Knowing the location of the charging port is only the first step in learning how to properly charge your Mavic Pro controller. The battery of the controller is not as finicky as the drone batteries, but charging it properly is just as important. Remember not to overcharge the battery, and not to store the battery at a fully-charged state for a long time. By following proper charging practice, you can extend the life of your batteries – whether for your drones or your controllers.