A Guide to Choosing Firmware for Your 3D Printer
Amidst all the bells and whistles of 3D printers, it is easy to overlook the importance of the programming that lies within the hardware. The firmware of a 3D printer is basically what gives it life. It interprets the G-Code generated from the slicer and sends out instructions to the various hardware components for execution.
If you’re really into tinkering with your 3D printer, you can even consider changing up its firmware. This can potentially improve the performance of your 3D printer. Here’s our guide on how to change the firmware of your 3D printer, as well as the most popular firmware options.
What does the firmware do?

The firmware of the 3D printer is often described as the bridge between hardware and software. It is a program that can interpret commands from the G-Code and translate these commands into specific actions of the hardware components.
To demonstrate, the firmware can read a G-Code command like “M109 S180” and it will send an instruction to the heating block to increase its temperature up to 180 C. Similarly, a G-Code command like “G1 X20 Y50” will prompt the firmware to send instructions to the stepper motors that control the movement of the print head so that it will reach the position described by X=20 and Y=50.
Underneath all these seemingly simple instructions are thousands of calculations and logic operations that the firmware does. This determines just how precisely and accurately the components of a 3D printer function. In some cases, firmware can have unique features that open up different options for 3D printing.
Why should you change a 3D printer’s firmware?
Although changing a 3D printer’s firmware does not take a lot of work, it can be quite a daunting task if you’re doing it for the first time. There will almost certainly be some troubleshooting involved, as well as a new learning curve that you will have to overcome. Is a new firmware worth all the extra work? Here are a few good reasons for making a firmware change:
Hardware changes
The number one reason that people change firmware is because of compatibility issues. This can come up if you’re installing a new control board in your 3D printer. Some control boards may have a limited list of compatible firmware. In some cases, your new control board may only work with a proprietary firmware.
Before getting a new control board, make sure to do your due diligence and check for any compatibility issues. If you’re unsure about any compatibility issues, then it would not hurt to ask the manufacturer.
Faster performance
Each firmware is uniquely coded and gets periodic upgrades. This can mean significant differences in performance across different firmware. In many cases, this can mean better performance for your 3D printer through faster calculations and more precise movement. Tweaking with firmware is one of the many ways that professionals can make their 3D printers just a little bit faster or more accurate.
Unique features
3D printing firmware might also have differences that are more than subtle. One firmware may offer better compatibility with multiple extruders, while another may support the printing speeds of Delta or CoreXY 3D printers. These are highly specialized features that you may find only on a specific handful of firmware options.
Most popular 3D printing firmware
There are probably more than a dozen different firmware options out there for 3D printers, but we will just narrow down the list to the five most popular and widely used.
1. Marlin
To this day, Marlin remains the most widely used firmware in 3D printing. Created in 2011, Marlin has since been adopted and improved by a huge community via GitHub. With this level of support, GitHub is known as one of the more reliable firmware options – should it have any bugs, you can count on the community to have them fixed quickly.
This open-source nature is also one of the reasons why Marlin is known as a highly versatile firmware. It can be used on both 8-bit boards and 32-bit boards and is compatible with a wide range of 3D printers and control boards. Users who are building their own 3D printers from separate components often go to Marlin as their firmware of choice.
Marlin is compatible with practically any type of 3D printer hardware. It works with Cartesian, Delta, and CoreXY printers, multi-extrusion printers, auto bed leveling, filament run-out sensors, heater power control, and up to 30 languages. Marlin is so versatile that it is often also used in CNC machines.
2. Repetier

Repetier is as much a mainstay in the 3D printing community as Marlin. It works with a wide range of 8-bit boards and, more specifically, control boards that use Arduino. It is mainly this lack of compatibility issues that has made Repetier popular for a very long time.
In terms of reliability and consistency in performance, Repetier is an excellent firmware choice. It works exceptionally well with the Repetier Host all-in-one software, so you might want to consider combining the two in your 3D printing setup.
Repetier supports various performance and quality-of-life issues. These include high-speed printing, compatibility with LCD monitors, and the ability to print files directly off SD cards. With its long history and very active community of users, documentation and guides on Repetier are easily available and incredibly detailed.
3. Prusa

Prusa is one of the top brands in the market for 3D printers, so it’s no surprise that their proprietary firmware is also excellent. The Prusa firmware is a modified version of Marlin that is programmed specifically to work with the Einsy Rambo control boards of Prusa 3D printers. This is probably the biggest drawback of this firmware – you can’t really use it unless you own a 3D printer from Prusa.
The big advantage of developing firmware specifically for a small selection of 3D printers is that it can be optimized to work extremely well with the hardware. The Prusa firmware supports all the best features that Prusa printers have been known for. These features include multiple extruders, multi-material printing, mesh bed leveling, and temperature oversampling. Despite being proprietary, the Prusa firmware is still open-source and has benefitted from user customization and improvement.
4. Klipper

Klipper takes a different approach to processing G-Code commands. Instead of the control board having to do all operations, some of the execution steps are off-loaded to a separate microcontroller in addition to a general-purpose computer such as a Raspberry Pi. The result is that Klipper can do calculations much faster, making it an ideal firmware for high-speed 3D printers.
With a more sophisticated processing sequence, Klipper is capable of executing more steps per second. This can result in significantly improved print quality and detail accuracy. One of its more intriguing features is its ability to cancel out errant movements of the print head using an attached accelerometer. This can help avoid common artifacts such as ringing or misaligned layers.
The biggest drawback of Klipper is that it’s a lot more complex to set up, especially compared to more mainstream options like Marlin.
5. SmoothieWare
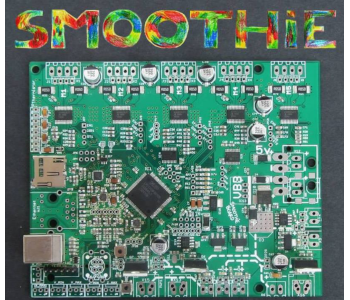
SmoothieWare is firmware that was written specifically for the Smoothieboard controller, but its compatibility range has expanded a bit since then. This firmware for 32-bit boars boasts of easy configuration and versatility not just for 3D printers, but also laser engravers and CNC machines.
The focus of this firmware is performance and freedom of configuration. It allows for jerk-free motion even when running at higher speeds, making it ideal for CoreXY and Delta 3D printers. Setting up Smoothieware is easy if you will be running it on a Smoothieboard controller, mostly because most of the documentation is based on the original hardware.
If you’re using a Smoothieboard, then installing Smoothieware is really a no-brainer. Unfortunately, the range of compatible boards is still very limited. If you’re lucky enough to have a compatible board, the Smoothieboard is among one of the best firmware in terms of performance and ease of use.
How to check your 3D printer’s firmware
If you’re still just beginning with 3D printing, you might now even know exactly which firmware your 3D printer is using. There are several ways that you can check depending on your 3D printer.
- If your 3D printer comes with a firmware by default, then it is likely documented in the printer’s manual. You can also try checking if the printer displays the firmware name and version on its display or user interface.
- Conversely, you can use access the firmware of your control board using a console and send the M115 command. This will return the firmware information including its name and version. In some cases, this will also provide a link to where the source code of the firmware can be downloaded.
Knowing your printer’s firmware has several advantages. The first is that you can check if there are more recent versions of your firmware. You can also try to check online for community support should you run into problems. Lastly, it is crucial information in deciding whether a change in firmware is in order.
How to install new firmware in your 3D printer
If you have finally decided on installing new firmware in your 3D printer, there are a few things that you will need to download or look up online first. These can be done on any standard computer. The one you use regularly with your 3D printer should work perfectly fine.
Download the firmware and lookup printer settings

The first step would be to download the firmware of your choice. The default option would be to download the latest version, although you may want to look at the developer notes to see if there are any bugs that need to be addressed. In such a case, it would be better to stick with the latest stable release.
Each firmware should have a general profile for the type of 3D printer you are using. Now would be a good time to look this up and write down the most important parameters. At a minimum, this includes the steps of all the stepper motors, as well as their maximum feed rates and travel distance values. This will eliminate much guesswork in setting up the new firmware.
Some firmware options, such as Marlin, come with an “examples” folder that has configuration files for the most popular 3D printers. You can try exploring for those or read up on the documentation of your firmware.
Download Arduino IDE
The Arduino Integrated Development Environment (IDE) will allow you to view the code for the firmware, edit it, compile, and upload it to the 3D printer. It can be downloaded here.
First off, connect your computer to the 3D printer using a USB cable and open your firmware of choice using Arduino IDE. At this point, you can edit the firmware code according to the recommended parameters for your printer.
Go to the “Tools” section of Arduino IDE and look for the control board of your 3D printer in the drop-down list. You can then click the “Verify” button at the top left of the window which will start compiling the code. Hopefully, the code will compile without errors.
With the firmware compiled, you can now upload it to your 3D printer using the “Upload” button, also located in the upper left section. If you’re changing to a completely new firmware, many of your printer settings will likely have been reset to default values. To restore these settings based on your preferred configuration, you can run the “Initialize EEPROM” tool in the interface of your 3D printer.
Final thoughts
The idea of changing the firmware of your 3D printer may seem daunting, and that’s for good reason – this is not something that you should do on a whim. Using new firmware could mean having to reevaluate the settings of your 3D printer, with due consideration of how it works with different filaments.
We have outlined some of the acceptable reasons for changing a 3D printer’s firmware. You can do it to improve the printer’s performance or just to avoid compatibility issues. The act of changing the firmware actually isn’t very hard. The real challenge is in adjusting and learning how to use the new firmware.

