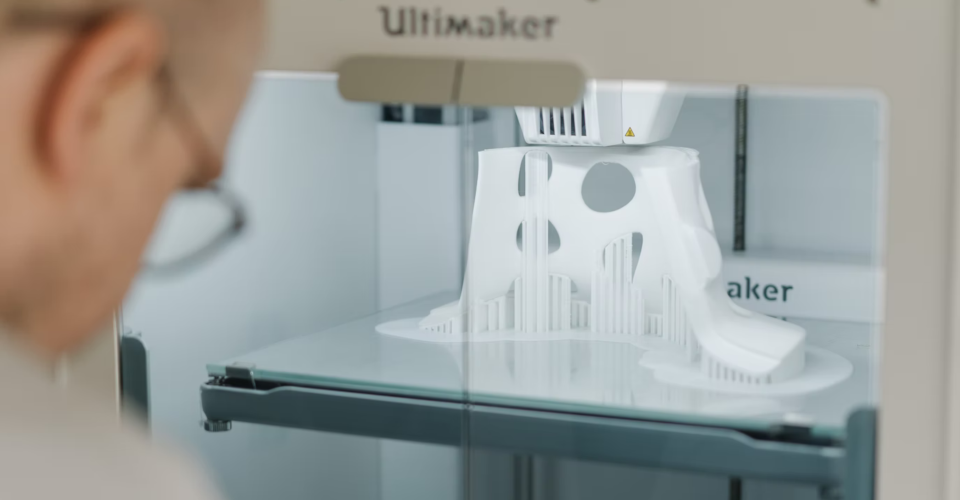
How to Clean the Print Bed of Your 3D Printer

Keeping your 3D printer bed clean is one of the more effective ways of making sure that your prints come out perfectly. However, doing this improperly can result in irreversible damage to your print bed.
Dishwashing liquid, isopropyl alcohol, or acetone can all be used to clean a 3D printer print bed depending on the type of print bed you are using. Avoid using any abrasive agents, including rough sponges. Print bed cleaning should be done regularly or whenever there is a significant accumulation of residual adhesive, filament, or dust.
When should 3D printer print bed cleaning be done?

The frequency of print bed cleaning depends on how heavily you use your 3D printer. If your 3D printer is under regular use, then establishing a fixed schedule will probably be the most effective. Setting aside a few minutes each week to do a cleaning session can make a huge difference.
Initially, establishing a schedule can be difficult. The best schedule is one that is based on how heavy your 3D printer usage is. If you can see a visible accumulation of leftover adhesive on your build plate, then that should be a trigger for cleaning.
If you haven’t used your 3D printer in a long time, then you should also probably clean your build plate before running a print. Print beds tend to accumulate dust quickly while in storage. Getting rid of the dust is a good way to maximize bed adhesion.
How to clean your print bed
The specific procedure to clean a print bed depends on what type of print bed you are using. However, there is one piece of advice that applies to all – avoid touching the print bed with your bare hands. Your fingers will leave an oily residue on the print bed that will compromise bed adhesion. Wearing standard latex gloves while cleaning is enough to avoid this.
Another tip we wish to emphasize is to make sure you’re working in a well-ventilated area whenever you use solvents like alcohol or acetone. The fumes from the solvents aren’t just unpleasant. At a high concentration, some people may suffer nausea or headaches from inhaling these fumes.
Glass
Most 3D printers nowadays have a glass print bed. The surface of the glass is exceptionally smooth and the material itself heats up evenly. Glass is also easy to clean because of how robust it is.
If there is leftover filament in your glass bed, we suggest trying to remove them via scraping it with a spatula. Do this gently – excessive force can still scratch a print bed. For adhesive residue, we recommend cleaning the bed with some dishwashing liquid and warm water. If this still does not work, a cleaning agent like isopropyl alcohol or glass cleaner should be the last resort.
Do NOT use stronger cleaning solutions or other cleaning agents that are not formulated for glass. If you must use a sponge, use the soft side of the sponge and apply it only very lightly. Microscopic abrasions on the surface of the glass will only encourage more residue buildup.
PEI sheets
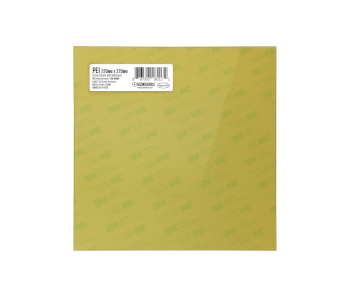
PEI sheets have become quite popular because of their advantages in bed adhesion. The flexible nature of PEI sheets also makes print removal a trivial task. However, this also means that residual adhesive tends to stick to a PEI sheet more easily.
The recommended cleaning solution for PEI sheets is either 70% isopropyl alcohol or acetone. This should dissolve any residual adhesive, allowing them to be wiped away easily. PEI sheets are quite fragile, so scraping away residue with a spatula generally isn’t recommended.
If the bed adhesion of your PEI sheet starts to deteriorate despite regular cleaning, you might need to “reinvigorate” its rough surface. This can be done by gently rubbing some fine-grit sandpaper on the PEI sheet. Be careful not to overdo this. The goal is just to remove surface imperfections because of lights nicks and scratches.
Keep in mind that PEI sheets are meant to be replaced eventually. Bed adhesion may not fully recover, despite your best efforts. When this happens, just use a new PEI sheet. They are still quite practical considering how many times you can use them before a replacement is needed.
Aluminum
Finally, the good old aluminum print bed is still a valid option for those who would rather not modify their 3D printers. If your print bed was left with significant filament residue, the first option would be to heat up the bed and try to remove the residue by scraping. Again, be careful not to be too forceful with the spatula, lest your print bed end up with scratches.
If you’re dealing with residual adhesive or very small pieces of stuck filament, the best solvent to use would be acetone. You might need to spray acetone heavily on the surface to fully dissolve the adhesive before wiping it away with a clean cloth.
What can happen if you don’t clean your print bed?
Cleaning a print bed is one of the more important housekeeping tasks you need to do for your 3D printer. It ensures that your print bed is perfectly smooth, oil-free, and dust-free. These are important conditions for maximizing bed adhesion and avoiding warping.
It should also be mentioned how cleaning your print bed regularly is a lot easier in the long run. Allowing adhesive, grime, and dust to build up in the print bed only makes it harder to clean. You will end up having to exert more mechanical force during cleaning, which makes damaging the print bed more likely.
Final thoughts
Everyone who owns a 3D printer should learn to take the time to clean their print bed regularly. It’s a quick task and putting it off for later will only make it harder for you. The emphasis here is to use the proper tools for the right situation and to not be too forceful if some scraping is needed.