
How to Clean the Foam Cushion in your VR Headset

Virtual reality may just be the new frontier of gaming. Right now, there’s nothing more immersive than a VR environment that tracks and reacts according to your movements in the real world. For this reason, VR gaming makes you physically move around so much more compared to traditional gaming.
While the physical movement is great and is something that most people could use more of, it leads to one nasty consequence: VR foam masks that get soaked with sweat after several minutes of gaming. When this happens, you have no choice but to clean the foam cushion. How exactly are you supposed to do this? Will it lead to degradation in the foam material?
Why does VR headset hygiene matter?
VR games are deliberately designed to get you moving. In fact, VR games do such a good job in this aspect that there are now VR-based fitness programs. Naturally, all this heavy movement results in sweating.
Normally, sweating while doing any form of exercise is not a problem. However, the interface of VR headsets with the face of the user is typically lined with a highly absorbent foam cushion. Not only does this result in VR headsets that turn into breeding grounds for bacteria, but it has also made it impossible for a group of people to share a single headset.
In the same way that phones and doorknobs harbor an unusually high level of pathogens, VR headsets and its accessories can also serve as agents of transmission of harmful bacteria. Because of the enclosed nature of VR headsets, they can cause sweating rather quickly. The warm environment of VR headsets even has the potential of further promoting bacterial growth.
Tips on cleaning your VR foam
The bad news is that there isn’t a single, absolutely most recommended method to clean the foam cushion of your VR headset. We’d rather not get the foam too soiled (as we’ll discuss later), but in case you’ve already jumped the shark, then here are our best tips.
1. Read your manufacturer’s instructions
Before you do anything, make sure to read the instructions that come with your VR headset and check if the manufacturer has a prescribed method. Recommended cleaning methods can vary from one brand to another.
For instance, the Oculus Rift suggests that you use an anti-bacterial wipe on the facial interface foam, and expressly states that you are not to use any alcohol or abrasive cleaning solution. On the other hand, Vive suggests that you remove the foam from the headset, gently it with a cold and damp cloth, and air-dry it at room temperature.
Samsung does not have a prescribed cleaning method but merely recommends that you keep your safe clean and dry when using the Samsung VR.
The reason why checking the manufacturer’s recommendations is important is because doing so ensures that your product warranty stays valid. If Oculus explicitly forbids the use of alcohol to clean their headsets, doing so may prevent you from making any warranty claims.
2. Clean it with warm water
A word of warning: this method is NOT recommended by any manufacturer. If you are nervous about losing your warranty, then it’s best to stick to the manufacturer-prescribed method. The method we are about to describe is quite simple and seems effective. However, we will not be held liable if you void your product warranty by cleaning your VR headset foam cushion using our method.
Our method involves removing the foam and submerging it in warm water. The water needs to be just hot enough to kill off any pathogens in the foam but not too hot so that the foam cushion won’t end up getting deformed.
To start, prepare a small bucket of warm water at about 130 to 140 °F. Take off the foam cushion from your headset and submerge it in the bucket. This will allow the foam to absorb the warm water and effectively become disinfected.
Remove the foam from the warm water and squeeze out as much water as possible. Be careful while doing this step, as the foam covers of most VR headsets are thin and soft Repeat this step two or three times, making sure to wring out as much water from the foam as possible every time.
After washing, dry the foam with a towel and try to remove as much water from it as possible. The foam will still be damp, so place it in a spot where it can air-dry quickly. It’s best dried under direct sunlight. Keep in mind that any residual moisture can harbor bacteria, so the foam cushion needs to be dried as quickly as possible.
Is cleaning the best way to avoid pathogen transmission?
The problem with bacteria in your VR headset foam cushion is that they cannot be removed simply by wiping them away. While some brands of VR headsets recommend wiping the foam cushions with alcohol, even this may not be a sufficient disinfection method. After all, the bacteria aren’t just on the surface – it’s probably embedded deep into the foam.
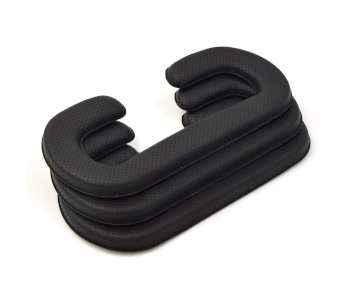
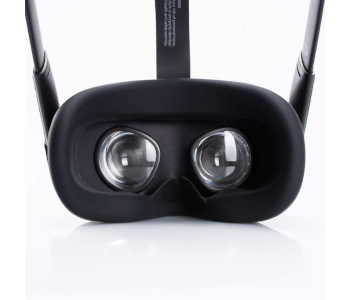
The most effective way to avoid bacterial growth and transmission in the foam cushion is to not allow it to soak up your sweat in the first place. This can be done by getting a removable and replaceable VR mask insert that will sit between your face and the foam cushion.
There are lots of these products in the market, such as this PU-lined foam liner for the Vive and this silicone eye mask for the Oculus Quest. No matter what product you get, what’s important is that they can be easily swapped out and washed when necessary.
If you’re having a group gaming session using a single VR headset, then we recommend assigning a removable liner for each person. This way, there will be no exchange of bodily fluids, and the chances of pathogen transmission will be drastically reduced.
Too late! My foam cushion is already beyond cleaning!
If you haven’t done the necessary preventive methods, then the foam cushion of your VR headset may already have fostered colonies of bacteria through repeated sessions of sweating. At best, continuing to use your headset in these conditions can lead to your skin breaking out in rashes or acne. However, that foam cushion could also be harboring more harmful pathogens that could cause worse health conditions.
If, after attempting to clean your foam cushion, you find that it is beyond salvaging, then your best course of action is to buy a replacement. Fortunately, it’s very easy to buy a replacement face pad nowadays, and they are not so expensive either. You should be able to find a replacement foam whichever VR headset you have. The following are some of the best replacement foam cushions we have found:
- Oculus Rift Foam Replacement by VR Cover
- HTC Vive Memory Foam Replacement by VR Cover
- Samsung Odyssey Foam Replacement by VR Cover
- HTC Vive Pro Face Foam Replacement by TamBee
Replacement foam pads for newer models, such as the Oculus Quest and the Rift S, are a bit more challenging to find. In any case, it’s best to start using a face cover as soon as you get the new foam pad.
Final thoughts
VR gaming can be a surprisingly physically demanding activity, to the point that we need to start treating VR gaming peripherals in the same way that we treat our gym clothes and towels. In the same way that you would not reuse a towel that has already been soaked with sweat, you will need to wash the foam pad of your VR headset after a sweat-filled session.
Our suggestion is not to let that foam pad get soaked with sweat in the first place. All it takes is for you to get a face mask that you can remove, replace, and wash separately. These face masks are very cheap and can be used hundreds of times. Nobody likes doing laundry, and we bet that you wouldn’t want to add that VR foam cushion to your weekly laundry pile.