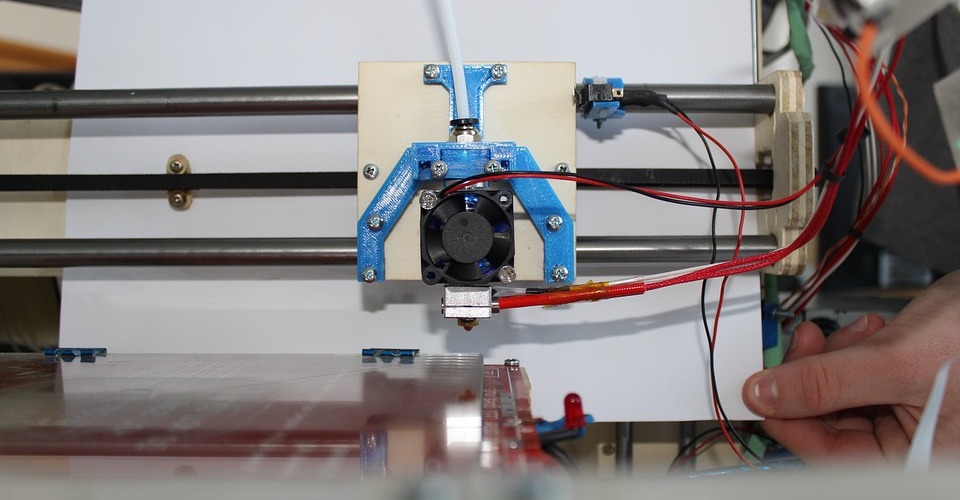
Easy Ways to Clean your 3D Printer Nozzle

The road to being a good 3D printing professional involves running into bumps every now and then. You will deal with messy filaments, stubborn prints, and an extruder assembly that just refuses to cooperate. One of the most mundane but frustrating chores that experienced 3D printing professionals have gone through is having to clean a clogged nozzle. Is there any way to avoid getting your nozzle clogged? If it does, then what’s the best and easiest way to clean it?
Preventing the clogging of your nozzle
People who had their nozzle get clogged up have probably learned one (or more) of these lessons the hard way. The first thing you need to know is that you do not have to put up with nozzles that get clogged. By taking proper care of your nozzle and extruder assembly, you can avoid running into this problem. Here are some of the best ways to keep your nozzle clog-free:
1. Clean out the nozzle between switching filaments
The most common cause of extruders and nozzles getting jammed is when some leftover filament gets stuck in the nozzle when changing filaments. In most cases, it is simply impossible to remove all the material in the nozzle when you pull out a filament so you can change it with another. However, it’s much easier to remove this leftover material rather than have it form a compact plug by pushing it in with more filament.
2. Make sure your filament is clean
Any dirt or dust in your filament will burn as it goes into the hot end nozzle, and this burnt material will accumulate over time and form a hard plug. Filaments from manufacturers are usually clean enough to be used directly, but you will have to ensure that the filaments are stored in air-tight bags. For best results, you should store your filaments in vacuum bags with a few packets of desiccant.
3. Keep your nozzle at the optimal height
One of the parameters that 3D printers need to get right is the height between the nozzle and the build platform. Setting the nozzle too high will result in the premature cooling of the filament and poor bed adhesion. On the other hand, setting it too low causes retrograde extrusion, a condition where the filament cannot flow properly. Aside from the quality of your print suffering, retrograde extrusion can jam your nozzle quickly.
4. Print at the right temperature
The nozzle of a 3D printer is typically much smaller than the diameter of the filament. This means that the filament needs to be completely melted for it to smoothly flow through the nozzle. Setting your printer temperature lower than the recommended temperature for the filament you are using will make it harder for the extruder to convey the filament through the nozzle, resulting in filament material cooling just inside the nozzle. This is one of the most difficult jams to clean.
Ways to unclog your nozzle
Depending on how severe your nozzle jamming problem is, there are a couple of ways that you can deal with it. Your mileage may vary, so these methods are listed from the easiest to the most complicated.
1. Brush your nozzle from the outside
By far, the easiest solution to a jammed nozzle is to simply brush the nozzle from the outside using an appropriate brush. This only clears the tip of the nozzle, so it may not solve the worst problems with clogging. However, it’s an easy solution that you can regularly do as part of maintaining your 3D printer.
For best results, it is recommended to use a wire brush so you can remove the stubborn burnt material that may have accumulated in the nozzle. To keep your nozzle from getting damaged, it is recommended to use a brush with brass threads. A steel wire brush might be more effective for removing clogged material but may also damage the nozzle.
2. Push the jam out with a pin
If your nozzle is only clogged by a small amount of melted filament, then you should be able to push it out with a small pin or needle. We have heard that acupuncture needles work great for this method. To remove the clog in this manner, you merely need to heat the nozzle a bit to soften – but not to melt – the material. This can be done through the hot end assembly or manually by using a hot air gun. From this point, removing the jam is only a matter of pushing it out using a needle.
3. Cold pull with nylon filament
One of the most reliable ways to remove a clog, especially one caused by a significant amount of melted filament, is to do a “cold pull” using another filament. A nylon filament is the best option for this method due to its high melting temperature. ABS is also a good, and far more common, alternative.
To do the cold pull method, you need to dismantle the extruder setup to allow you manually push a filament through the nozzle. Start by heating the nozzle to 250 °C and leaving it at this temperature for about 5 minutes. Firmly but gently, push the nylon (or ABS) filament through the nozzle. At the temperature of the nozzle, the previous filament that had caused the clog should be completely melted and extruded along with the nylon. Continue doing this until you no longer see any of the old filament coming out with the nylon.
Allow your nozzle to cool down to room temperature so the nylon filament can re-solidify. After this, heat the nozzle up to 120 to 130 °C. This will be just hot enough for the filament to soften so you can pull it out completely. Give the filament a solid yank out of the nozzle. This should leave an impression resembling the shape of your nozzle on the end of your filament. Any dirt or loose materials that were not pushed out in the first part of this process should come out with the cold pull.
You can do this process several times if you can’t get all the leftover material in your nozzle on your first go. If you find pulling out the filament too hard on your first try, then you can try higher temperature settings for the cold pull step.
4. Remove the nozzle and soak it in acetone
This is an “if all else fails” measure which can take a long time or may not be effective for all types of filaments. Start by removing the nozzle from the heater block using a socket wrench. If your nozzle clogged while printing with ABS, then the clog should be removed by soaking the nozzle in ABS for at least 15 minutes. Make sure to wipe away the residual acetone or allow it to vaporize before reinstalling it in your extruder assembly.
If the jam was not caused by ABS or another filament that will dissolve in acetone, you could also use a heat gun or blowtorch to heat it and melt the clog away. Once the nozzle is very hot, you can use a thin, soft wire to check if you can clear a hole through the nozzle.
What to do when your filament has been stripped away
In most cases, pressure buildup in the nozzle results in the filament getting “stripped away” by the hobs of the extruder. This means that, aside from a clogged nozzle, you also have the problem of extruder gears that
If this has happened, it’s quite easy to see the evidence when you pull out your filament, and you see the sections where it seems to have been ground away.
When this happens, you’ll need to clean out the hobs of your extruded as they have probably already been filled with plastic. Without cleaning them out, they can no longer grab the filament and extrude them at the proper printing speed.
Disassembling your extruder assembly to access the hobbed gear can be messy, so make sure that you understand how to put it back together again before proceeding with this step. If your 3D printer is still under warranty, disassembling the extruder yourself may also render your warranty void.
If this is a viable option to you, then cleaning out the hobs in your extruder gear is as simple as taking a small pointed tool and poking out the plastic material that may have been lodged into the individual hobs. A regular wood toothpick will do for this method.
Final thoughts
Nozzles getting clogged is pretty much par for the course in 3D printing. This is especially true when you are just starting, or when you are trying out a filament that you’re not yet familiar with. Prevention is still much better and easier than cure, and you can take a few steps to reduce the chances of your nozzle clogging. However, when nozzle clogging happens, it is equally important that you know what to do to solve the problem.
Have you had your nozzle clog before? What did you do to remove the jam? We’d like to hear your thoughts so just sound off below!