
How to Create Completely Clear or Transparent 3D Prints

For some people who are into 3D printing, creating a project that is completely clear is something of a holy grail. As anyone who’s tried it will tell you, it’s not as simple as using a clear filament. Achieving this feat requires very specific printer settings and post-processing, all taking into account basic concepts of optics.
How does one achieve a fully transparent 3D print? Wonder no more, as we’ve taken the experience of people who have been able to succeed with transparent 3D printing and have come up with this quick guide. The process itself isn’t going to be quick – all we can say is that we hope that you have the patience.
What does it take for something to be transparent? A review of optics
Let’s start our guide with a brief discussion about optics by answering this question – what makes an object transparent? In designing an object that we want to be as clear or transparent as possible, there are two phenomena that we are trying to avoid: the absorption and diffraction of light.
Absorption refers to the ability of an object to absorb light instead of reflecting it or letting it pass through. This happens because the electrons of an opaque material have energy states that allow them to move from one band to another, thereby absorbing energy from the photons of light.
In transparent objects, the energy levels are arranged such that they absorb photons at the frequency of visible light. However, it’s possible for them to absorb photons of infrared or ultraviolet light, or light at frequencies that cannot be seen by the naked human eye.
While absorption is typically a phenomenon that is a function of the material, diffraction can be controlled by processing. In diffraction, scattering of the rays of light or internal reflections prevents light from getting transmitted through an object. This is usually because of impurities in the material or imperfections in the material’s surface.
Materials made of crystals – such as glass – also exhibit transparency because the boundaries between adjacent crystals are smaller than the frequency of visible light. This is achieved through the rapid cooling of glass under a high-pressure environment, resulting in the formation of very small crystals with very small grain boundaries.
Our key takeaway from this discussion is that there are two avenues that we need to consider when 3D printing a clear object – the material, and its processing. Let’s tackle each one separately.
Use a clear filament
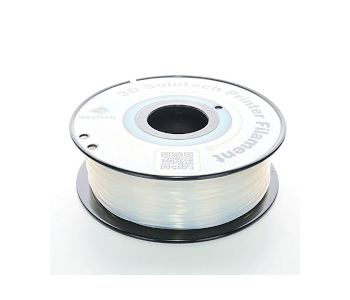
The first component of our mission is the material. Fortunately, this is a pretty straightforward matter. Clear filaments are no longer uncommon. Most of the clear filaments you can buy today are made from PLA, but there are also several options made from PETG or ABS.
The material itself doesn’t matter. Any of the three filament options we’ve listed above can be used to create almost perfectly clear 3D prints. However, keep in mind that not all plastics are naturally clear. ABS, in particular, is a naturally yellowish-white plastic that requires additives to achieve a clear appearance.
What you need to be more discerning about is the quality of clear filaments between different brands. First off, you will want a filament that actually looks clear. Depending on the brand and how the filament was made, some clear filaments may turn out to be slightly translucent or have a minor yellow hue. Also be wary of filament with air bubbles, as these can easily cause heavy light diffraction and make it impossible to achieve a perfectly clear appearance.
Choose which axis you need to be transparent
Before proceeding with printing a model, it would be prudent to decide on which axes you need the object to be transparent. Are you going to look through it from the side (x and y axes) or from the top (z-axis)? Achieving transparency in the z-axis is much simpler and decidedly more complicated in the x-axis and y-axis. Unfortunately, the latter is more often the case. For solid objects, transparency in all three axes might even be the objective.
Print with big layers
When setting printing parameters, we have to keep in mind that we are trying to reduce diffraction and internal reflection. This means giving the rays of light wider paths to transmit through with minimal ‘impurities that can cause the light rays to bounce in unpredictable directions.
The first way to achieve this effect is to print with thick layers. Layer heights set at up to 90% of the nozzle diameter are recommended. The rationale behind this is that thicker and more spherical layers reduce internal reflection by providing the rays of light thicker segments of material where they can pass through unimpeded.
Thin layers aren’t necessarily a problem as long as you can get them to “fuse” with each other and make a more solid block of plastic. However, layer boundaries that aren’t completely fused can act as impurities in the inner surface of the finished print, thus causing diffraction and refraction. Printing with thick layers also forces the material closer together than normal, making them less likely to form distinct layer boundaries.
Print slow and hot
You will want each layer to fuse almost completely with the previous layer, so it’s recommended to print at the highest temperature possible. This means setting your printing temperature at the highest value of the recommended temperature range of the filament you’re using. In some cases, you might even benefit from going over the recommended range by a few degrees. Again, the idea is to create a single, solid block of material instead of one with clearly demarcated layers.
Another strategy is to print slow – about 30% slower than the normal printing speed for your filament. This helps with accuracy, ensuring that layers are laid down exactly where they need to be to achieve complete fusing. The inclusion of air bubbles is also something you are trying to avoid by printing slow. Of course, accurate movement of the print head relies on proper calibration, so make sure that you do a nozzle calibration and homing of the print head before starting with the printing process.
Print with 100% infill
When viewing an object in the axis where you want it to be transparent, any shift in the material can cause internal reflections or refraction. For solid objects, this means that any infill less than 100% simply will not do. Light will bend repeatedly when transitioning from plastic to air, resulting in a finished print that is absolutely not transparent.
Smooth and polish like there’s no tomorrow
A downside of printing with thick layers is that it results in prints with very rough outside surfaces. An uneven surface will cause the reflection of light in different directions, creating an almost opaque look. Fortunately, this is a problem that can be resolved with proper smoothing and polishing techniques.
If you’re working with ABS, then you’re in luck, as you can simply do the usual acetone vapor method. By subjecting an ABS print to a bath of acetone vapors, a very thin layer of ABS can be selectively dissolved to create a perfectly smooth finish. In most cases, this is enough to achieve a perfectly transparent look with ABS.
Finishing a PLA print will take a lot more time and effort. Smoothing PLA relies on old-fashioned sanding, but you’ll have to do this to such a refined degree to achieve transparency. This means using several types of sandpaper, from low-grit to high-grit. According to some experts, you may have to go as high as 4000-grit to achieve a perfectly clear PLA print. At that grit grade, sandpaper almost feels like cardboard.
PETG is a filament material that is pre-disposed to create prints with clear and smooth surfaces. It also has excellent layer adhesion, so you shouldn’t have problems with internal reflection when printing with PETG. It’s not soluble to acetone nor does it smooth as nicely as PLA, but PETG is the kind of filament that should not need a lot of post-processing if you can dial in the proper printer settings.
Polymaker PolySmooth – a filament designed specifically for transparent prints
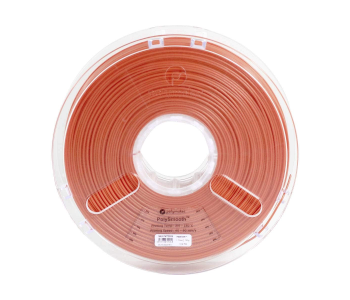
Since we’re on the topic of clear or transparent prints, it would be an injustice not to mention one of the best filaments made precisely for this purpose. The Polysmooth filament from Polymaker prints just as easily as PLA, has excellent layer adhesion, and has a wide printing temperature range. It comes in a wide range of colors, many of which are designed to be as clear and transparent as possible.
There are no details on exactly what type of material the Polysmooth filament is made of – it’s probably a trade secret. What we can tell is that it’s one of the easiest filaments to use if you want to create transparent objects.
Polysmooth may have the same ease of use as PLA, but it has one major advantage – Polysmooth is soluble in isopropyl alcohol or ethanol. This presents the possibility of smoothing via a vapor bath. Polymaker has leveraged on this advantage by selling the Polysher, a specially designed polishing chamber that comes with a small reservoir where you can place the alcohol.
Instead of heating the alcohol, it is nebulized in the chamber or sprayed in a very fine mist. This alcohol aerosol dissolves a very thin layer of the Polysmooth material, creating a perfectly smooth finish with minimal effort.
The Polysmooth filament is a lot more expensive compared to standard PLA or ABS. The Polysher polishing chamber will set you back another $300, making this entire setup quite pricey. However, there’s no question about how well the combination works if you want to come up with perfectly clear 3D prints.
Final thoughts
Creating true transparency in 3D printing is something that has been attempted several times over the years. Nowadays, the technology and techniques needed to come up with clear 3D prints have been well-established. This does not mean that it’s going to be easy. If this is your first time attempting it, then you can expect a lot of trial and error before you can get results that you’re happy with.
There are just a few things to remember – print hot, slow, and big, and make sure to get a high-quality transparent filament. The Polysmooth filament from a Polymaker provides a good low-effort shortcut, but you can also achieve good results with other transparent filaments made with ABS, PLA, PETG, or PC.