How to Design Parts for SLA Printing

Slowly but surely, SLA 3D printing is starting to gain the levels of popularity of FDM. More and more people are now more comfortable getting over the difficulty hump of SLA printing to realize the superior quality of its output.
Those who are just beginning with SLA printing or are considering getting an SLA printer have much to learn. The transition from FDM to SLA can be quite jarring, especially in terms of use and maintenance. Another thing you need to know is how to make 3D models compatible with SLA printing. Here are some useful pointers.
Drainage holes are essential
A key difference of printing in SLA is that you’re working with a liquid resin raw material. This liquid resin will find its way into the empty spaces in your model. This means that some of the resin can get stuck inside any internal pockets of your model since you’re still building the project layer by layer. For this reason, models designed for SLA printing need to have holes to drain the excess resin.
One more reason why drainage is essential is the fact that there will likely be lots of hollow space in your model. We have to face it – resin is expensive compared to 3D printing filament. For this reason, it’s common to see SLA prints have more hollow space compared to FDM prints.
The recommended minimum size for a drainage hole is about 3.5 millimeters across. This takes into account the flow properties of uncured resin. The optimal location for the drainage holes depends on the aesthetics of your model but should also take into account the orientation of the model when it is printed. You would not want your model to be weighed down by excess resin during printing.
Minimize the z-axis cross-sectional area
Another unique characteristic of the SLA printing process is that each layer needs to be pried off the tank as it is printed. This can be a major cause of the failure of an SLA print. If your model has a large cross-sectional area perpendicular to the z-axis, removing the layer from the build player becomes harder and more prone to failure.
The best way to avoid such a failure is to reorient the model to reduce the z-axis cross-sectional area. In most cases, this will mean increasing the number of support structures. However, this is a compromise that most experts in SLA printing would recommend.
Wall thickness guidelines
Thin walls can be quite challenging in SLA prints, mostly because they are still prone to warping. However, purposely making your walls thicker than necessary will also use up even more of that precious resin. Here are some general guidelines on designing walls that strike the perfect balance between resin use and durability.
- If thin walls so do not have any supports at their terminal sides, they must be at least 0.6 millimeters thick. To reduce the stress at the joints, you can also consider placing filleted bases on these walls.
- Thin walls that are anchored to supporting edges can tolerate a minimum thickness of 0.4 millimeters. Supported walls are much more robust and can do away with the filleted base design.
Regardless, you will want the thin walls in your model to have as uniform a thickness value as possible. Non-uniform walls tend to cause stress to be accumulated in their thinner portions. If your design deliberately needs non-uniform walls, the best you can do is to make the transition as smooth as possible.
Keep overhangs within 19 degrees
Just as in FDM printing, overhangs can be problematic in SLA. They can either cause a print to fail or result in features that become warped. Similarly, overhangs can be reinforced with some support structures.
Overhangs in SLA are a bit more demanding when it comes to supports. If you want to print without a support, an overhang feature needs to be only a maximum of 19 degrees from the horizontal or only 1 millimeter in length. Otherwise, you may find that overhang features can deform if they do not outright collapse.
With this very tight tolerance, you will likely have to resort to a dense distribution of support structures. This is quite common in SLA printing.
Holes, gaps, and engraved details
A lot has been said about the superior resolution and detail accuracy of SLA printing compared to FDM. While these claims are true, there are still limitations to keep in mind.
Holes
Any hole with a diameter less than 0.5 millimeters can be challenging in SLA printing, regardless of how deep it is. At this size, the hole has a high likelihood of closing off. It is considered good practice to keep holes at a minimum diameter of 0.65 millimeters. If very small holes are needed in your design, then it is considered a better option to just drill them during post-processing.
Gaps and engraved details
As with holes, any gaps or clearances can close off if they are too small. This often happens when there is text engraved into the model. The rule of thumb to keep in mind here is pretty simple – make these gaps at least 0.4 millimeters wide and 0.4 millimeters deep. Thicker and deeper gaps are better. Again, there are methods to engrave a finished print at post-processing if you need more refined details.
Bridges
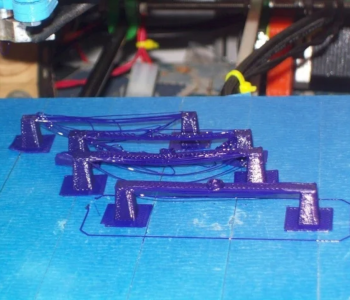
Bridges in SLA printing can be problematic because of two reasons. They can fail because they are essentially horizontal overhangs. They can also fail if their cross-sectional area makes it too difficult to pry off the build plate. The solution is to plan the design early on to consider the limitations of SLA.
A horizontal bridge must have a maximum length of only 21 millimeters between supports. Shorter bridges are preferable and have a lower likelihood of failure.
Wide bridges, although stable, are not encouraged in SLA printing because of their increased cross-sectional area. This is where balance comes in. If you want your bridge to be longer, you will have to make it thinner. Conversely, you can shorten your bridge if it needs to be wide. The specific cross-sectional area that a print can support will depend largely on the type of resin you are using.
Embossed details
Embossed details are the opposite of engraved details – they are raised slightly off the surface. This is another common way of adding text to a model. Embossed details are easier to manage as they are not made of gaps that can close out. To make embossed details visible, they need to at least be 0.1 millimeters high measured from the base surface.
Some sources claim that 0.5 millimeters is the accepted tolerance both for embossed and engraved details. This can also be worth exploring if the 0.1-millimeter tolerance is not working for you.
Split big models into smaller parts
A major limitation of SLA printers, particularly the desktop-scale models, is that they have very small build volumes. However, this should not discourage you from making super-sized 3D printing projects. There are a lot of 3D printing professionals that work exclusively with SLA printers despite their limitations.
The key is to break down large models into smaller parts that your SLA printer can accommodate. This is not as simple as placing cutting planes on your model. To make sure that these parts interlock properly and securely during assembly, you will have to integrate snap-fit connections into them.
Designing connections for SLA prints is a lot easier because of the high resolution of the technology. You can opt to make a very snug fit using a clearance of only 0.1 millimeters. If you need the parts to be able to move around after assembly, then a 0.5-millimeter clearance is more appropriate.
You also need to place some thought on the shape of the connectors. Square pegs are more secure if you want connections to be fixed and are great for holding adhesives. Round pegs allow for rotation, should your finished part need some articulation.
Alternatively, a model that is just a bit too large for your printer’s build volume can be scaled down easily using your slice software. Just be careful when taking this approach as it also shrinks any gaps or holes in the design. When scaling down, double-check your model’s feature to make sure that they still comply with all the rules we have discussed above.
Final thoughts
Seeing more people jump into SLA 3D printing in the past few years has been very encouraging. Although SLA printing is more challenging, it’s also innately more rewarding especially if you’re into printing highly detailed figures and models.
If you design your own models for 3D printing, the shift to SLA will also demand a similar shift in paradigm. The mere fact that you’re now working with a liquid material requires a few design considerations. There are also the usual complications such as engraved sections, gaps, bridges, and overhangs. None of this is excessively complex and cannot be learned with some experience.