8 Tips for Designing Models for 3D Printing

There is beauty in the simplicity of 3D printing. With a 3D printer and slicer software, all you need is just a 3D model to start printing any project. You don’t even need to design your own 3D model – there are thousands of them available online for free. However, designing a 3D model from scratch is the sensible next level if you want your skills to progress.
However, there is a different philosophy in creating a model that is meant for 3D printing. There are several factors to consider in making sure that your design is realized faithfully into reality. Before you start molding or sculpting that model, here are a few tips to consider.
1. Consider the 3D printing technology

Whenever you start designing a model for 3D printing, you must start by determining which 3D printing technology will be used. Even between the two common candidates – Fused Deposition Modeling (FDM) and Stereolithography (SLA) – there is already a huge disparity in how the design should be approached.
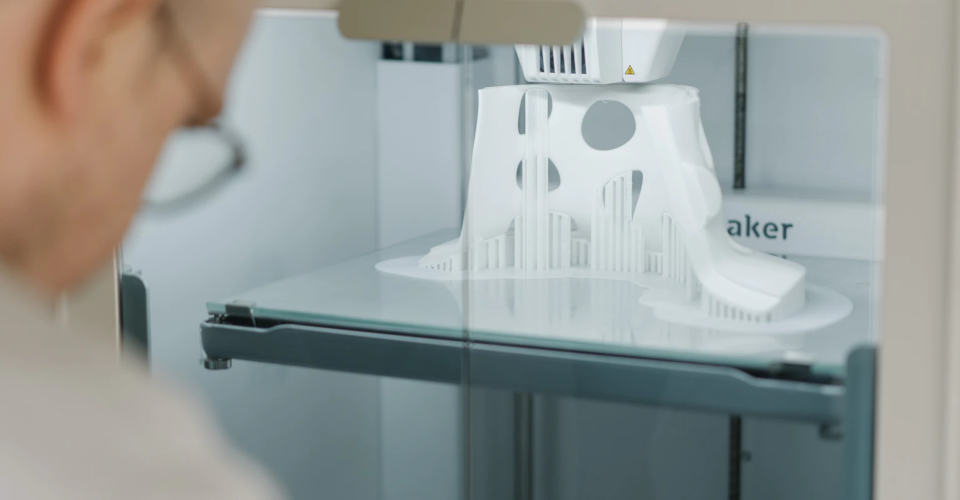
FDM printers have become incredibly common nowadays, so there’s a good chance that your 3D model will end up being printed using this technology. The appeal of FDM printers has always been the fact that they are cheap and easy to use. However, the resolution of an FDM printer is severely limited by the size of its nozzle. If your design has a lot of overhangs or bridges, then you will inevitably end up with several support structures if is to be printed with FDM.
SLA 3D printing technology, despite being older, has not hit mainstream popularity mainly because of higher costs. Designing of SLA is much less restrictive since it is capable of printing at a much higher level of resolution. If you need to recreate models with very intricate details, then you might have to go to the SLA route. The liquid resin raw material provides no inherent support so you might still need a large number of support structures.
Next to FDM and SLA, Selective Laser Sintering (SLS) is probably the third most common 3D printing technology. SLS printers are quite rare and typically only used in professional or industrial settings. The resolution of SLS is comparable to that of SLA, so highly detailed designs won’t be a problem. The main advantage of SLS is that the powder bed raw material provides support to the project as it prints. This eliminates the need for support structures, which means you’ll be free to add as many overhangs and bridges as you like.
2. Consider the material
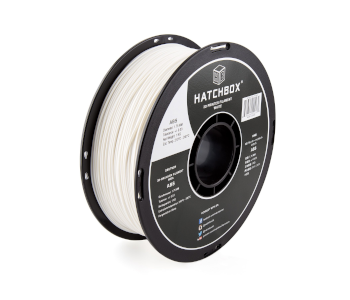
When creating a model for 3D printing, it would be a good idea to determine at the onset which specific material will be used to print the model. Although all 3D printing materials are useful, most of them have peculiar characteristics which may present challenges if they are not considered during the design phase.
In FDM printing, filaments that print at high temperatures are heavily prone to warping. This phenomenon is caused by the accumulation of thermal stress during cooling, which may result in distortion of the features and dimensions of the final print. Although there are several measures to address warping during 3D printing, a 3D model can also be designed to minimize the effects of warping. Using rounded instead of sharp corners and avoiding large horizontal planes are some of the common strategies.
If you are planning to use a flexible filament, then you will have to deal with the fact that they are often too soft to support their own weight. This means that overhangs and bridges will be a bit more problematic than they usually are. The same can be said for exceptionally heavy filament materials, such as composite filaments infused with dense solid particles.
3. Consider the purpose of the project
Are you designing a part that is meant to be functional or just as a display piece? Different design philosophies have to be applied to either objective. Projects for display need to have a focus on aesthetics. This means that fine details need to be aligned with a printer’s maximum resolution to make them look as good as possible. You will also want to avoid excessive support structures, as removing them always runs the risk of ruining a finished print.
3D printing functional parts requires a more detailed analysis of your needs. Do you want the part to be very strong or flexible? Maximizing strength will likely require printing at 100% infill, as well as orienting the model to avoid the inherent weak points of 3D printed parts. If you need a bit of flexibility in the finished part, then you will have to limit the model’s wall thickness. Perhaps your goal is to maximize the throughput of your 3D printer. Proper selection of infill percentage and patterns can help you speed up the 3D printing process without sacrificing too much of the finished parts’ mechanical integrity.
4. Consider the 3D printer’s maximum build size
Given how small 3D printers have gotten in the last few years, the prospect of 3D printing large projects may seem problematic. However, it’s not impossible. Even by just using slicer software, you can simply cut up a large model into smaller parts and print them separately. A much better route is to plan for such a procedure in the design process and model the separate parts appropriately.
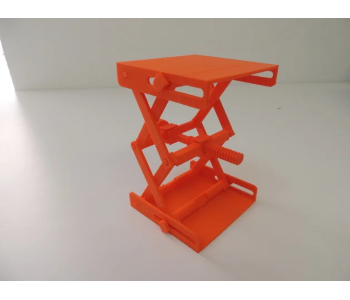
3D modeling separate parts that are meant to be assembled after printing presents an opportunity for you to design them to be interlocking. This provides a much more secure way for these parts to be put together instead of simply gluing them together. Interlocking parts with press-fit designs are also great for large projects that can be put together and disassembled again for easier transportation.
5. Design to minimize supports
Supports are an essential part of 3D printing, but we like to look at them as a sort of necessary evil. While they provide mechanical stabilization during printing, they also consume a lot of filament material and can be very difficult to remove. Once you get the hang of 3D modeling and printing, you might want to adopt a design philosophy that emphasizes active avoidance of supports.
There are several strategies to achieve this goal. The simplest way is to orient your model to require as few supports as possible. This can be done using just a slicer software. You can also follow the 45-degree rule in designing overhangs. If the 45-degree rule cannot be followed, then designing overhangs with chamfers is another good alternative.
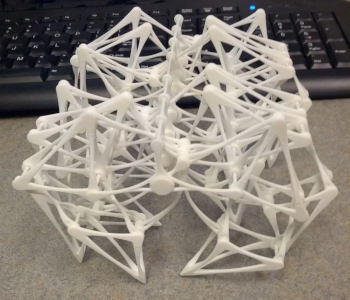
An unconventional option is to integrate supports into the overall aesthetic of your model. This typically applies to models with an artistic flair to them, such as figurines. There is no single way to creatively integrate supports into your design – perhaps you can make your figure lean against a column or have fabric billowing at the base of the model. Pulling this off is going to take a bit of design experience and out-of-the-box thinking.
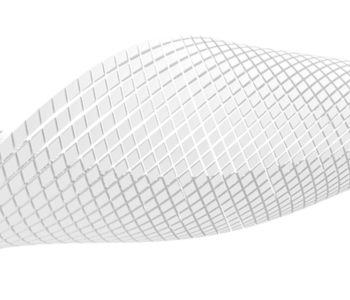
6. Orient to optimize resolution

3D printing, particularly using FDM technology, inherently creates products with anisotropic properties. This means that the characteristics of the final print, such as its mechanical strength and resolution, are not equal across all three axes. During the design phase, it’s worth considering the different values for X-Y resolution and Z-resolution of your specific 3D printer.
X-Y resolution refers to the level of detail that can be accurately recreated along the horizontal plane. This is determined by two factors – the diameter of the nozzle and the step interval of the stepper motors that control the movement of the print head. Z-resolution refers to resolution in the vertical plane and is typically expressed as a fraction of the nozzle diameter.
Determining which of the two is higher will depend on the components of the printer. If you have very fine details in your model, you may have to print the model at a specific orientation to optimize your printer’s resolution.
7. Determine the minimum and maximum wall thickness
When creating a model for 3D printing, you must recognize the concepts of both the minimum and maximum wall thickness. There are different considerations in determining each parameter. Minimum wall thickness has to consider both the diameter of the printing nozzle and the specific 3D printing material. Walls that are too thin can be too weak and end up breaking off and collapsing, either during printing or after the print has been completed.
By this logic, wouldn’t it be a good idea to just set the walls as thick as possible? While thick walls provide superior strength, the increase in the amount of material needed also means that there is more buildup of thermal stress. This makes thicker walls a bit more prone to warping. If you’re working with material that easily warps, then printing with infill may be a more effective option to enhance the strength of the final print.
8. Allow for tolerances in interlocking parts
As mentioned, designing interlocking parts for projects with separate components is much more effective than simply slicing them into sections. Press-fit designs are best for such components as they provide a snug fit that works well for either temporary or permanent connections.
For every pair of press-fit or interlocking assembly, there are two basic parts – a shaft and a hole. The tolerance refers to the degree by which the shaft is larger than the hole, thus allowing them to join together snugly. This value is very small – typically between 0.2 to 0.4 millimeters – but may vary based on the flexibility of the material. You may have to do a bit of experimentation to figure out what settings are best for your needs.
Final thoughts
The very high degree of design freedom of 3D printing is one of the strongest advantages of the technology over other manufacturing techniques. 3D printed products may not be the cheapest or strongest, but 3D printing can translate almost any 3D model into a real-world object. Note that the operative word there is ALMOST – a 3D model needs to satisfy a few requirements to make it compatible with 3D printing.
The tips we have outlined here should help you optimize your 3D models. The tips go beyond just making it possible to 3D print a model, but also to help it look as good as possible. Of course, 3D modeling is just one step of the process. You will have to be just as invested in the actual 3D printing phase.