The Dreaded DJI Mavic Gimbal Overload: Causes and Possible Solutions

The original Mavic Pro was released by DJI in 2016, kicking off a whole catalog of ultra-portable drones that continue to be released until today. Although the Mavic Pro has stood the test of time as one of the most reliable ultra-portable drones, it is by no means a perfect drone. One of the most common concerns that continue to crop up among new and old Mavic Pro owners is the dreaded “gimbal overload” error message. What causes this error and how can you solve it? Read on as we attempt to find out.
About the Mavic Pro gimbal
Despite its age, the Mavic Pro has managed to remain relevant until today. After all, it was the first 4K drone that can be folded down and carried in your backpack. Although its popular successors, including the DJI Mavic Air and Parrot Anafi, have managed to improve on its design, the Mavic Pro will always be the classic ultra-portable drone.
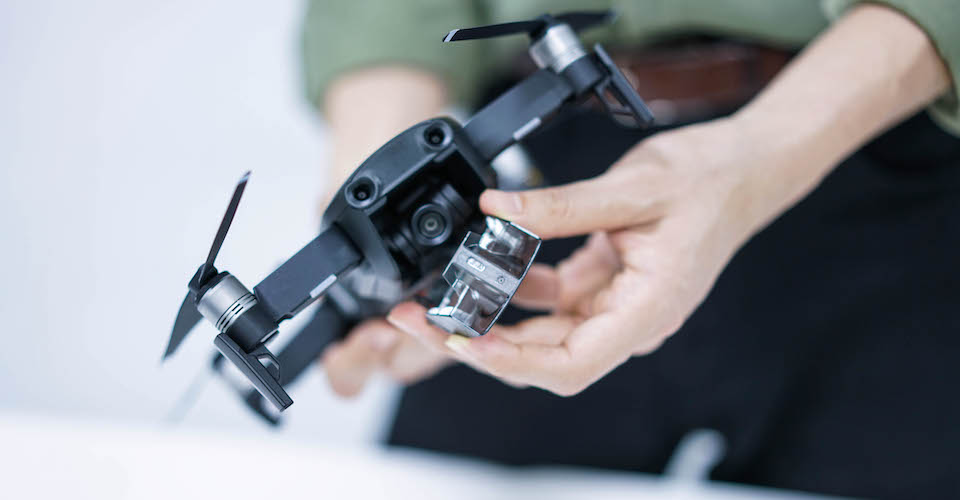
Supporting the 4K camera of the Mavic Pro is a 3-axis stabilizing gimbal. Although the ability to capture mechanically stabilized footage was well-appreciated, the gimbal was also one of the most oft-criticized parts of the Mavic Pro. It looked and felt very fragile and transporting the Mavic Pro involved having to secure the gimbal with a clear plastic cage.
True enough, most crashes involving the Mavic Pro have ended in broken gimbals that need to be replaced. It doesn’t even take a major crash to damage the Mavic Pro gimbal. Even careless handling such as folding or unfolding the drone have resulted in the gimbal suffering minor damage.
The gimbal overload error
The gimbal problems of the Mavic Pro don’t stop there. Throughout the years, Mavic owners have reported getting the dreaded “gimbal overload” message. There does not seem to be a single event that precedes getting this error message. Sometimes it happens after a crash, other times it happens after the drone has not been used for a long time. In very rare cases, even the owners of relatively new Mavic 2 drones have received this error message.
Possible reasons behind the error message
What does the error message mean? Simply put, a motor overload means that something is stopping the gimbal from moving the way it normally does. The DJI GO app only recommends that you check if the gimbal clamp has been removed, which isn’t helpful at all. Finding the root cause of this error message has been a complicated matter, as it could be any of a number of things.
1. Loose gimbal mounting bracket
Many users have noticed that the brackets that anchor the gimbal to the body of the Mavic Pro tend to come loose over time. The mounting mechanism of the gimbal also has a rubber component that tends to soften and stretch over time, especially under intense heat.
A loose mounting bracket will definitely result in a gimbal motor overload, as the gimbal will end up getting misaligned from its original position. This means that the gimbal will tend to brush against the body of the drone, preventing it from moving within its full range of motion.
2. Damaged ribbon cable
Some users have claimed to have resolved the problem of the gimbal motor overload by replacing the ribbon cable that runs through the printed circuit board (PCB) of the gimbal. A defective ribbon cable will probably result in a host of gimbal problems, which may not be limited to just a gimbal motor overload. Considering how thin and flimsy the ribbon cable is, this is a perfectly reasonable theory.
3. Out-of-calibration gimbal
The gimbal of the Mavic Pro can get out of calibration after several uses, which can result to a tilted horizon or shaky footage. An uncalibrated gimbal is also prevented from moving at its maximum range of movement, which can lead to a gimbal overload error message. Fortunately, doing a gimbal calibration is probably one of the easiest fixes you can do using the DJI Go app.
4. Out-of-date firmware
For drone pilots who have not touched their Mavic Pro in quite a while, it is easy to conclude that an out-of-date firmware is the cause of the gimbal overload error message. We’re not quite sure how this works exactly, but some users swear that a simple firmware update solved the problem.
How to solve the problem?
With all the possible causes of the gimbal overload error, the fixes that Mavic Pro owners have come up with has become similarly varied. We do not guarantee that any of these fixes work – do them at your own risk. If you are not sure about what you are doing, it is best to let the experts at DJI solve the problem for you.
1. Quick but temporary fix
If you run into the gimbal overload error in the middle of a shoot or while you’re in vacation, then you have very little time or resources to fully address the problem. Creative Mavic Pro owners have come up with this quick fix which everyone admits is only temporary, since it does not address any possible causes for the error.
To do the quick fix, all you need to do is to hold the Mavic Pro sideways and wait for the gimbal to restart. It will go through the motions of testing its full range of motion, after which the gimbal should function normally. There’s no guarantee that it will work, but it’s better than nothing.
Again, this method does nothing to address the underlying cause of the gimbal overload error. This means that the error will almost certainly recur at some point down the line. Once you have the time, it is recommended to come up with a more long-term solution.
2. Check the integrity of the mounting bracket
The moment you receive a gimbal overload error, the first thing you should inspect is the gimbal mounting bracket. The gimbal is mounted on three brackets – two on the front, and another one on the back. The back bracket is especially problematic, as many Mavic Pro owners have not even seen it or know that it exists.
In the case of the rubber element of the bracket getting deformed, you will have to resort to reinforcing the bracket of the gimbal with a soft material such as rubber or foam. There are video tutorials on how to do this, but the objective is to prevent the gimbal from brushing up against the belly of the drone.
3. Clean the gimbal
The gimbal of the Mavic Pro is especially fragile and delicate. In fact, the gimbal is so delicate that some dust or sand particles can stop it from moving. Some users have found that a simple cleanup of the gimbal does the trick. Just in case you end up landing on a sandy beach, it is best to be ready with a cheap camera cleaning kit.
4. Check takeoff conditions
Any obstacle in the immediate surroundings of the gimbal can put it under unexpected pressure and prevent it from moving at its maximum range. Taking off from tall grass has been shown to be a major reason for gimbal overload messages, although these error messages commonly disappear after about a minute of flight.
For better care and maintenance of your gimbal, it is best to take off from and land on clean and flat surfaces. If this type of surface is hard to come by, then you might need to consider investing in a landing pad. They are not expensive and can prevent further damage to your camera and gimbal setup.
5. Calibrate the gimbal
Calibrating your gimbal returns it to the settings and movement range that manufacturers have designed it for. Fortunately, calibration is very easily and quickly done through the DJI GO mobile app. Take note that some users have reported that it can take more than one recalibration cycle for the gimbal overload error to be resolved. In any case, it is always good practice to recalibrate your gimbal regularly.
6. Update firmware
If you have not flown your Mavic pro for a long time, then perhaps it is time to update your firmware. This can be done through the DJI GO app, although it is much faster to do it through the DJI Assistant 2 desktop software. Firmware updating only takes a few minutes at most and is one of the least effort solutions for the gimbal overload error.
7. Replace the ribbon cable
This solution requires a high level of experience in working with electronics, as well a genuine curiosity for how to take apart a drone. Basically, the ribbon cable that runs through the PCB of the gimbal can be easily broken, resulting in a lot of potential error messages. Fortunately, a replacement ribbon cable can easily be purchased and at a very low price.
The real challenge of doing this fix is in taking apart the drone and figuring out how to properly install the ribbon cable. There are several video tutorials on how to do this, but we must stress the importance of documenting what you are doing so you can take a step back in case you make a mistake.
8. Send the drone to DJI for repair
Finally, when you have exhausted all DIY fixes, you have no choice but to defer to the expertise of DJI. If your drone is still under warranty, then you’re extremely lucky. If not, a fix done by DJI can set you back by as much as $400.
This is not the best solution if you are in a hurry, as it can take more than 3 weeks before the drone will be returned to you. The high cost and long turnover of DJI fixes is one of the primary reasons for the high number of DIY fixes for the gimbal overload error.
Final thoughts
Considering the high cost of getting a Mavic Pro, it is perfectly understandable when the owners of this drone freak out at the slightest error message. However, this whole debacle points to a problem that appears to be more prevalent than what we have discussed in this article. Several Mavic Air owners have reported the same problem. In a slightly more concerning twist, gimbal problems have plagued even the newly released Mavic 2 Pro and Mavic 2 Zoom.
It’s important to be aware that doing any repairs or even opening up your Mavic drone could void your warranty. We only recommend these fixes if you’re outside the warranty period or under time constraints.
While it is easy to see that the gimbal is one of the most delicate parts of any drone, there is still no reason that a drone that costs more than $1500 would have a gimbal that cannot withstand a minor crash without suffering some damage. To be fair, the design of gimbals in the later Mavic drones appear to be much more robust and rugged compared to the original Mavic Pro. However, this is a department where DJI still has much room to improve.
My Mavic Pro has suffered from the gimbal overload error since I received it. The error message pops up every single time the drone is turned on. Sometimes it glitches during a flight and I am completely unable to operate the camera for 25-30 seconds. The camera profile and color changes by itself, the focus goes in and out, the camera view tilts diagonally and the image is crooked. It never saves the video to the card, but usually saves it to my phone. I have examples posted on Youtube.
I have uploaded several video examples of this glitch while in flight. Check out Craig805 on Youtube.
I get this error now after a crash and repair. It is not a fake error, the gimbal is actually failing to stabilize.
It happens suddenly when under a bit of stress (wind/speed) and seems to only affect the “roll” part of the gimbals, and yes it is visible on the footage (tragically visible).
Sideways movement seems to have an added effect for triggering this error.
I own the mavic 2 pro. My next step is to take it back to the repair shop to recheck the screw tightness and cleanliness. I think i f*ed the warranty, not sure.
I bought mine today & tragically crashed! The gimbal isn’t responding at all! Please let me know if you find any idea how to solve this a part from sending it to the dji shop which is miles away from me.
I have a Mavic Pro and it has a gimbal overload error. Everytime it powers up, the gimbal able to move but it moves so quick and end up violently jerking then stops. I tried to replace the gimbal ribbon but it showed the same problem. At first I thought that maybe the problem is not on the ribbon but on the gimbal itself. I bought a gimbal set with camera and replaced it but it has the same dreaded error gimbal overload. I guess the board controlling the gimbal is the culprit but I dont want to guess this time and spend money. Anyone of you have any idea?
Dropped my drone in the snow. Cleaned it off, but missed some moisture. Went to fly and that created frozen bits which caused the error. Took it inside, removed all moisture. Calibrated it and its now fine. I only post this for folks in colder climates that might have had this issue.
I could buy a Mavic Mini for the cost of replacement. No crash and a floss tie to keep the clamp with the cover only thing I can think of is practicing sphere shots a few days prior. :/
Hi Gerry
I have the same problem,If you mannage to sort it out please let me know
Regards
i’ve got this issue too, i didn’t crash the Mavic Pro. But i think i have a good idea what the problem is. I called my local DJI repair center they told me it could be the board not the gimbal itself. But i believe it’s the gimbal unit; because the motor and gimal arm get’s super hot on start up. So i will try to replace to full gimbal assembly. i will update everyone if it fixes the issue. “Gimbal overload Error”
i’ve got this issue too, i didn’t crash the Mavic Pro. But i think i have a good idea what the problem is. I called my local DJI repair center they told me it could be the board not the gimbal itself. But i believe it’s the gimbal unit; because the motor and gimal arm get’s super hot on start up. So i will try to replace to full gimbal assembly. i will update everyone if it fixes the issue. “Gimbal overload Error”
wish me luck
I have a Mavic Air 2, I crashed it (twice) and it has shown this error ever since. But not always… sometimes I am able to get a stable shot, but 8 out of 10 it is painfully glitching.
It suffers any kind of stress, like wind or hard turns.
When I hold the drone, and it is ON, I can hear the gimbal do a scratchy noise, which goes away with a soft touch.
Please advise!
riley, did you resolve the problem?