The Top 10 Causes for Drone Crashes and Flyaways

If you fly a drone that costs a thousand dollars of more, visions of your drone crashing or flying away out of your control have probably played in your mind several times. This is reasonable – after all, you don’t know if your drone will still work after surviving a crash, or if you can still recover the drone after it flies away.
While you can get insurance to give you some peace of mind, the best solution is still to avoid crashes and flyaways altogether. Knowing is half the battle won, so let’s look at why these drone crashes and flyaways happen and what you can do to avoid these causes.
1. Being distracted
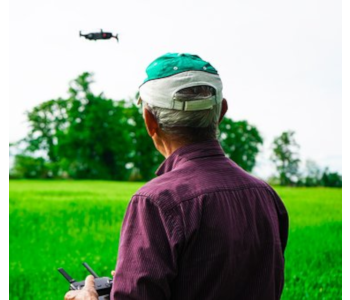
The most common reason for a drone crashing is also the simplest – the drone operator simply being too distracted to pay attention to the drone. For reference, drone pilots are expected to keep their eyes on the drone at all times. If this is not possible, then they must have a visual observer who will perform the duty and can communicate with them immediately if there are obstacles nearby.
Although it’s tempting to say that beginner drone pilots are more prone to committing this error (and they probably are), we’ve also seen professional drone pilots covering an event and getting too caught up in the moment. Avoiding a drone crash due to a gap in attention is a habit built through habit and discipline. Experience could also play a big part, especially if you’ve already crashed your drone once because you were talking to someone else or was looking at what’s happening on the ground.
2. Automatic flight modes
Autonomous flight and camera modes have now become pretty common, especially in high-end drones. There are the basic ones like Waypoint Mode and Point of Interest Mode, and also the fancier options like Rocket, Helix, and Dronie. A subject tracking, or “Follow Me” Mode has proven to be one of the most useful camera modes for professional drone photographers.
In any case, these automatic camera modes help capture images and videos that would otherwise have been impossible if the drone had to be operated manually. When these camera modes are activated, the drone automatically flies around in some complex pattern, resulting in wonderfully dynamic aerial footage.
The problem with letting a drone fly automatically is that it can easily run into an obstacle and crash, especially if you’re not paying attention or are not able to stop the drone on time. While obstacle avoidance systems help avoid such an accident, it’s not a feature that can be found in all drones. Much less common are obstacle avoidance systems that provide protection to all directions – there’s probably just a handful of models that support such a capability.
Our advice is to use an autonomous flight mode only in areas that are free of obstacles. Even in such conditions, make sure to continue keeping your eye on the drone with your fingers ready to take back control of it.
3. Strong winds

Quadcopter drones rely on a steady flow of air being pushed by its propellers, thereby creating lift. In the same manner, fixed-wing drones depend on the lift generated by the flow of air below its wings to keep them airborne. In either case, they require a steady and uninterrupted stream of air to allow them to fly.
The problem with strong winds is that they drastically affect the prevailing wind direction at any spot in the airspace. For quadcopters, this may mean disrupting the stream of air that gives it lift. For fixed-wing drones, it may cause the drone to go into a completely different direction than that intended by the pilot. If you cannot manage to regain control of your drone, then it could either end up crashing or drifting away from your controller’s transmission range.
To avoid this phenomenon, we recommend getting a drone with good GPS stabilization. This allows the drone to maintain a stable hover based on its GPS coordinates, counteracting any drifts by flying in the reverse direction. This isn’t a perfect solution, but it works well enough in moderately windy conditions.
However, it is still best to ground your drone if the wind starts to get too choppy. More than drifting away, strong winds knocking your drone out of the sky will start to become a real problem. This is a more serious problem if you fly an ultra-portable drone.
4. Birds

Birds are the original rulers of the sky, and we’re just visitors in their domain. This means that is often a good idea to ground your drone if you see birds nearby. More than the risk of birds attacking your drone and making it crash, it’s your responsibility as a drone pilot to ensure that your drone causes no harm to birds and other animals.
One thing to keep in mind about birds is that they can fly really fast. If you find yourself in the midst of a predatory bird, then it would be best to steer clear of the area right away. Even if you’ve got your eye on the drone, you might not have enough time to maneuver it out of the way if a bird decides to attack. Eagles can snatch a drone out of the sky easily, and not even the best carbon fiber frames will protect it from the bird’s sharp talons.
To reduce the chances of a bird attack, it’s often recommended to fly your drone early in the morning. Birds typically take advantage of the added lift of thermals that come up in the hotter parts of the day, making it the perfect time for them to hunt prey. Related to that, you should also stay away from known nesting areas or where the prey of these birds often congregates.
5. Flying in FPV
Nowadays, even toy drones have some sort of FPV feature. FPV provides a real-time video feed of what the drone’s camera sees, making you feel like you’re in the drone’s non-existent cockpit. If you’re a drone photographer, the FPV video feed is pretty much the only to make sure that you’re framing your photos and videos in a manner that you’re satisfied with.
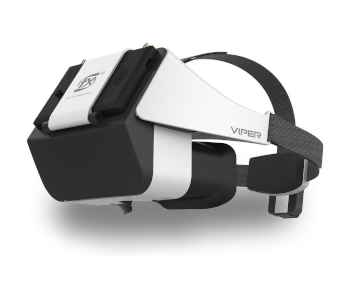
An extra dimension of immersion can be provided when you use your drone’s FPV feature with FPV goggles. This lets you see the real-time video feed using 3D glasses. There is an entire FPV racing community that was built on this technology.
The problem with flying a drone using FPV goggles is that it limits what you can see to what the drone’s camera sees. This reduces your situational awareness, as you may not notice hazards or obstacles outside of your camera’s view.
If you’re planning to fly with FPV goggle, the rule is that you should always have a visual observer to scan your drone’s surroundings. More than just a simple rule, this is actually a law implemented by the FAA as part of their requirement to maintain visual line-of-sight at all times.
6. Electromagnetic interference
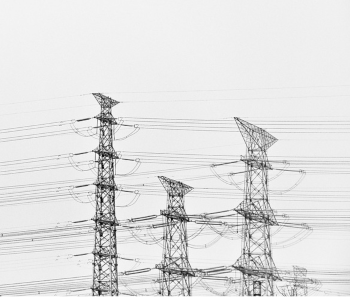
All electrified objects, including power lines, cell towers, and industrial equipment, emit some sort of magnetic field. This magnetic field can interact with other electrical devices nearby, including your drone. The result is what we call electromagnetic interference – the disruption of your drone’s normal signal flow because of external sources.
Electromagnetic interference can mess with your drone’s control functions, making it jerky and unresponsive. At worst, you can end up losing control of your drone altogether. If that happens, then it’s anyone’s guess what the drone will do – it can drop out of the sky, continue flying away, or trigger the RTH function. The prognosis isn’t too good, so it’s best to avoid the incident altogether.
The good news is that there really shouldn’t be any reason for you to be flying near power lines or cell towers unless you’re doing an inspection job. If this were the case, then it would be best to fly your drone 50 to 100 feet away to avoid the effects of electromagnetic interference. Using a drone with electromagnetic shielding may help, but we’d rather not risk it. If you need to do this type of job, then a camera with a lossless zoom function may be a worthwhile investment.
7. Flying too far
The transmission technology of modern drones is now so advanced that some of them can be controlled and still feed real-time video beyond five miles. In most cases, this is more range than you’re going to need. The FAA also requires drone plots to limit drone flight to within visual line-of-sight. Depending on the size of your drone and weather conditions, this can be as little as half a mile to about three miles.
Aside from the risk of possibly violating federal drone flight rules, flying your drone beyond visual line-of-sight also increases the chances of a crash or flyaway because of a loss of transmission signal. Although these drones have a rated transmission range way beyond what you’re operating in, the presence of obstacles and other electrified structures can still weaken the signal as the drone flies farther.
There’s also the issue of batteries: the farther you fly your drone, the more distance it will have to cover to make the return trip. And although drones with “smart” batteries can calculate how much time it will take for the return trip, this algorithm does not take into account factors such as wind resistance and changing weather conditions. The point is that you should not rely on your drone’s RTH to get you out of a tight spot.
8. Flying indoors
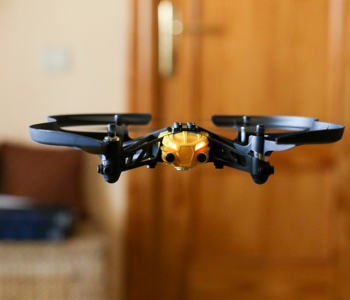
Flying indoors is kind of a taboo topic in the circles of drone pilots. It’s a convenient way to escape the restriction imposed by the FAA since any indoor space is technically not considered “national airspace.” There’s also quite a bit of demand for drone pilots who are willing to fly indoors, particularly to capture aerial photos and videos of indoor events.
However, indoor drone flight can be surprisingly difficult and exceptionally dangerous. While indoors, your drone isn’t going to have any GPS signals to help maintain a stable hover. Although your drone may have optical stabilization, the sensors need to be close to the ground to work.
If your drone has an obstacle detection system, you will, unfortunately, have to deactivate it when flying indoors. When flying in such an obstacle-rich environment, this feature isn’t going to help with safety – it’s going to be a crutch. The drone will automatically stop as soon as it flies near the ceiling or walls, making it almost impossible to do the job you’re getting paid for.
This means that you’re left with an old-fashioned manual flight with almost no technological aid. You can pull this off, but only if you’re skilled enough. If your drone has a flight mode that deliberately turns off GPS signals, then it might be a good idea to get some practice hours in. You will NOT want to crash a drone in an indoor environment.
9. Dead batteries
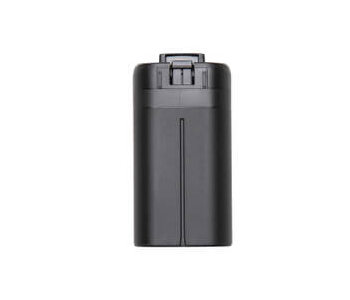
If you plan to do a flight mission for several hours, you will probably have a stash of fully charged batteries on hand. However, this doesn’t change the fact that your drone still has to come back every 20 to 30 minutes to get its batteries changed. You need to plan for this if you don’t want your drone to crash before it completes the trip back.
Most drones also come with an RTH function that gets triggered whenever the battery reaches a critical level. Smarter versions of this RTH feature are even able to calculate the time it would take to make the return trip, triggering it only when necessary. This is a nice feature to have and one that you need to make sure to set up before your first drone flight.
The problem comes up when drone pilots push the boundaries of how far they can fly on a single battery cycle. Even a smart RTH feature will only calculate the time it will take for the drone to return based on the distance. If the drone ends up flying against the wind, then that estimate may fall a few seconds too short. If you flew your drone out to the sea from the beach, then those few seconds may make the difference between you recovering your drone and losing it to the sea.
When it comes to battery capacity, the best piece of advice is to not push your luck. Save more than enough power for the trip back.
10. Automatic RTH
The RTH feature has been coming up a lot, hasn’t it? After all, it’s one of the simplest failsafe mechanisms of drones and one that can be found in practically all models – from the less-than-$50 toy drones to the sophisticated ones that cost thousands of dollars.
However, RTH isn’t something you can just activate once and never review again. The key parameter you’ll need to set is the altitude at which the drone is going to fly on its return trip. For the appropriate setting, you’ll need to consider the height of any obstacles that the drone may run into.
Although a low RTH altitude setting means that the drone will able to come back faster, it also makes it more prone to encountering obstacles on the way. If its obstacle detections systems are deactivated, the drone may crash without even making its way back to you. For this reason, it’s often a good idea to set the RTH altitude to 100 feet or more. This somewhat extends the time for the return trip but makes it generally safer for the drone.
Final thoughts
A drone crash or flyaway is a nightmare scenario for any drone pilot. Not only can you possibly damage to your drone to a point beyond repair, but there’s also the possibility that you the drone can no longer be recovered. Under most insurance policies, a recovered drone is critical to making claims.
Despite all the best practices, it happens to the best of us. However, that’s no reason to not take any safety measures to prevent or reduce the probability of a drone crash or flyaway. Considering how expensive a drone is, the small effort and care it takes to perform these measures are well worth the benefits.