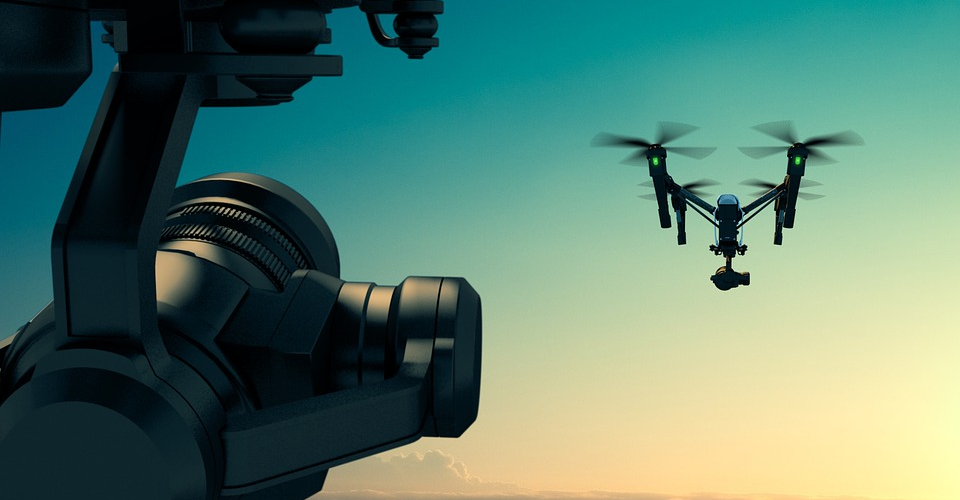
10 Composition Tips for Your Drone Photos

Taking aerial photos is one of the most fun and easiest things that you can do with a drone. It’s really no wonder that drone photography has become a huge industry, with seemingly hundreds of new professional drone photographers popping up daily. With all these photographers, standing out is going to be incredibly challenging – which makes the quality of your shots even more important.
In this article, we go over the best tips on composing your drone shots. Making your drone shots look great takes a combination of traditional photography methods and more unique ones that are more applicable to aerial photography.
1. Remember the rule of thirds

While we’re on the topic of traditional photography techniques, let’s start with the most basic rule of composition: the rule of thirds. In an age where everyone has a camera phone, even beginners know to place the subject of their photos somewhere in the intersections defined by a 3 x 3 grid.
The same rule applies when composing your aerial photos. The principle behind it is the same – by placing your subject somewhere that is not at the center of your photo, you compel the eyes of your viewers to move around the photo and see all of its elements. In non-technical terms, having your subject smack dab at the center results in a photo that is simply boring and static.
Just as with most digital cameras, drone cameras often come with a feature that overlays a 3×3 grid on your shot to help with the rule of thirds. If you’re still a beginner, then this could be a very useful tool to help in composing your shots.
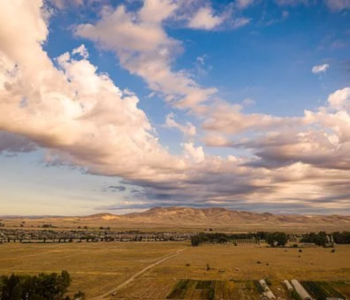
When shooting with a drone, you’ll often find yourself taking photos of landscapes and sceneries. For this type of photo, it is often recommended to have one to two-thirds of the photo dominated by the skies. By having the subject restricted to a smaller space of the shot, you can create a photo with depth and contrast.
2. Look for leading lines
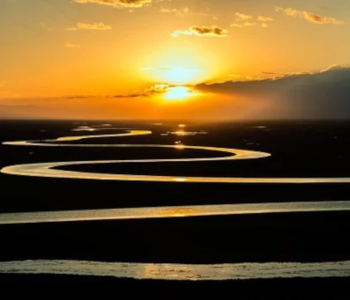
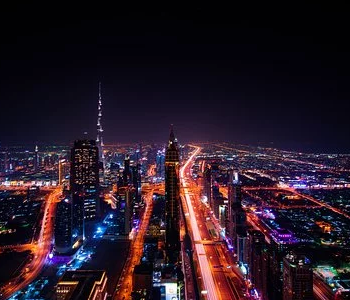
Again, this is another traditional photography technique: control how your viewers will look at the photo by using leading lines. By incorporating lines that run through your photos, you create a sense of movement and cohesion between the different elements in the image. A good set of leading lines pulls your viewers into the photo, keep them there, and take them on a journey of discovery.
A huge advantage of being able to fly around with a drone is that it’s so much easier to look for leading lines. Infinitely long or meandering lines are very common in nature – a shoreline, river, highway, or line of trees can extend to near infinity, providing a connection from your foreground to the background.
In many way, leading lines are a lot more obvious in aerial photography. However, the scope of an aerial photo is so expansive that there’s hardly any need for subtlety. Leading lines can make your photos much more interesting and give justice to all the different elements in your photo, so go ahead and use them with reckless abandon.
3. Use contrast to create depth

You might think that taking photos that look flat shouldn’t be a problem when you’re shooting with a drone, but you’d be surprised at the number of photos that we have seen that have almost zero sense of depth. When shooting an aerial photo, it is important to keep in mind that the distance between your foreground and background is usually much larger than if you were shooting on the ground. You have to capture this sense of scale, and the most effective way to do that is to create contrast.
Fortunately, flying over scenery from above gives you endless opportunities to create contrast. There are a lot of elements that you can use for contrast, such as color, brightness, or texture. As a general rule, warm colors reduce the sense of distance while cold colors increase them. This is a fact that you can exploit to create the illusion of distance from the foreground to the background of your photo.
Colors also play a role in how the eyes perceive the size of an object. Bright colors make an object seem bigger or closer to the viewer, while dark colors create the opposite effect. By making your foreground or subject appear larger and making the background shrink, you can make your subject pop out more without losing its contrast to the backdrop.
4. Try flying low
When you’re shooting with a drone, it’s very tempting to go as high as you can and take photos from that angle. After all, isn’t the point of drone photography to capture shots from perspectives that are not possible from the ground? Well, yes, but taking photos of everything from up top can make your portfolio seem one-dimensional and boring.
A technique that many drone photographers employ is to capture shots from a position that is only a few dozen feet above the ground. This is still an impossible perspective for a ground-based photographer but provides views that you can’t get from way up high. From a slightly lower height, leading lines are longer, and backgrounds are a little more interesting. It all depends on context, of course, so we suggest playing around with different angles and heights, wherever you are shooting.
Something worth mentioning is that flying your drone at lower altitudes is a little more dangerous than flying it above all possible obstacles. It will require a tighter focus on the part of the drone pilot as crashes are more common when drones fly close to the ground. If you’re not feeling confident with your precision flight skills, then you might want to consider having a visual observer by your side.
5. Look for interesting patterns – and break them

Patterns occur inherently in nature. Trees of similar color may grow together, waves will crash to the shore at regular intervals, and mountain ridges will rise steadily as they approach the peak.
While these patterns are interesting enough subjects on their own, what will make an interesting shot if you can find something that breaks these patterns. It can be a footpath that cuts through a forest, a single outcropping rock along a pristine beach, or a single hiker walking along a deserted trail. Try to look for these “breaks” in patterns and make them the subject of your shot – keeping in mind the rule of thirds, of course.
6. Incorporate people into your shots
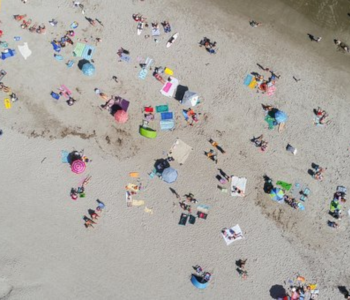
Speaking of elements that break patterns, a smattering of people is always a great way to make your scenery and landscape shots more interesting. When people “intrude” into a nature shot, it creates an interesting contrast between how small people are and how majestic the landscapes are.
In a way, having a person in the shot gives your viewers a sense of the scale of the photo in a way that they can relate to. It also gives the photo a dose of personal drama, especially if you only have a small number of people in the foreground of an expansive scenery. Consciously or not, anyone who views such a photo imagines themselves in the situation – the isolation and serenity feel a little more personal.
Since we’re talking about taking drone shots of people, it is our responsibility to remind you that flying drones over people is prohibited by the FAA’s Part 107 rules for commercial drone flight, even if they consent to it. There are, of course, a lot of ways for you to capture aerial shots of people without having to directly fly over them. Privacy is also (and has always been) a touchy subject when it comes to drone photography, so make sure that the subject of your photo is aware of what you are doing.
7. Put on some ND filters and play around with shutter speed
ND filters are accessories for cameras that keep shots from getting over-exposed when shooting at harsh lighting. While ND filters are common parts of any photographer’s kit, drone photographers may be wise to adopt the same practice.
The main reason why we think that ND filters are essential is the fact that playing around with the shutter speed is one of the best techniques in drone photography. As with traditional photography, slowing down the shutter speed to create long-exposure shots is a great way to capture movement in a still photo. You’ve probably seen examples of this technique in action shots of sports events, or in waterfalls and streams where the motion of the water is reduced to a blur.
The sheer scope of what you can capture from an aerial perspective opens up a whole new dimension of possibilities for long-exposure shots. From up high, you can capture the motion blur of vehicles moving down a highway or a mountain bike racing across a rugged trail. Even the old-fashioned concept of taking long-exposure shots of bodies of water is revitalized with drone photography, as you can take shots of the same subjects, but at perspectives that were not possible before.
8. Adjust exposure while shooting, not at post-processing
“We’ll fix it at post” – these are the famous last words of any photographer who finds that their raw shots are simply too bad to be salvaged by post-processing. And while post-processing of professional photos is already a standard practice nowadays, it is no replacement for good old-fashioned photography skill.
Composition and exposure are two of the most common elements of a shot that drone photographers tend to correct in post. If your shots are less than perfect or ideal, we highly recommend taking the time to correct your camera settings or composition in the field, rather than have to do it using editing software.
Although it’s possible to adjust the composition of your photo to follow the rule of thirds, you will inevitably crop out a lot of details from your original photo. This holds the same for overexposed and underexposed spots in your photos – although you can adjust the brightness of specific spots in post, you cannot capture the level of detail possible if you shot photos at the right exposure settings.
If exposure is proving to be problematic for your shot, then you can make use of any bracketing features in your camera to capture the same shot in different exposure settings. These shots can then be combined in post, so your photo comes out with the highest level of detail possible. Bracketing is one of the few times when relying solely on post-processing is perfectly acceptable.
9. Take advantage of natural light
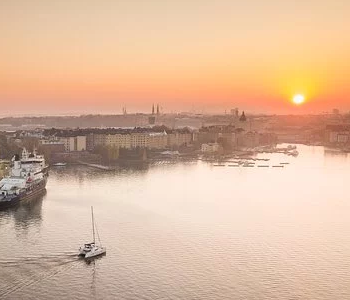
Since flying drones commercially after sunset is prohibited under Part 107 rules, you will almost certainly be shooting with natural light. While natural light can be difficult at times, hence the ND filters and bracketing suggestions, it can also be the greatest asset of your drone shots. With the unique capability of drones, you can capture shots of the sun peeking out of a massive mountain or the reddish hue of the sunset bathing a canopy of trees.
Any photographer who has ever wanted to take advantage of natural light is familiar with the concept of the “golden hour” – the time of day when sunlight takes on a red-orange color and casts long, dramatic shadows.
The golden hour is just as golden for a drone photographer, although you don’t have to limit yourself to shooting within this limited window. Luckily for you, there are now mobile apps that take the guesswork away from determining how sunlight will affect your photos. We recommend Sun Surveyor, which is available on both iOS and Android.
Contrary to its name, Sun Surveyor predicts the movement of both the sun and the moon. It even has a Live Cam feature that uses your phone’s camera to show how shadows will fall at any particular time of the day. The Map View allows you to measure distances, altitudes, and viewing angles, all of which can be pretty useful for planning your shots.
10. Break all the rules!
Our final recommendation is to disregard everything we’ve said here and march to the beat of your own drum. Some of the very best shots to go down in history are those that have defied the previously held norms and standards. Renowned landscape photographer famously said that “there are no rules for good photographs.” Who are we to argue?
Although the rule of thirds is a classic rule in composition, it is also one of many photographers’ favorite rule to break. Oftentimes, taking a good shot is a matter of following your intuition, rather than logic or the handful of rules that have been drilled into photographers for years.
Some photographers have even crafted a signature look from their photos that was created by intentionally overexposing or underexposing them. In some situation, what looks good to your eye is more important than what a light meter says are the perfect exposure settings.
To put it briefly, no one will care that you didn’t follow the rules if your shot turns out good. Following the rules is good if you’re still learning, but you’ll soon get the chance to develop your own techniques. When it comes to what “feels” right, all the rules can be thrown out the window.
Final thoughts
Anyone can buy a camera drone, but not everyone can take good photos with it. In a few rare cases, beginner photographers can get by relying purely on intuition. More commonly, though, they will need to adhere to a few basic photography rules.
Most of the composition tips we’ve listed here aren’t anything new, as these are the same ones that are recommended for old-fashioned photography. Although they are just as valid in drone photography, there are just so much more opportunities that a drone can provide. The best thing to do is to take your drone and practice, follow the rules, and experiment so you can find your own unique style.